Wix in 2026 works differently than it did a few years ago. It is now AI-first. You can open a chat, describe the website you want in plain English, and get a real, editable site back in a couple of minutes. You can also skip the chat, pick from more than 2,000 templates, and build in the Wix Editor by hand. Both paths land you in the same place, a site you own and control.
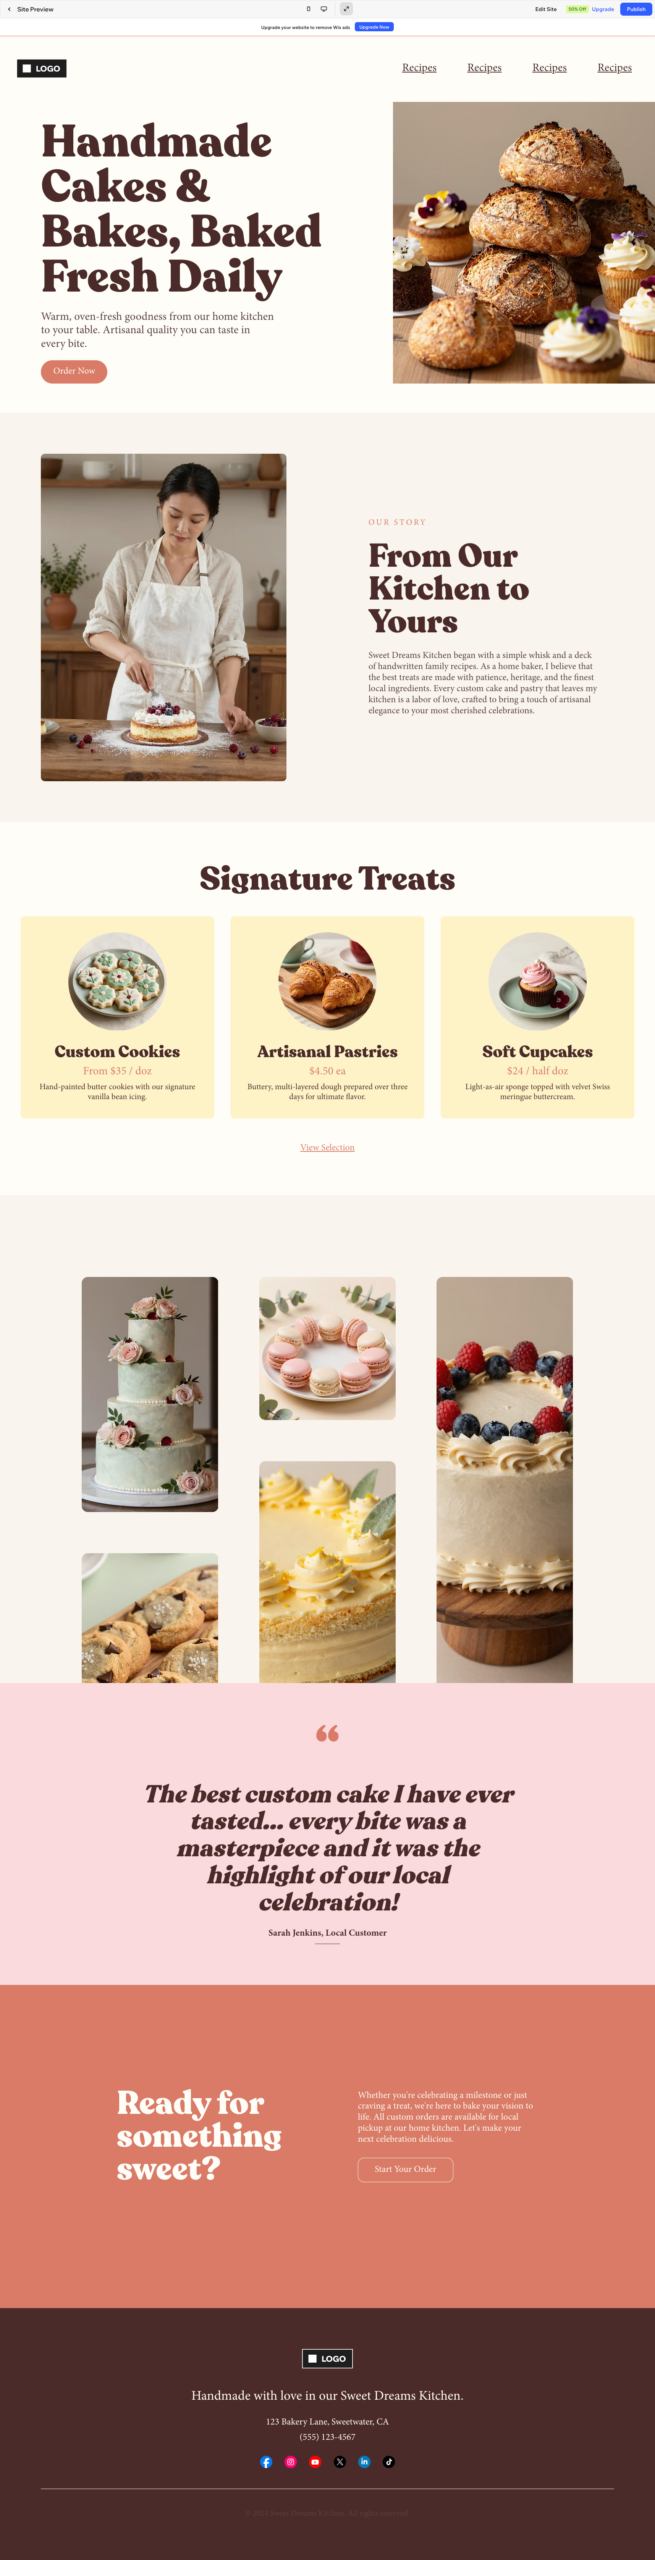
This guide walks you through both routes, then covers customizing your site, understanding your dashboard, going live, and choosing a plan. You do not need any coding or design experience. If you can answer a few questions and drag things around a screen, you can build a Wix site today. Here is the kind of site you can have running within 5 minutes, all built inside Wix:
Step 1: Sign up and choose how to build
Head to Wix.com and get started. In the top corner you will see two buttons, “Get Started” and “Log In.” Click Get Started, then sign up with an email address, or with your Google or Facebook account. It is free to create an account, and you do not need to enter a credit card to build and preview a site.
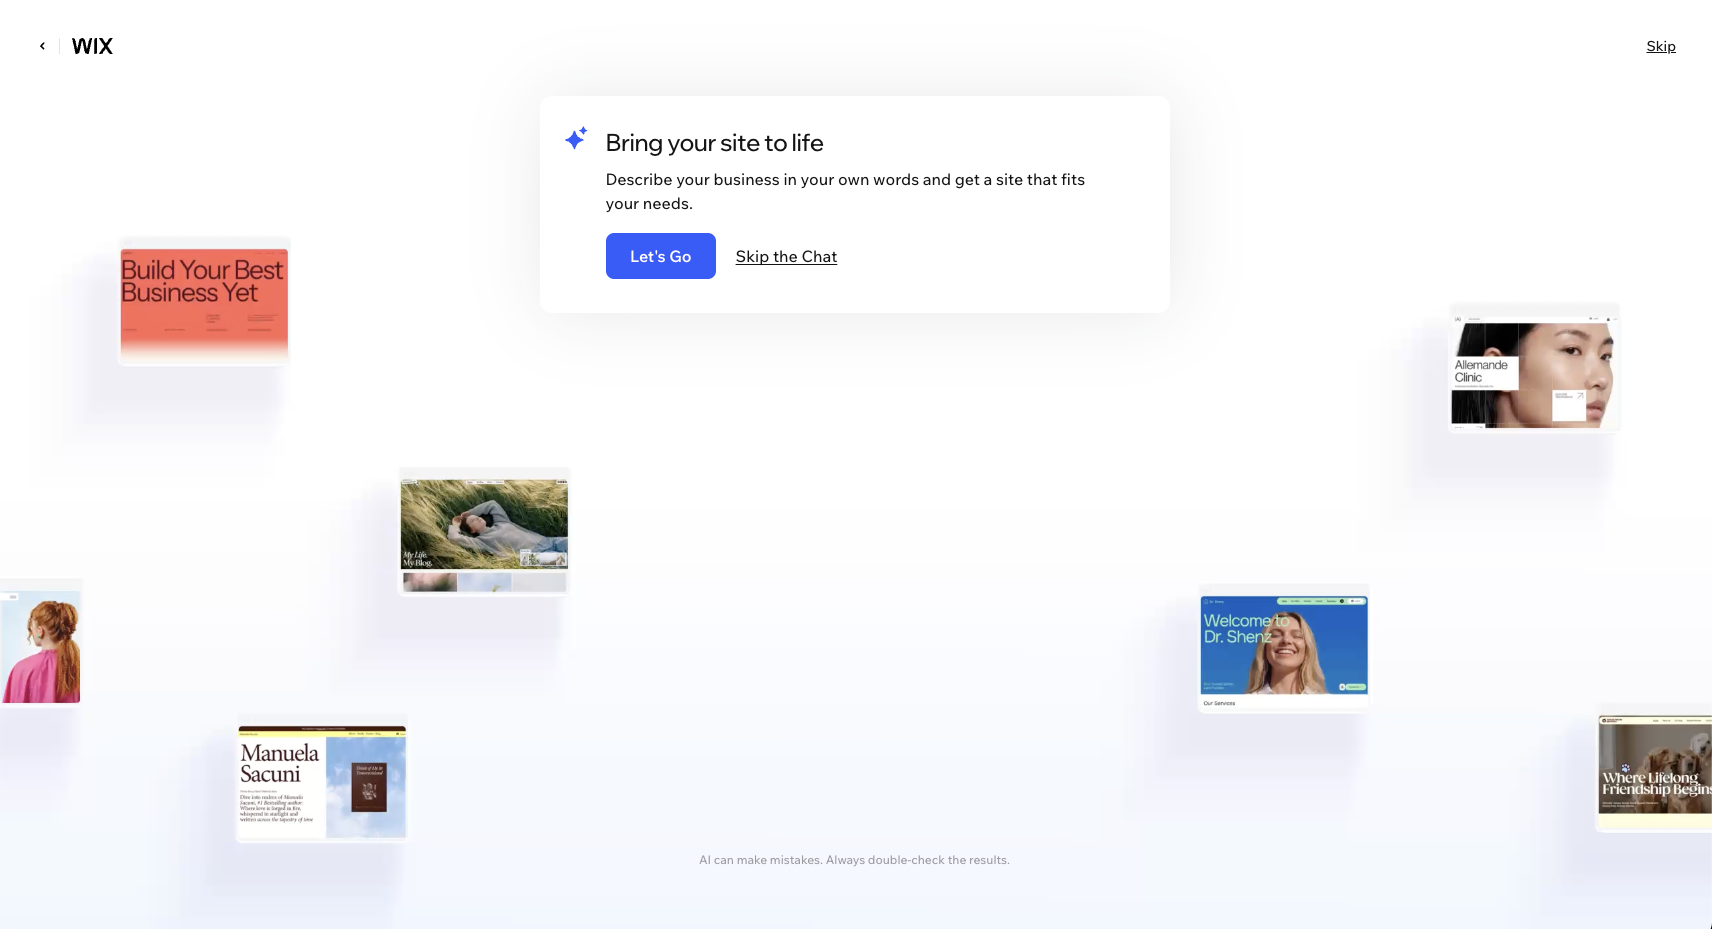
Once you are in, Wix asks how you want to build. This is the fork in the road, and it matters. You have two real options:
- Describe your site to an AI assistant. This is Wix’s flagship path now. You answer a few plain questions, and Wix drafts a full site for you to edit.
- Start from a template. You browse the template gallery, pick a design you like, and open it in the Wix Editor to customize.
There is no wrong choice here. The AI route is faster and friendlier if you are staring at a blank page and do not know where to begin. The template route gives you a clear starting design you can shape to taste. This guide covers the AI path first (Steps 2 and 3), then the template path (Step 4). Whichever you pick, you end up in the same editor.
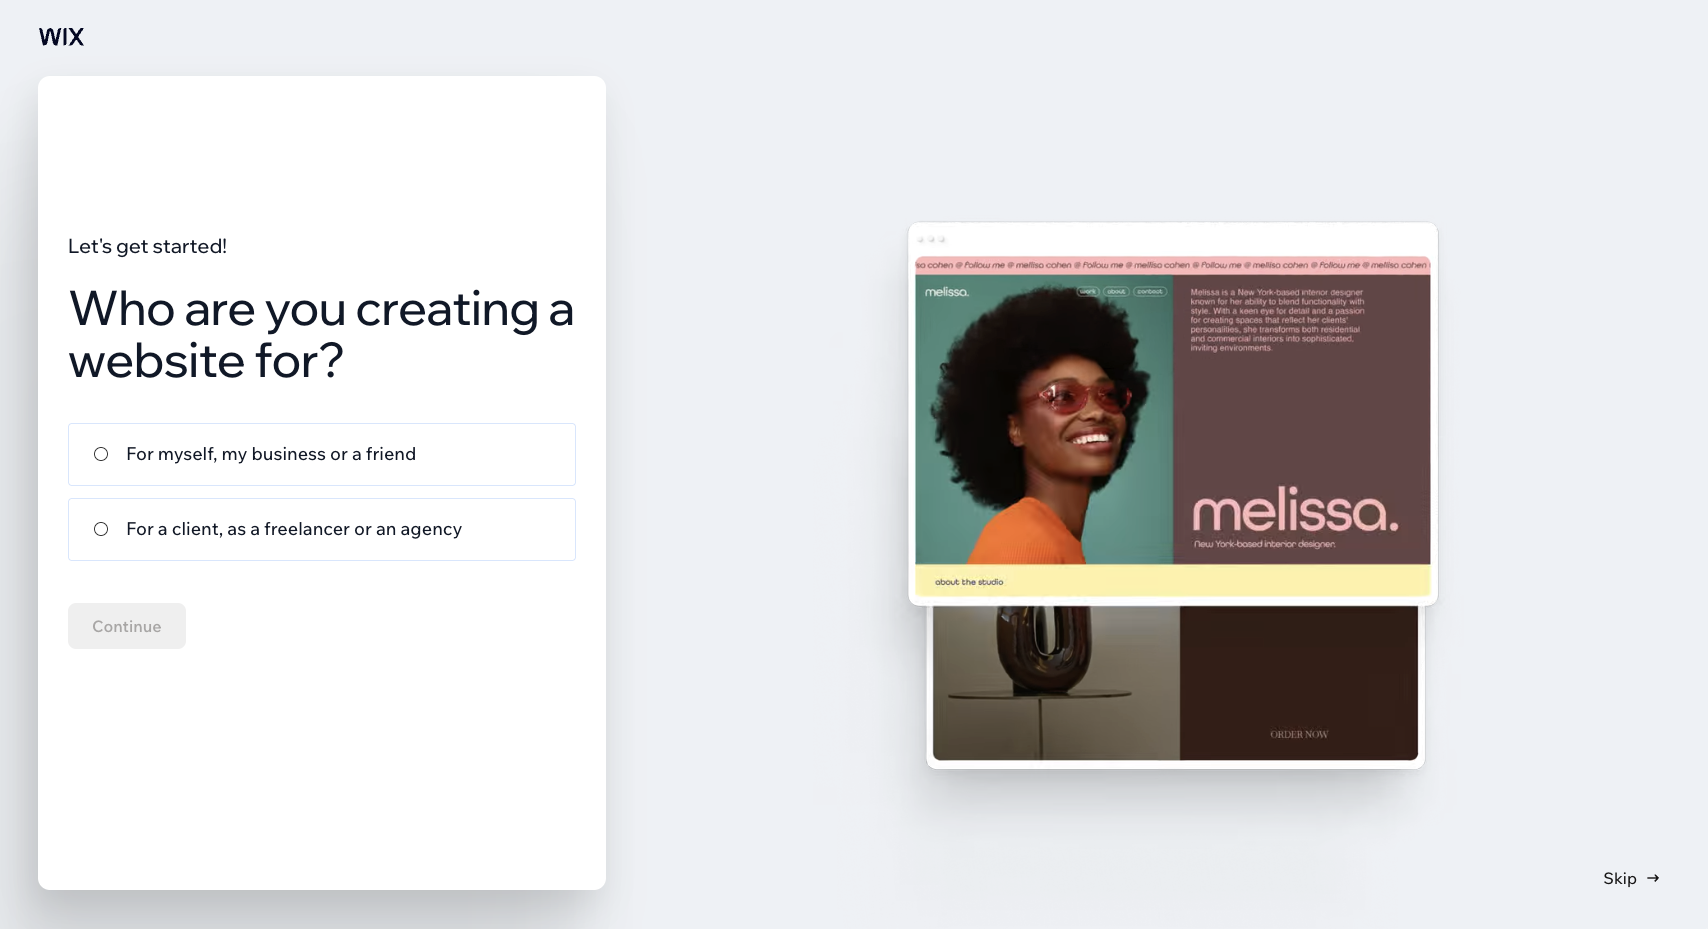
One thing to note before you go further. During signup, Wix may ask whether you want Wix Studio or the standard Wix Editor. If you are building your first site, choose the standard Wix Editor. Studio is a separate product aimed at agencies and freelancers, and we cover the difference near the end of this guide.
Step 2: Describe your site to the AI
If you chose the AI path, Wix opens a chat and starts a short back-and-forth. This onboarding is led by Wix’s AI, part of the platform’s newer AI building experience (Wix rolled out its flagship AI builder, called Wix Harmony, in January 2026, with an assistant named Aria). You do not need to know any of those product names to use it. You just answer the questions.
The AI asks you a handful of plain-English things, usually including:
- What your site is about. For example, “a small bakery in Portland that sells custom cakes,” or “a freelance photographer’s portfolio.”
- What to call it. Your business or site name.
- Who it is for. Your audience, such as local customers, clients, or readers.
- The tone or style. Warm and playful, clean and professional, bold and modern, and so on.
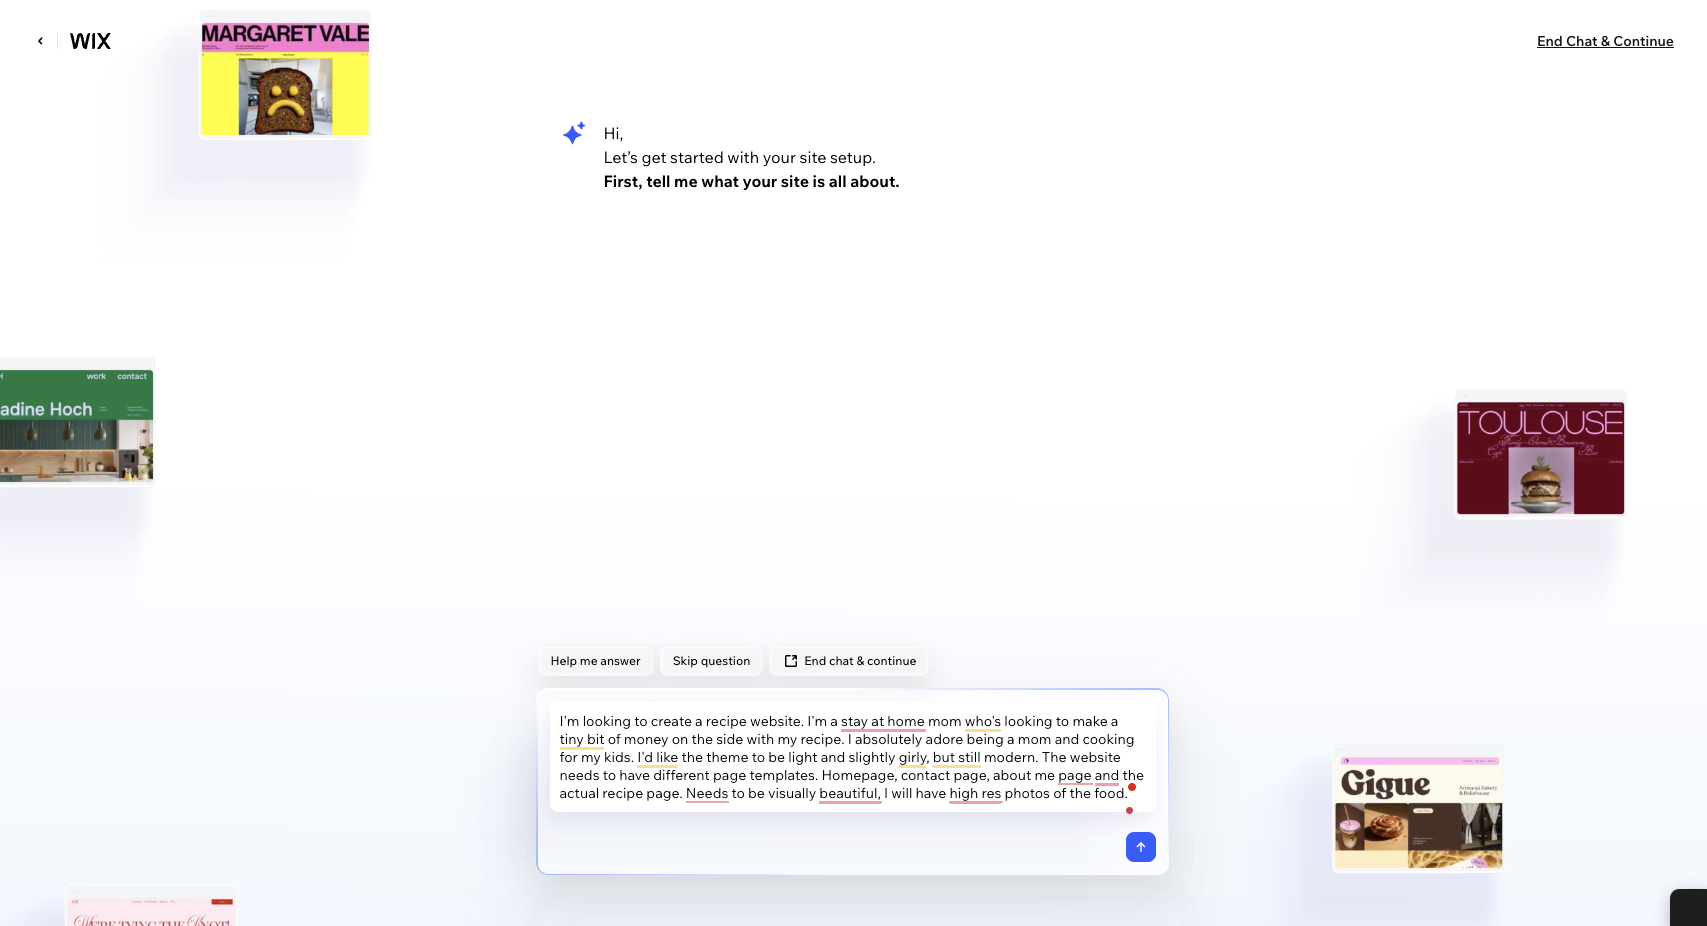
Answer as clearly as you can. The more specific you are, the closer the first draft lands to what you want. You are not locked into anything you type here, so do not overthink it. If you are not sure about the tone, pick whatever feels right and change it later in the editor. When you are done answering, Wix generates a design based on what you told it. This usually takes a minute or two.
Step 3: Let the AI finish setup
After the AI drafts your site, it walks you through a couple of finishing steps before handing you the keys.
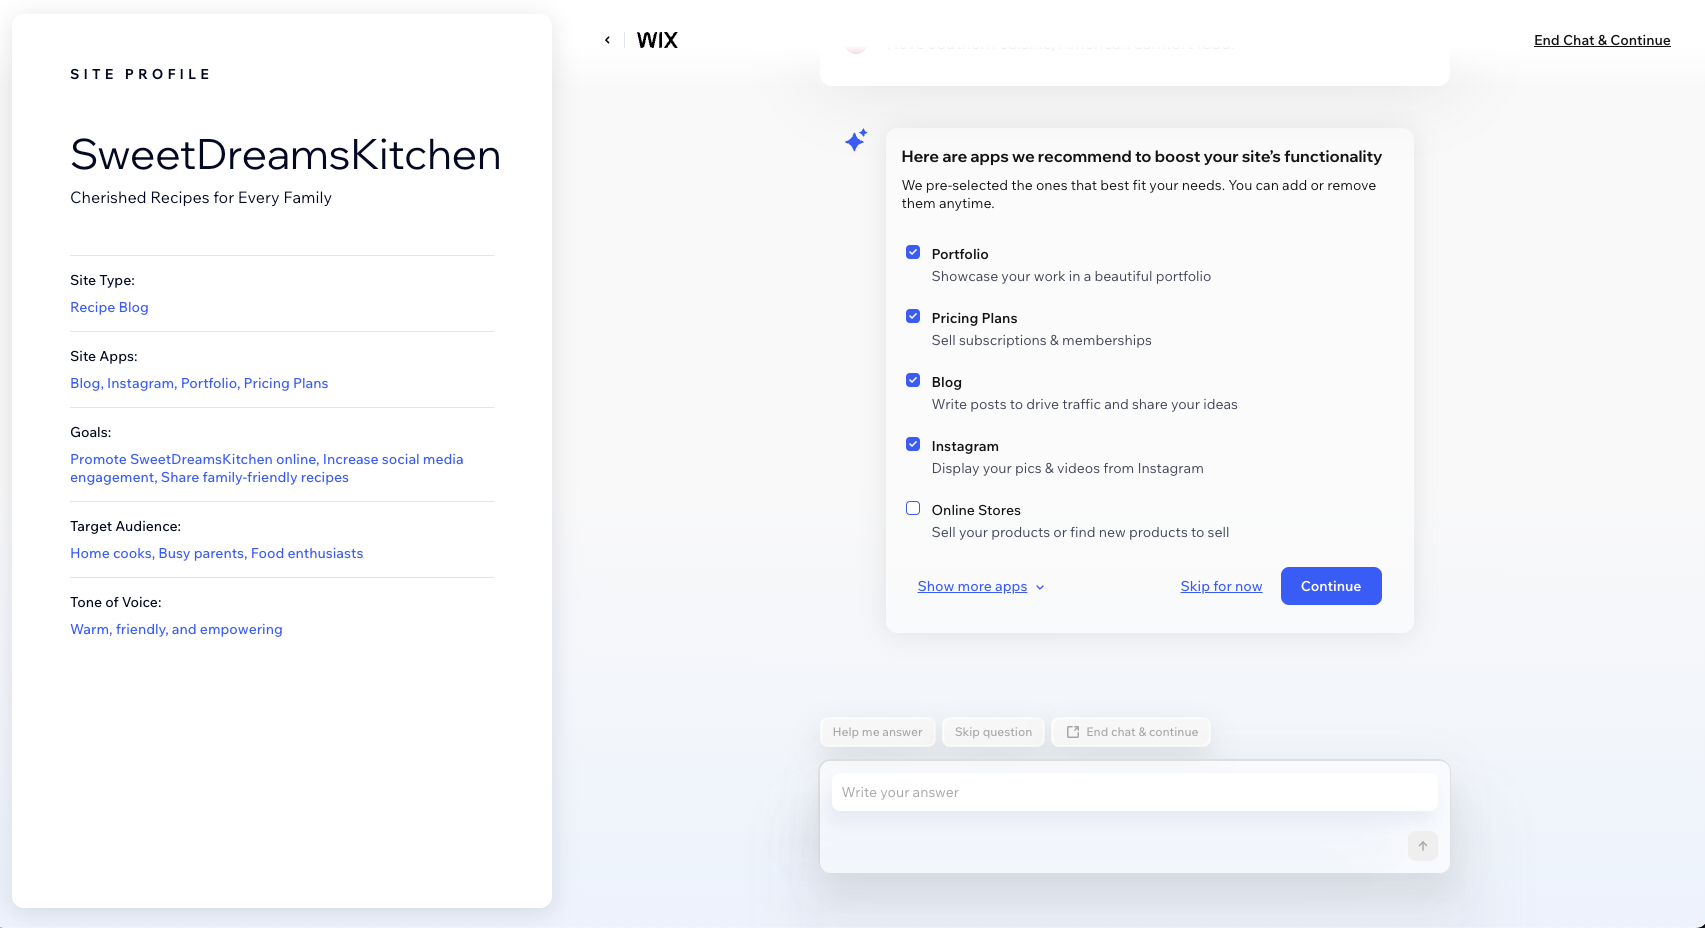
First, Wix suggests a set of recommended apps and features based on what your site is about. If you said you run a store, it might suggest an online store and payment tools. If you said you are a consultant, it might suggest a booking or contact feature. Check the ones you want, uncheck the ones you do not, and move on. You can always add or remove apps later, so this is not a final decision.
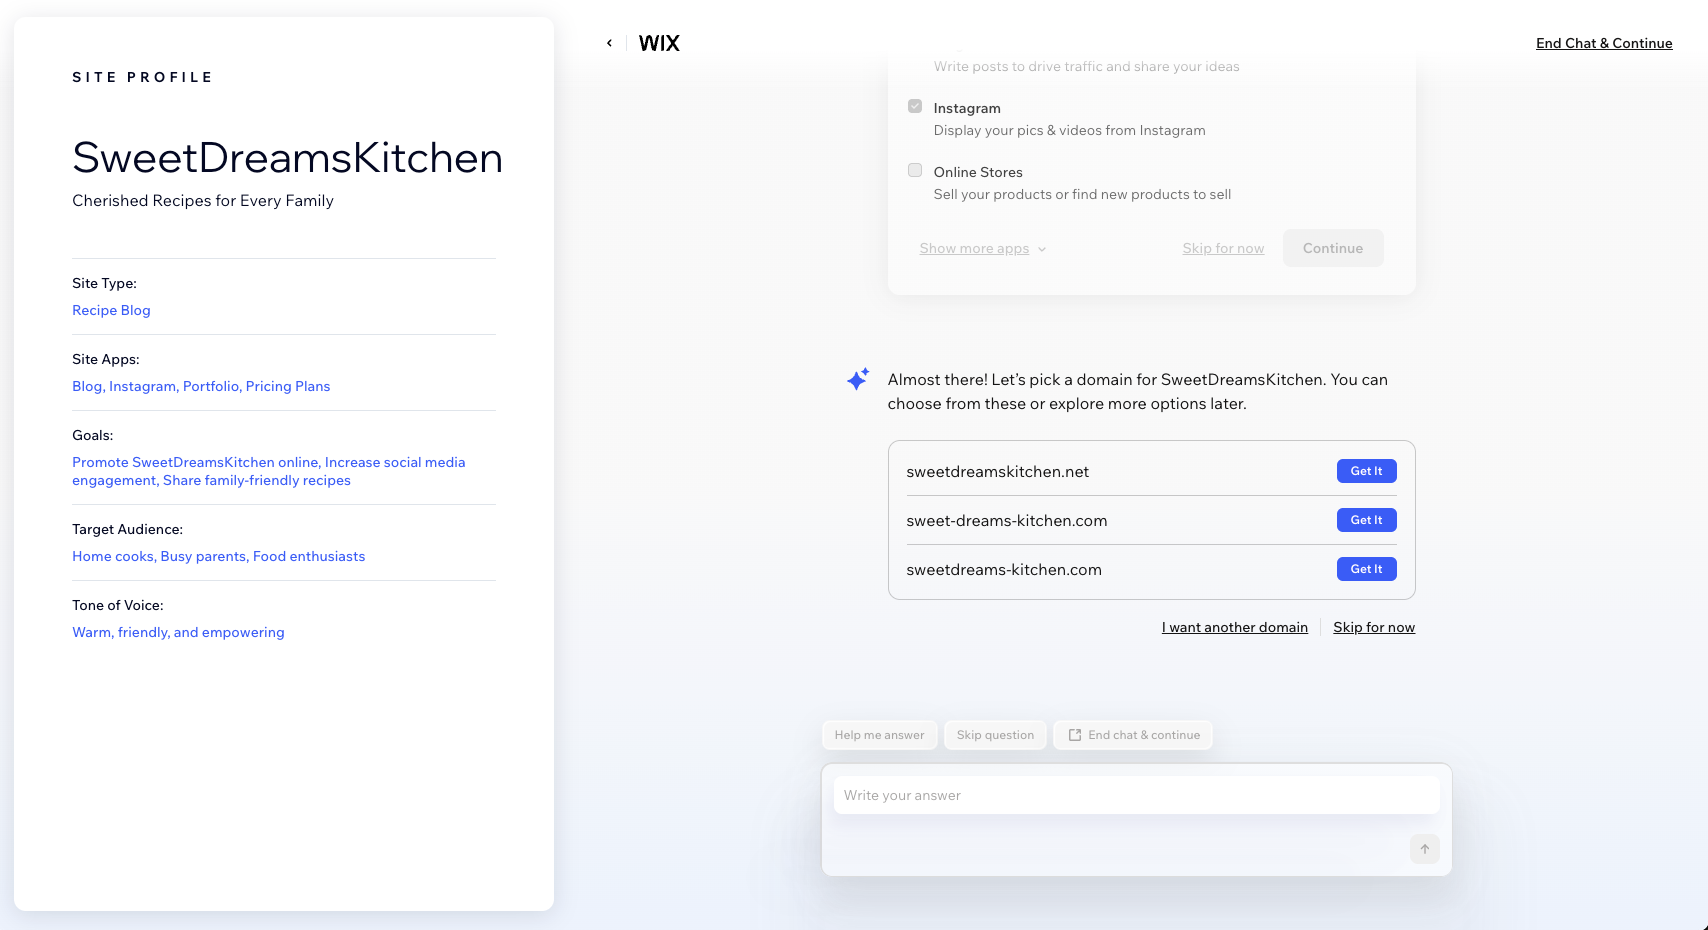
Next, Wix asks about a domain, the web address people type to reach your site. You will see options to search for a custom domain (like yourbakery.com) or to continue for now with a free Wix subdomain. You do not have to buy a domain today. If you are just exploring, keep the free option and decide later. We cover domains in more detail in Step 9.
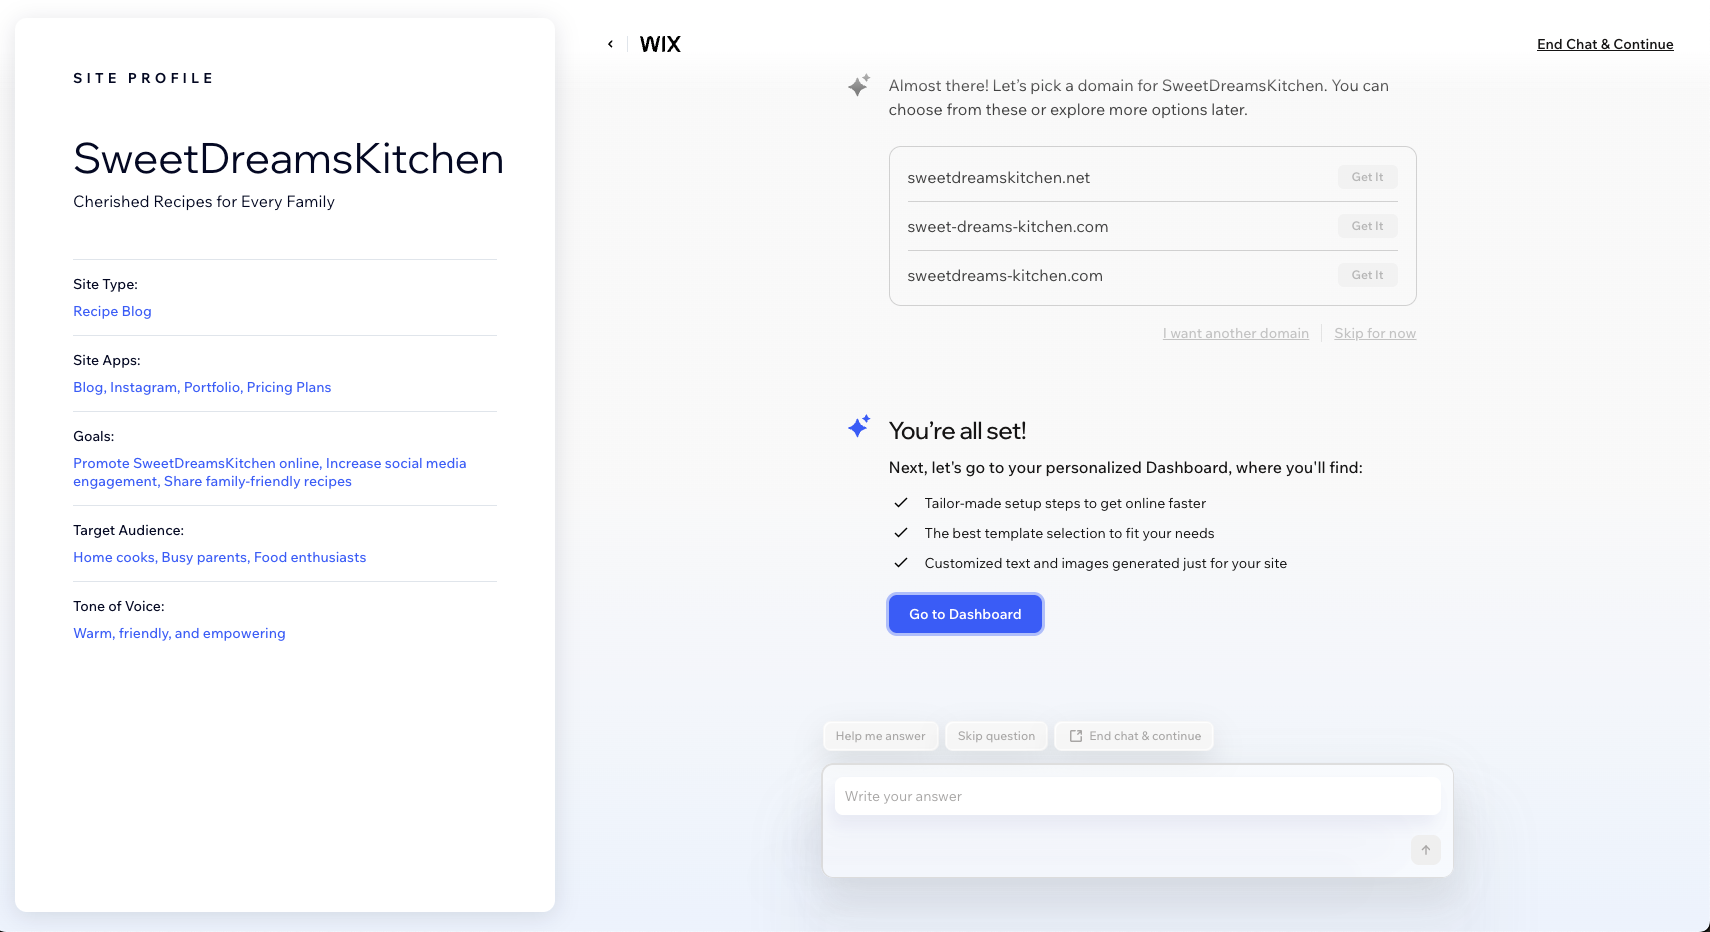
Once that is settled, you will hit an “You’re all set” screen with a button to go to your dashboard. Click it. Your site now exists as a working draft, and you are ready to customize.
Step 4: Prefer to start from a template?
If the AI chat is not your style, the template route is just as valid, and plenty of people prefer it. Wix has a gallery of more than 2,000 templates, sorted by category: online stores, portfolios, restaurants, blogs, business sites, events, and much more. Every template is a full, professionally designed site, already filled with sample text and images that you swap out for your own.
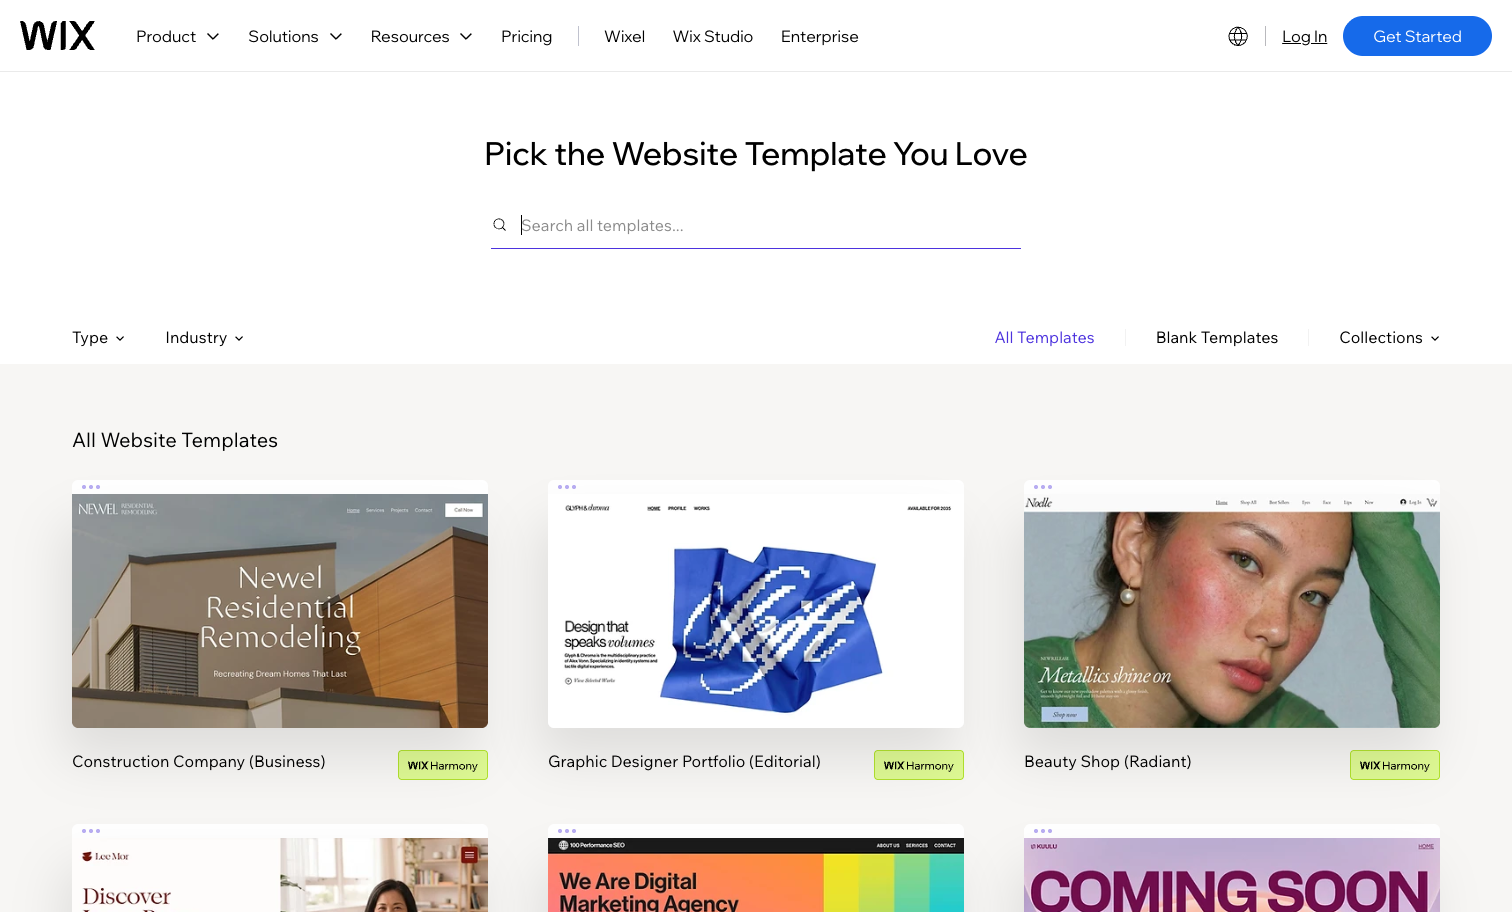
Browse the categories or search for the kind of site you want. When you find a design you like, hover over it to preview the whole thing, then click Edit to open it in the Wix Editor. Picking a template is not a permanent commitment to that exact look, since you can change nearly everything once you are inside. Do not agonize over finding the perfect one. Choose a layout that is roughly in the right shape, and shape the rest yourself.
Not sure a website builder is even the right tool for your project? It can help to read up on the leading website builders and how they compare before you commit your time to one.
Step 5: Customize in the Wix Editor
However you got here, the Wix Editor is where the site becomes yours. Today’s editor is Wix’s AI-assisted Harmony editor, so you can drag things around by hand or ask Aria, the built-in assistant, to make a change for you. What you see on the canvas is what your visitors will see. Here is the layout, then the moves you will use most.
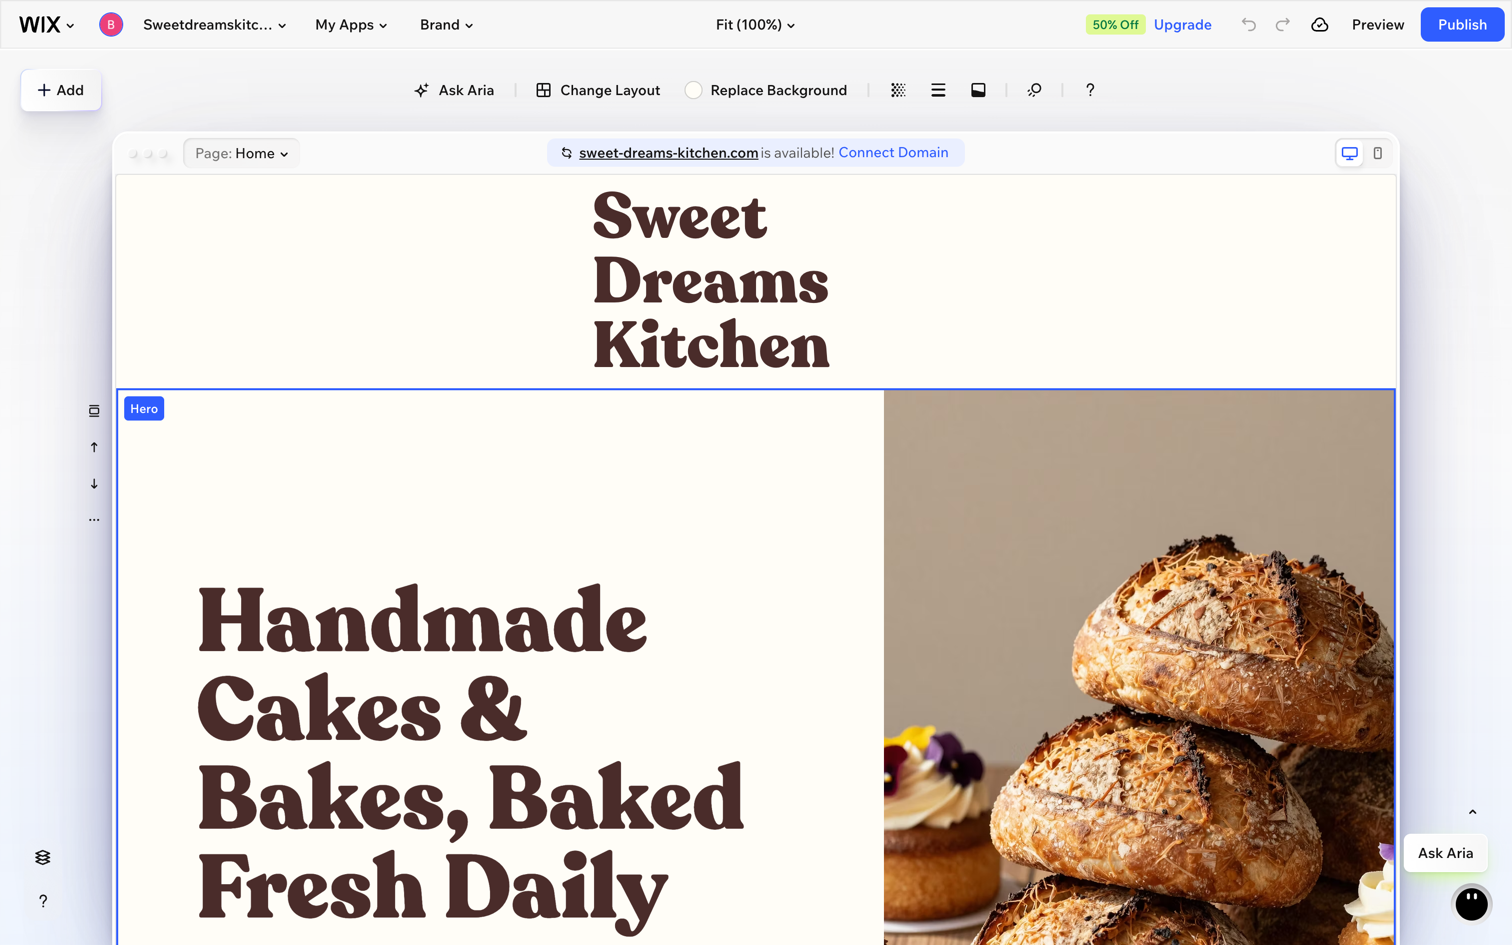
The editor at a glance. The top bar holds Add, Change Layout, Preview, Ask Aria, and the Publish button in the top-right corner. Down the left edge is the toolbar for adding elements and sections, media, and apps. The Page dropdown just above the canvas is where you switch and manage pages, and the Brand dropdown at the top holds your colors and fonts. The large area in the middle is your live page: click anything to select and edit it.
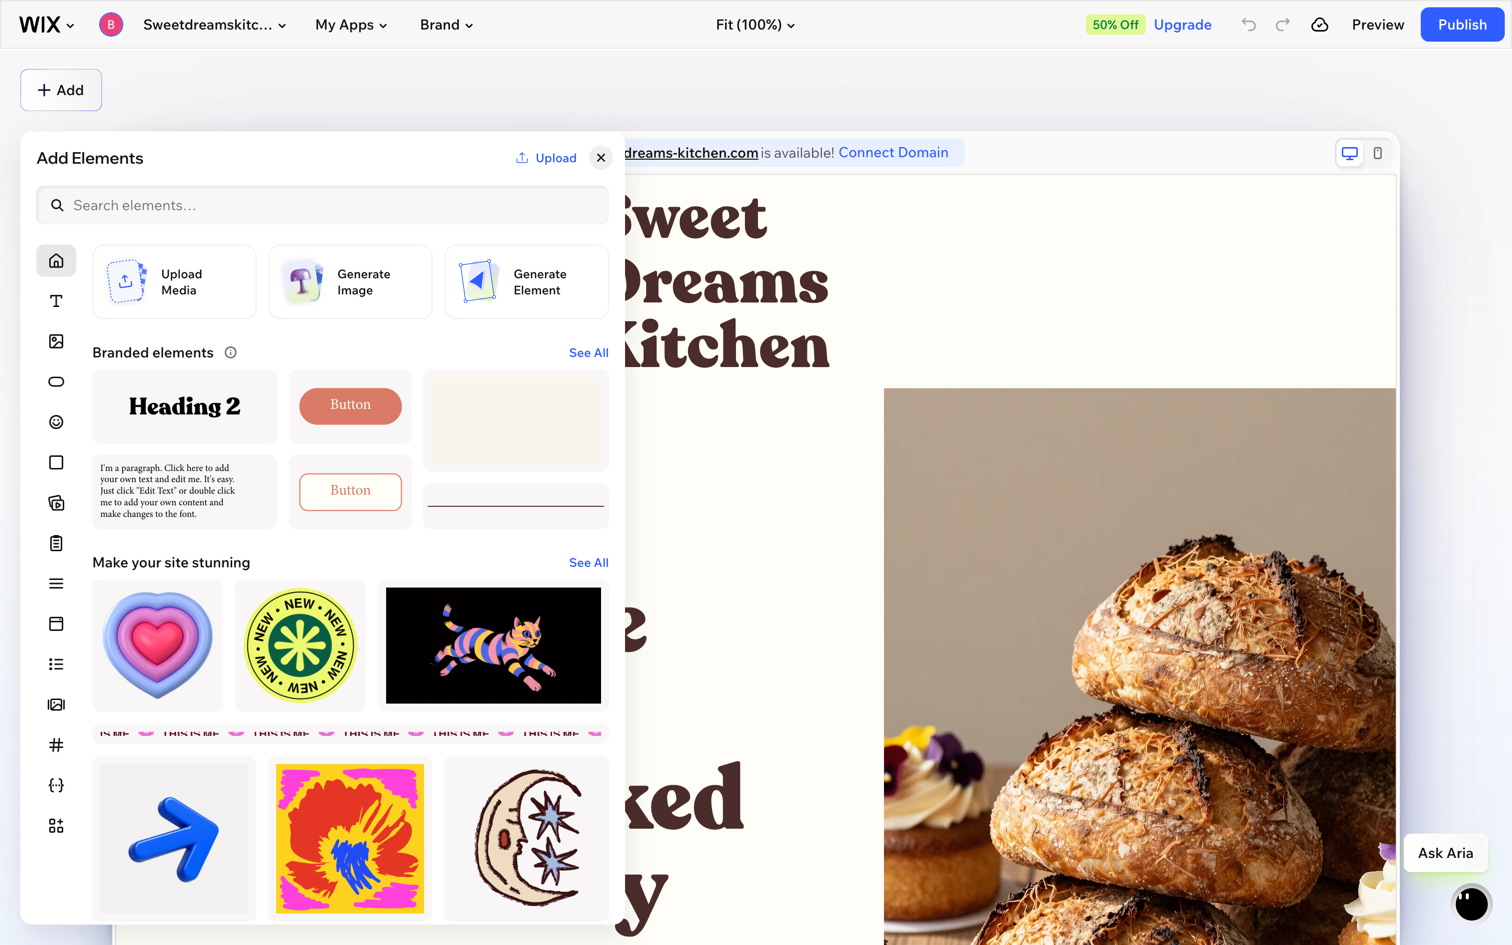
Add an element. Click Add Elements on the left toolbar. A panel opens with everything you can drop onto a page: text, buttons, images, galleries, contact forms, videos, and more.
Click the element you want, say a button or a heading, and Wix drops it straight onto the canvas, already selected. Then drag it wherever it belongs.
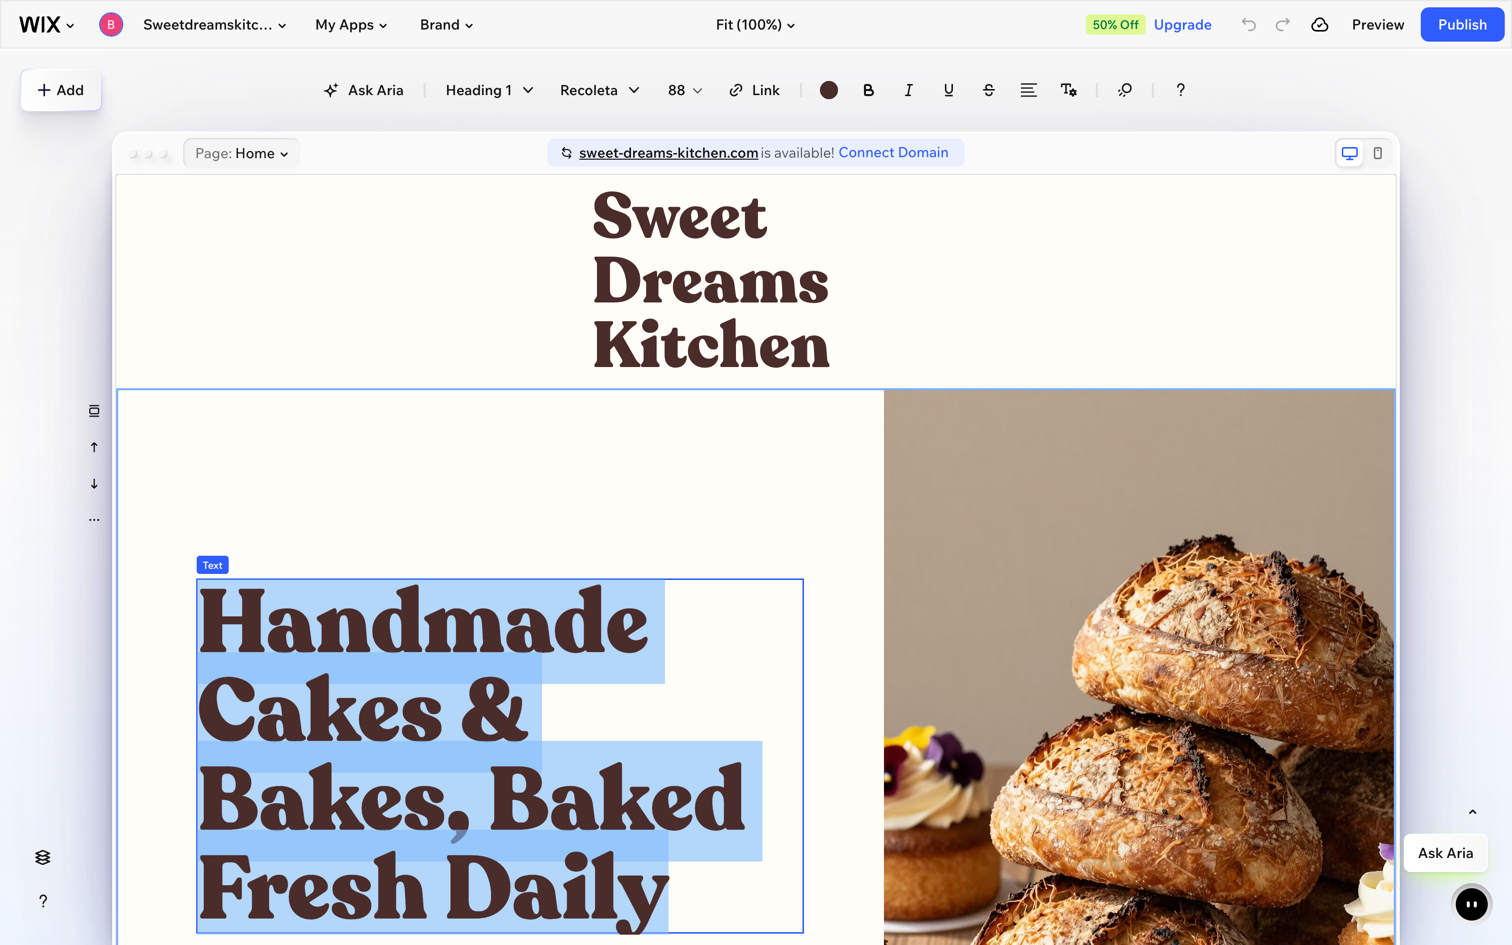
Edit your text. Click any text and start typing. A floating toolbar lets you change the font, size, weight, color, and alignment. Here the heading became “Sweet Dreams Kitchen”.
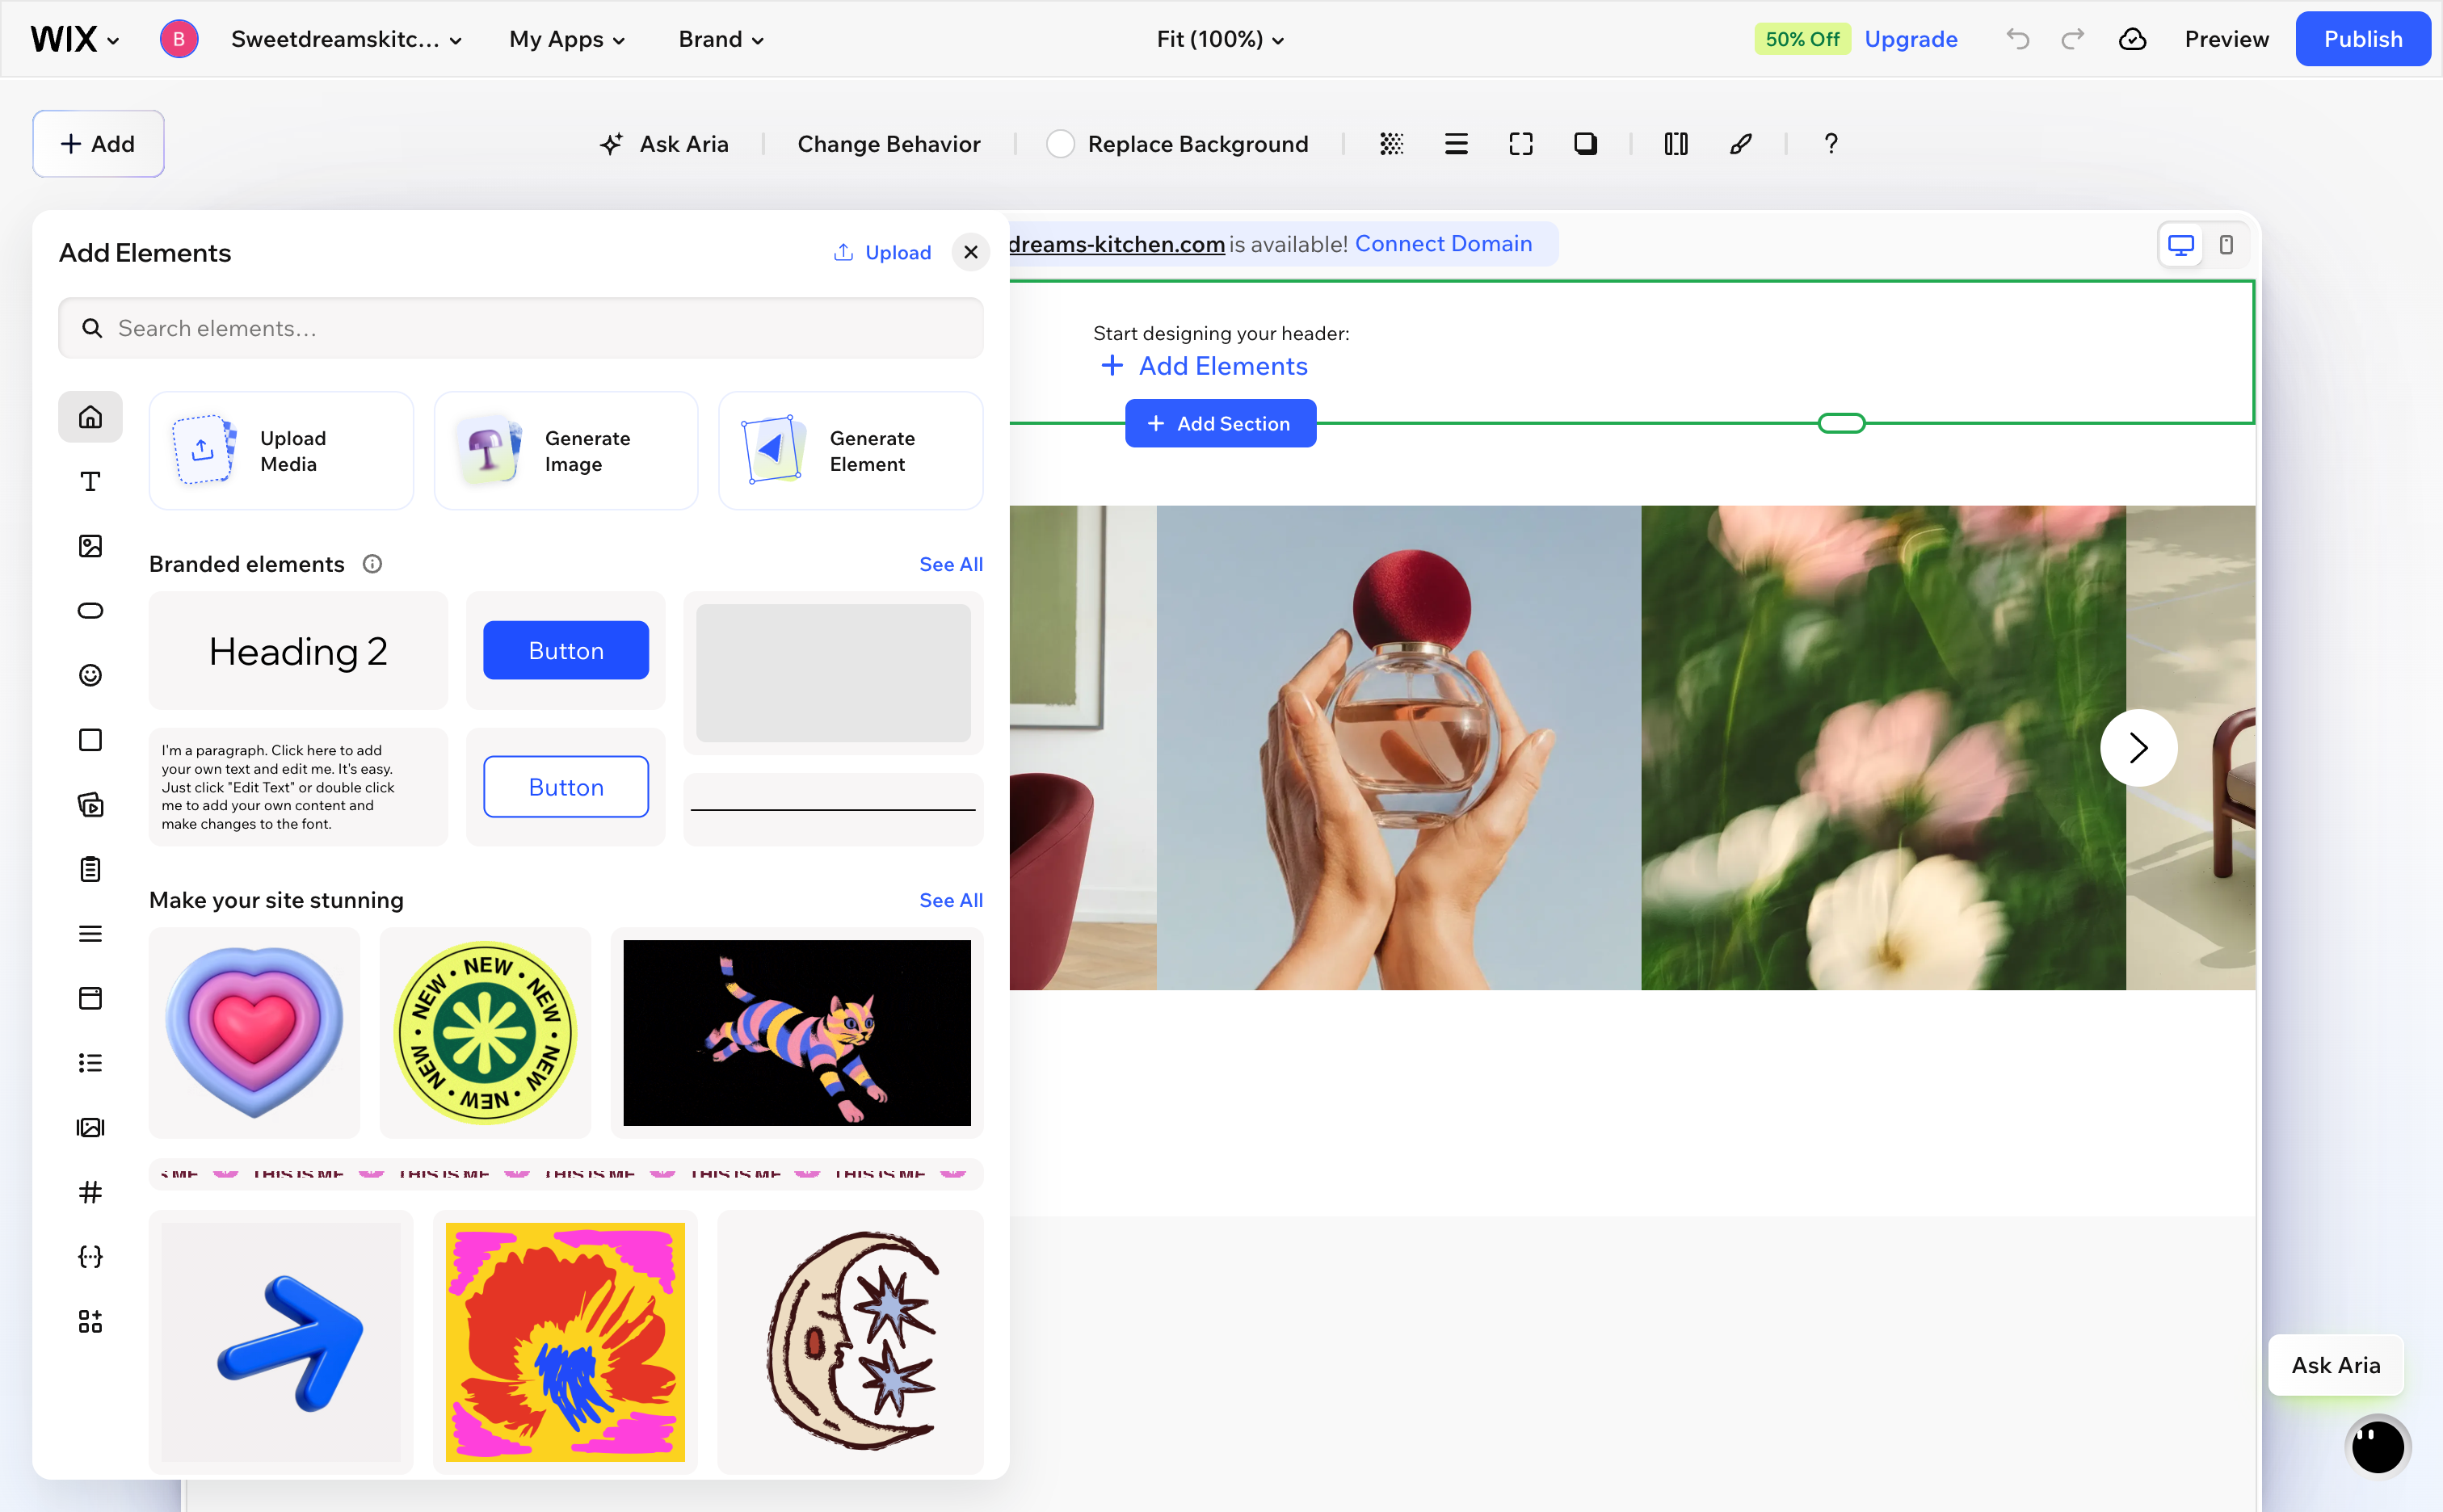
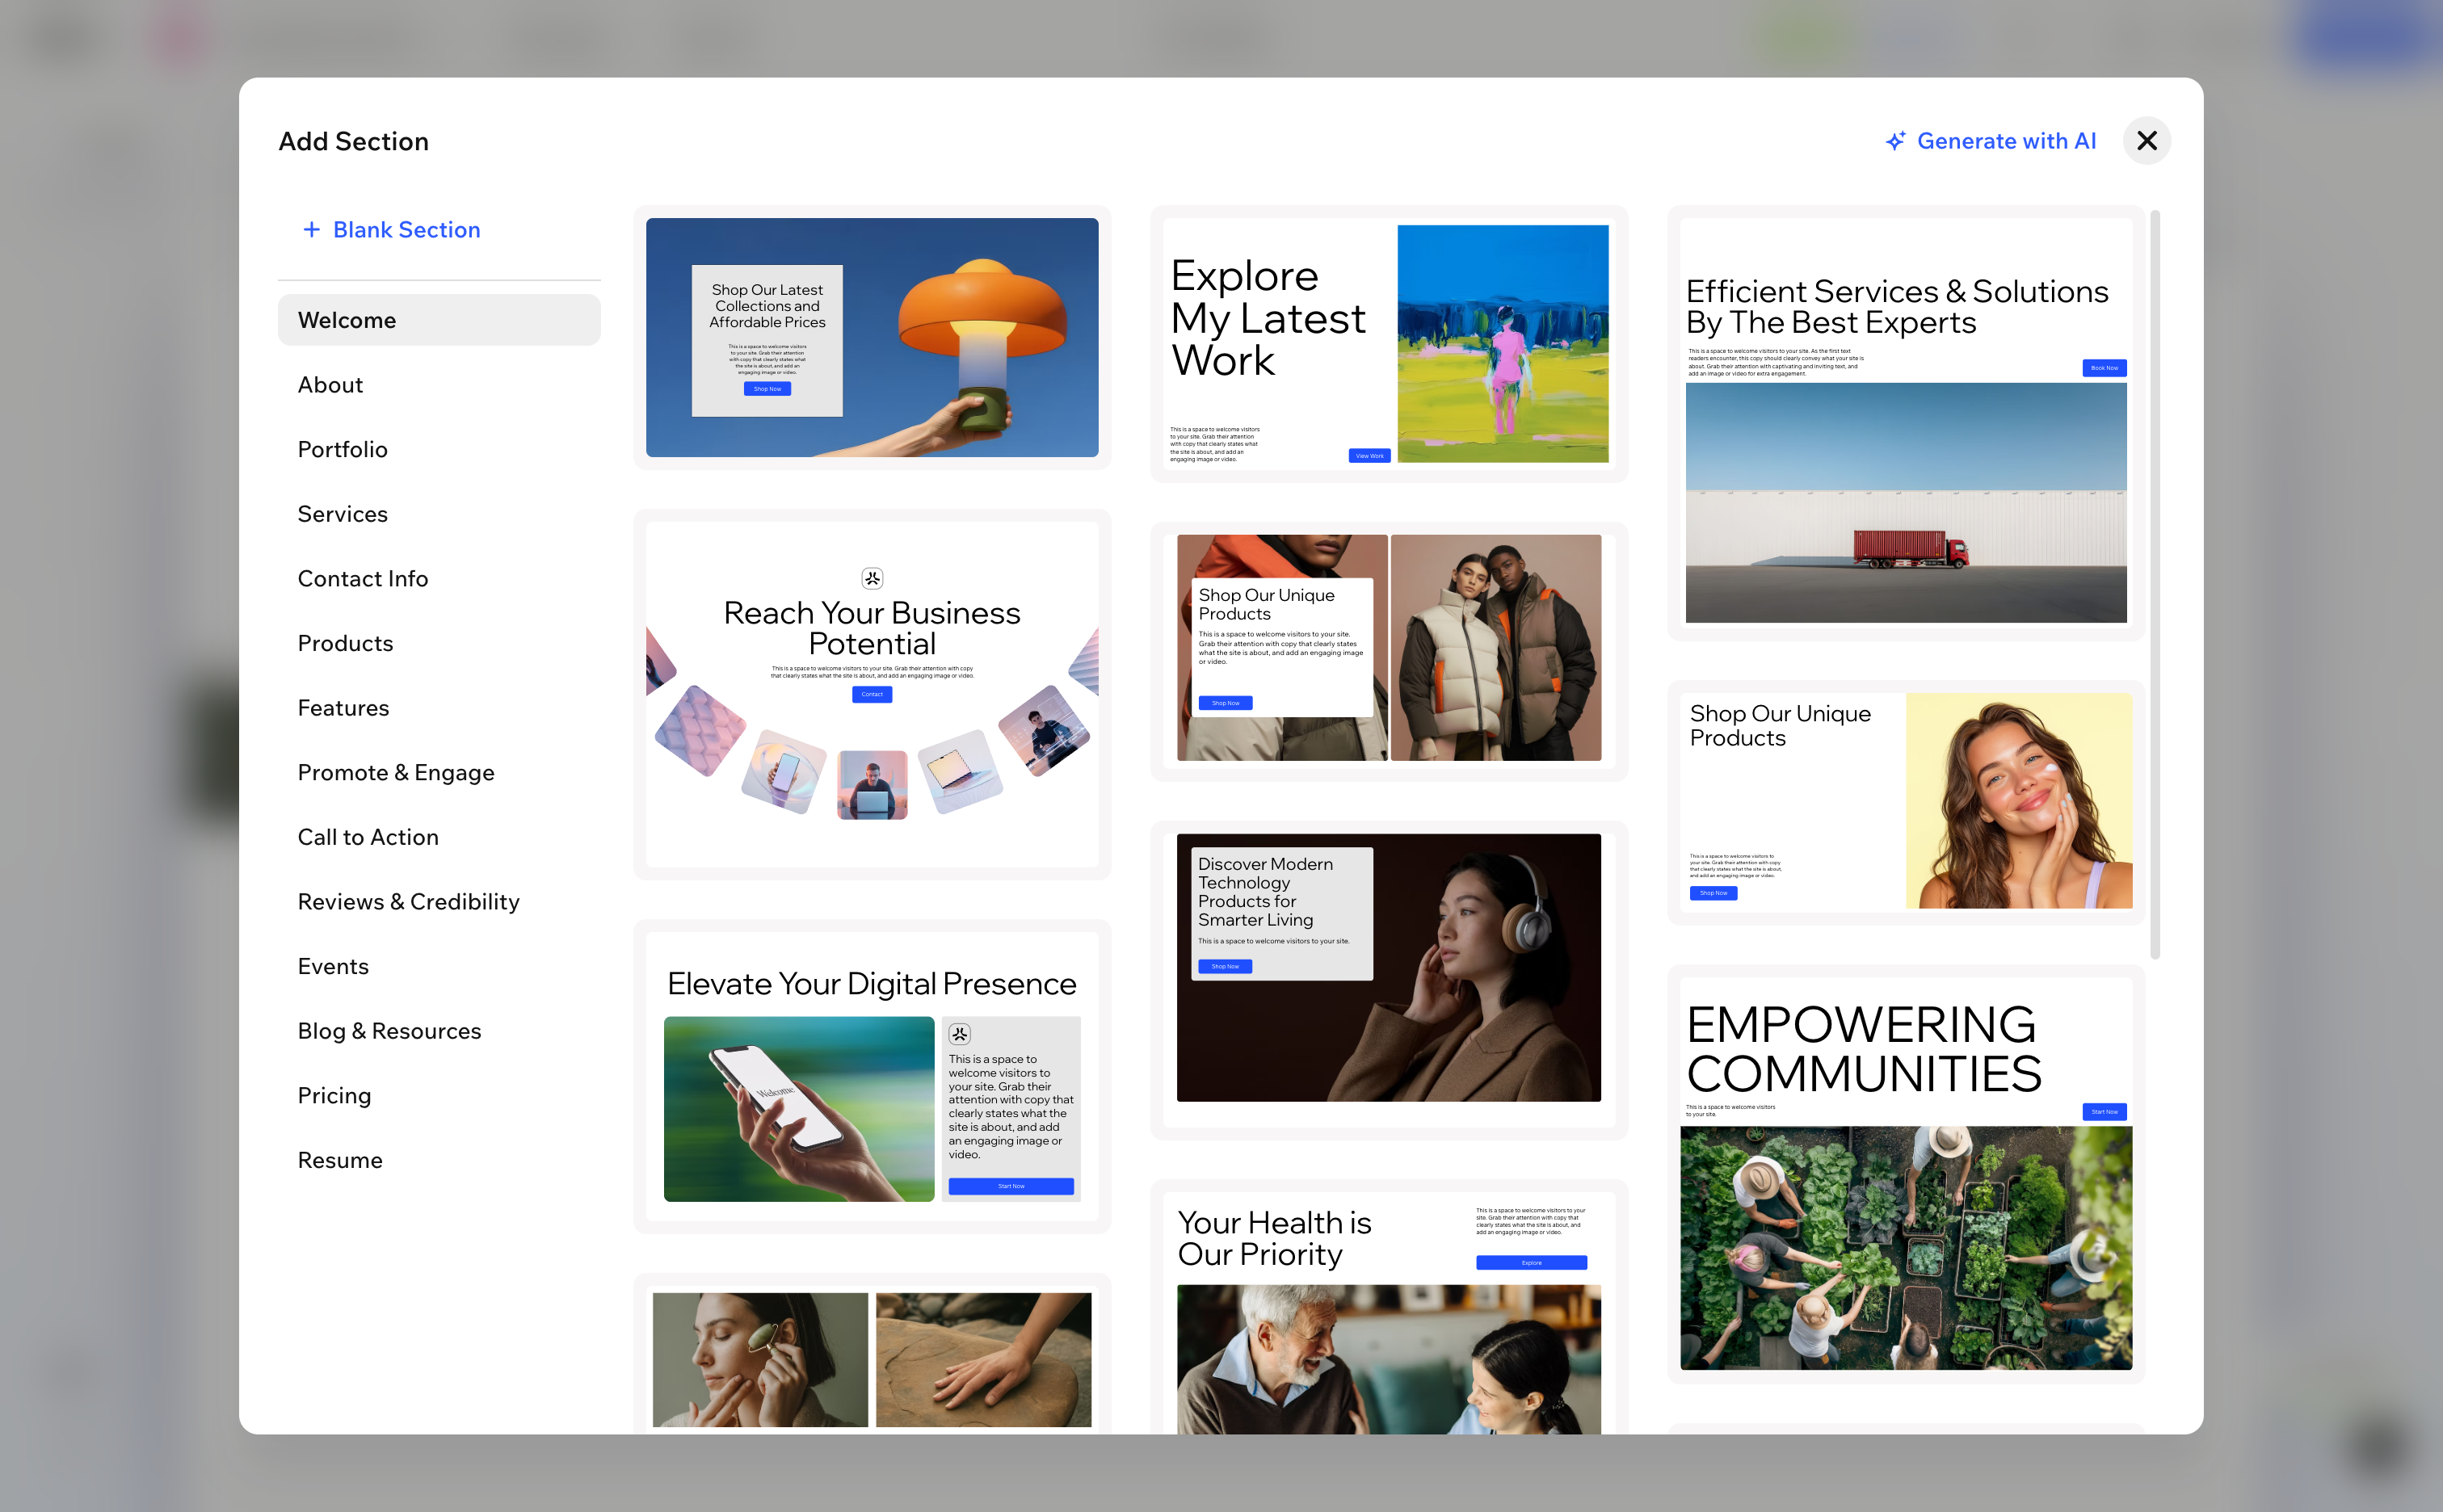
Add a whole section. Rather than placing elements one at a time, open Add Section and pick a ready-made block: a welcome banner, an about section, a gallery, a contact strip, and so on. Each one drops in as a finished layout you can then adjust.
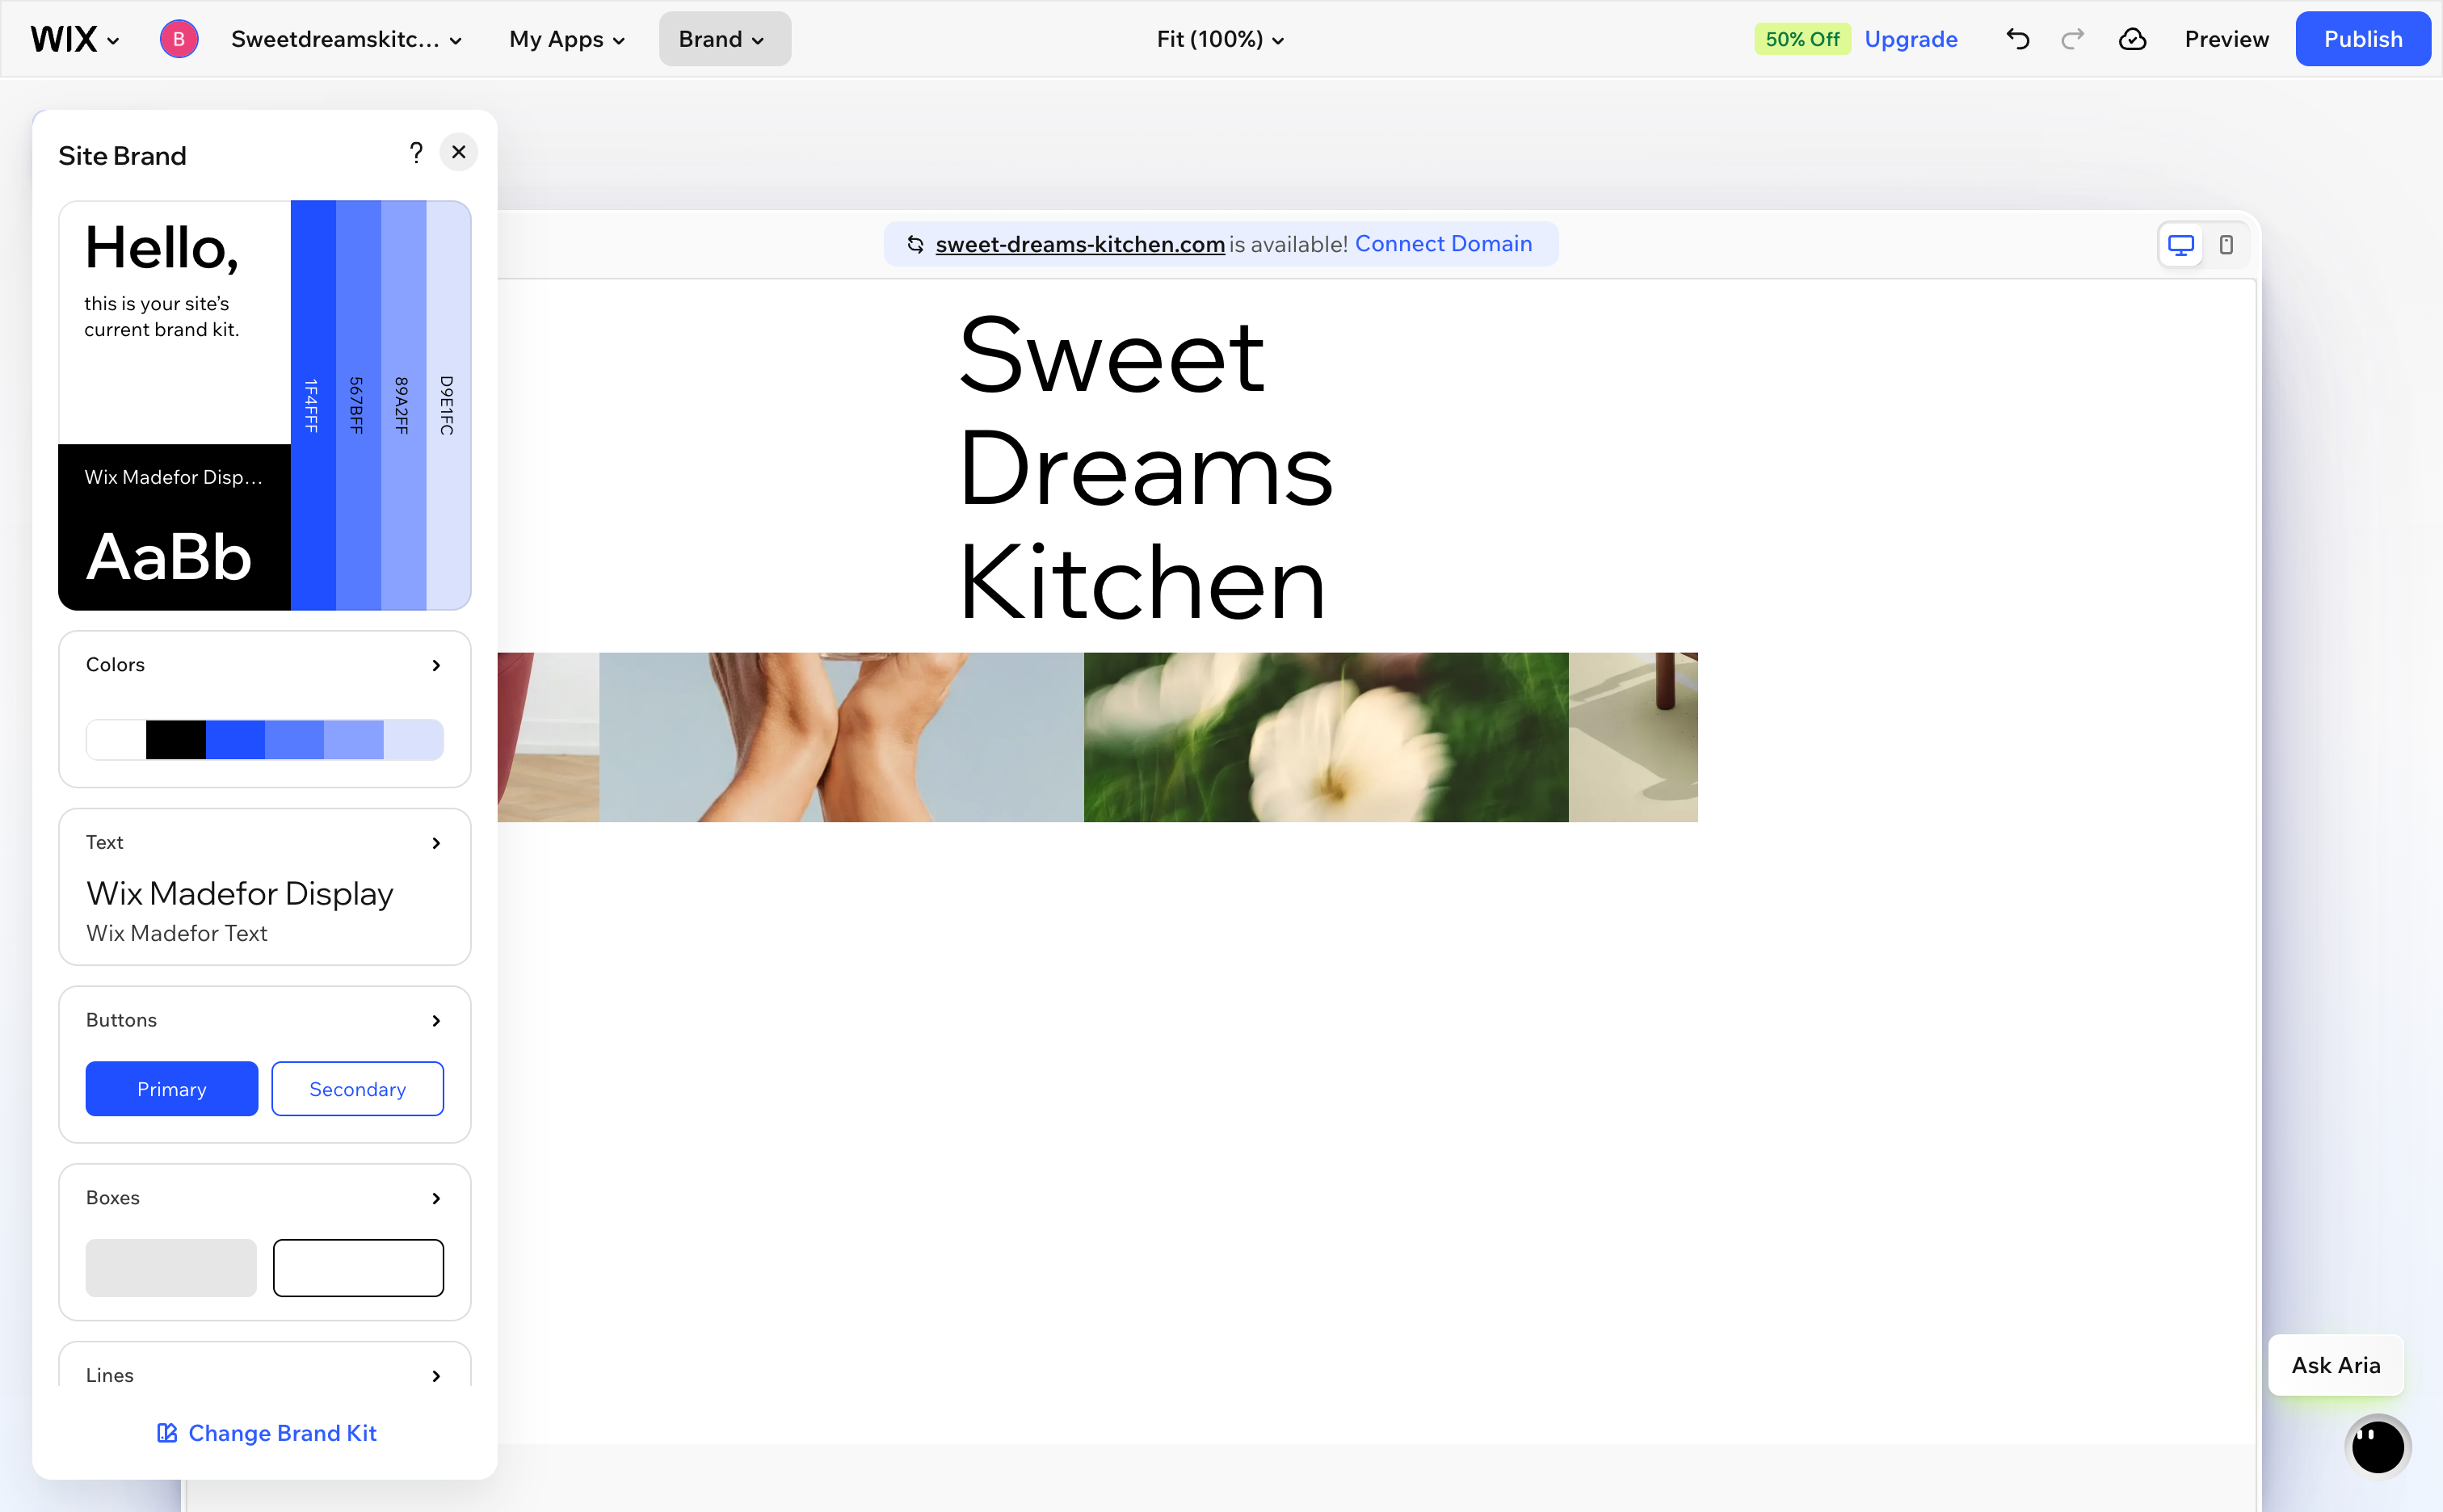
Set your colors and fonts. Open the Brand menu in the top bar to reach the Site Brand panel. Choose a color palette and a font pairing, and it applies across the whole site at once, so every page stays consistent.
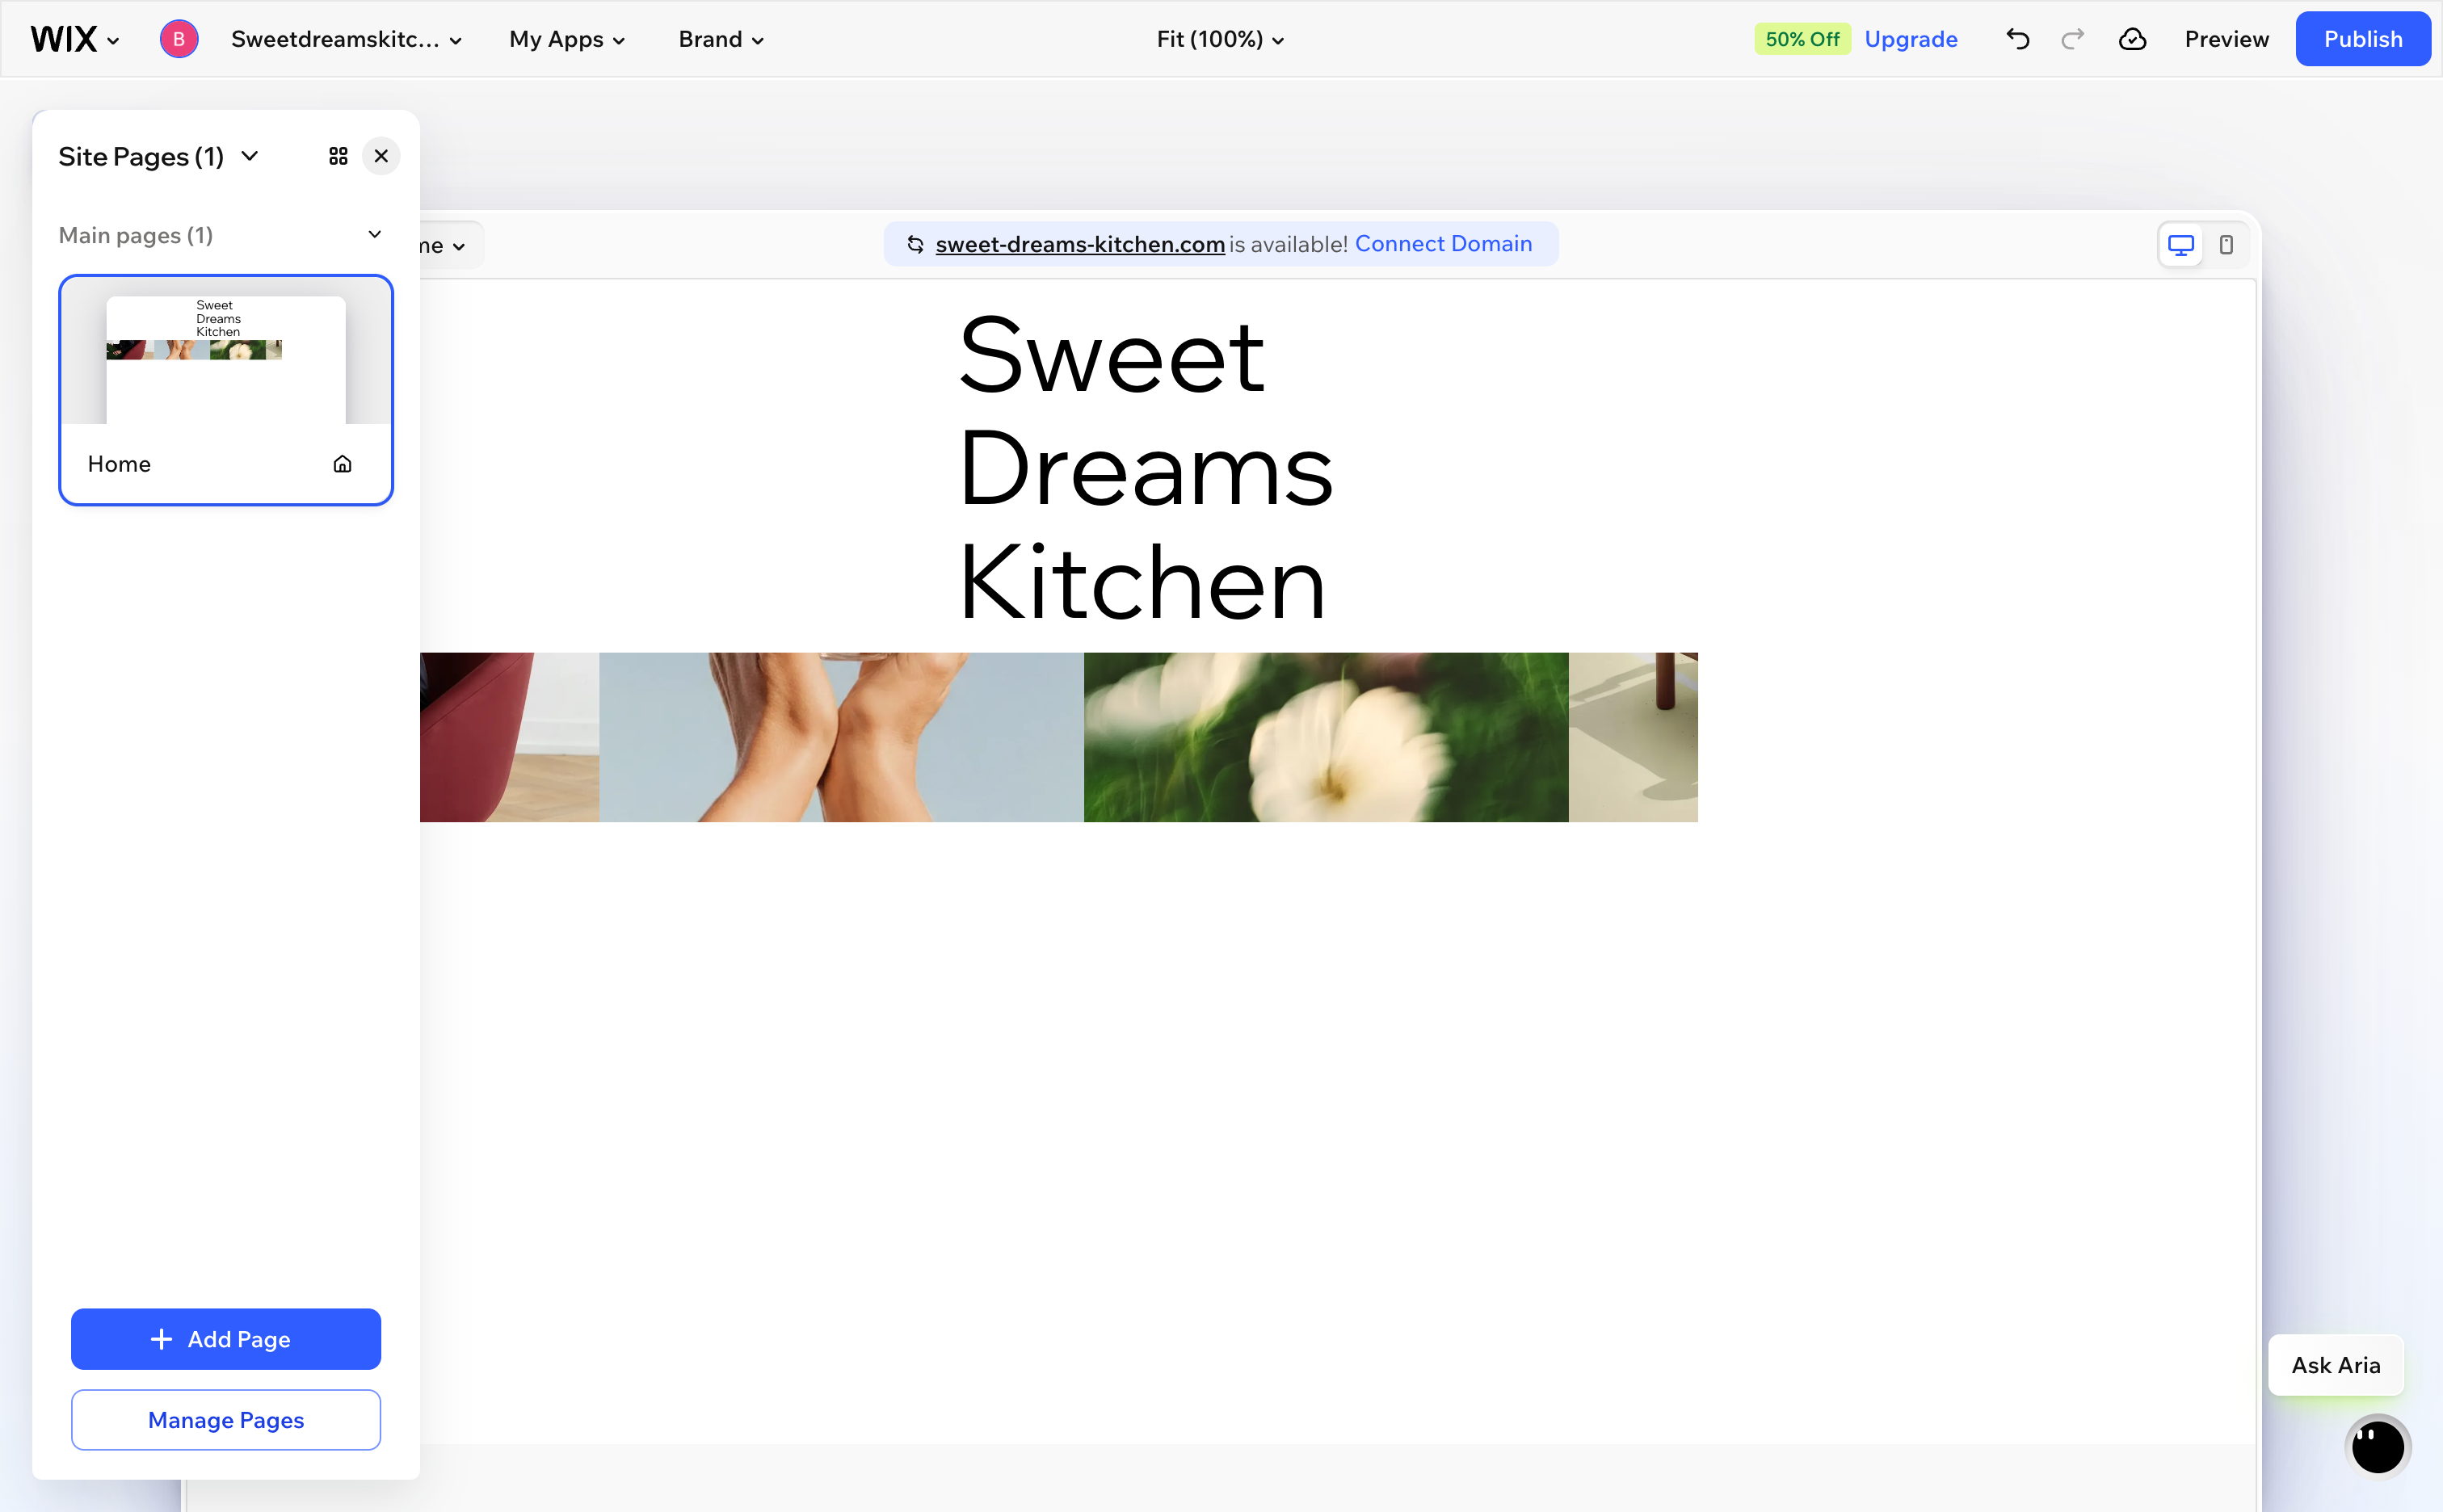
Manage your pages. Use the Page dropdown above the canvas to switch pages, add a new one, or open the full page list. This is where you build an About page, a Contact page, a menu, and anything else the site needs.
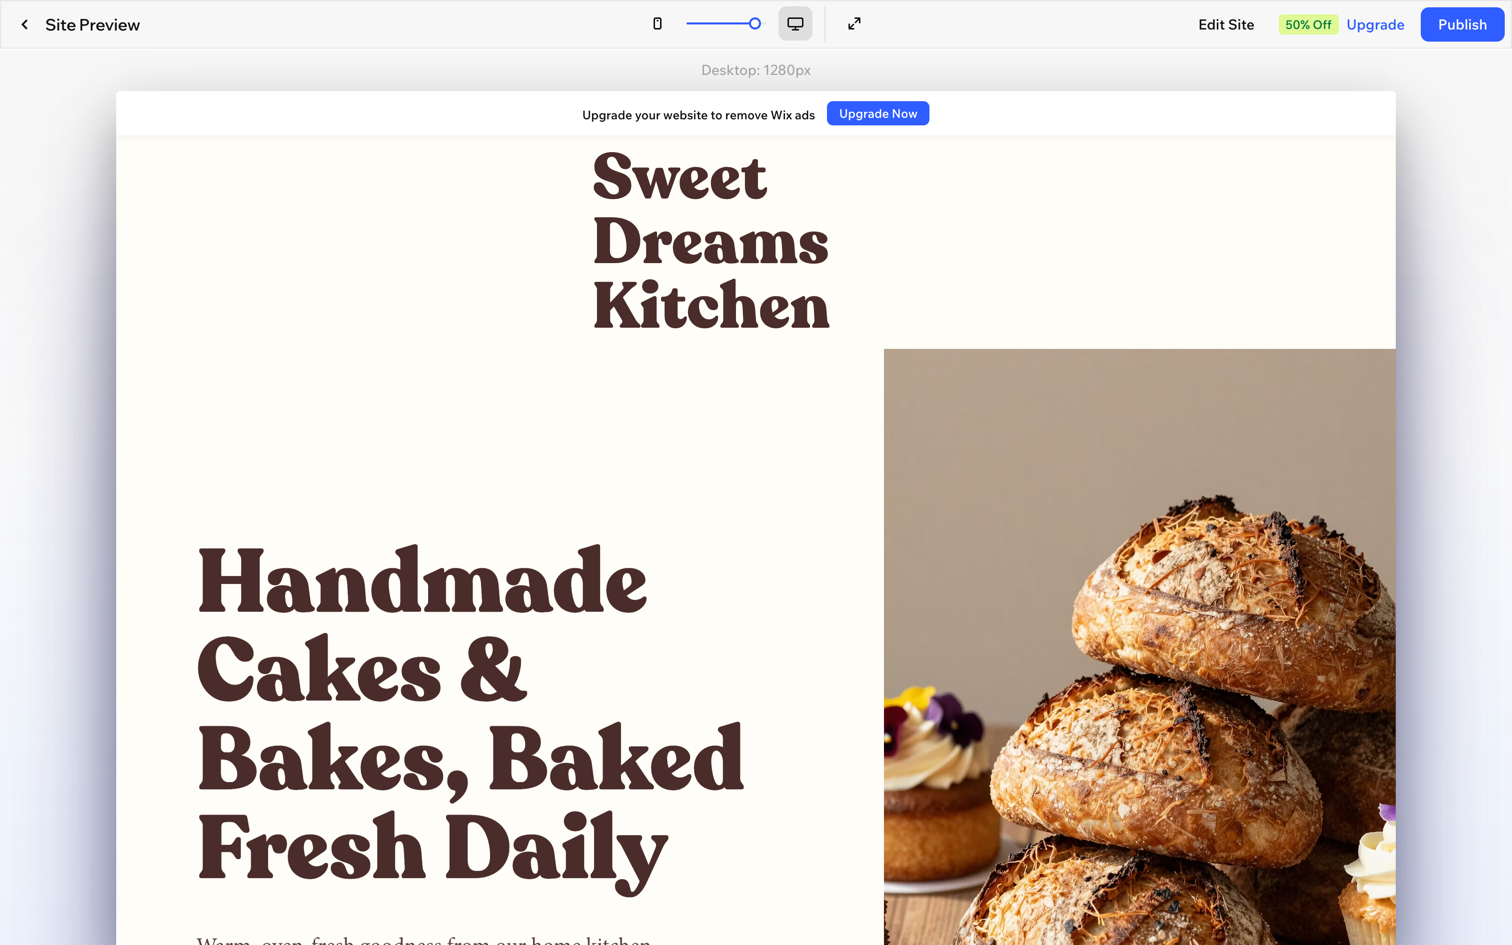
Preview as you go. Click Preview in the top bar to see the site exactly as a visitor will, on desktop or mobile, without publishing anything. Wix autosaves as you work, so experiment freely. Clicking around is the fastest way to learn the editor.
Step 6: Get to know your dashboard
The editor is for designing your pages. The dashboard is your control center for running the site: setup tasks, sales, customers, marketing, settings, and so on. The sidebar is long because it holds everything a growing site might need in one place. (If you followed older Wix tutorials, note that the old “Ascend by Wix” sidebar section is gone. Ascend now survives only as the name of a plan tier.)
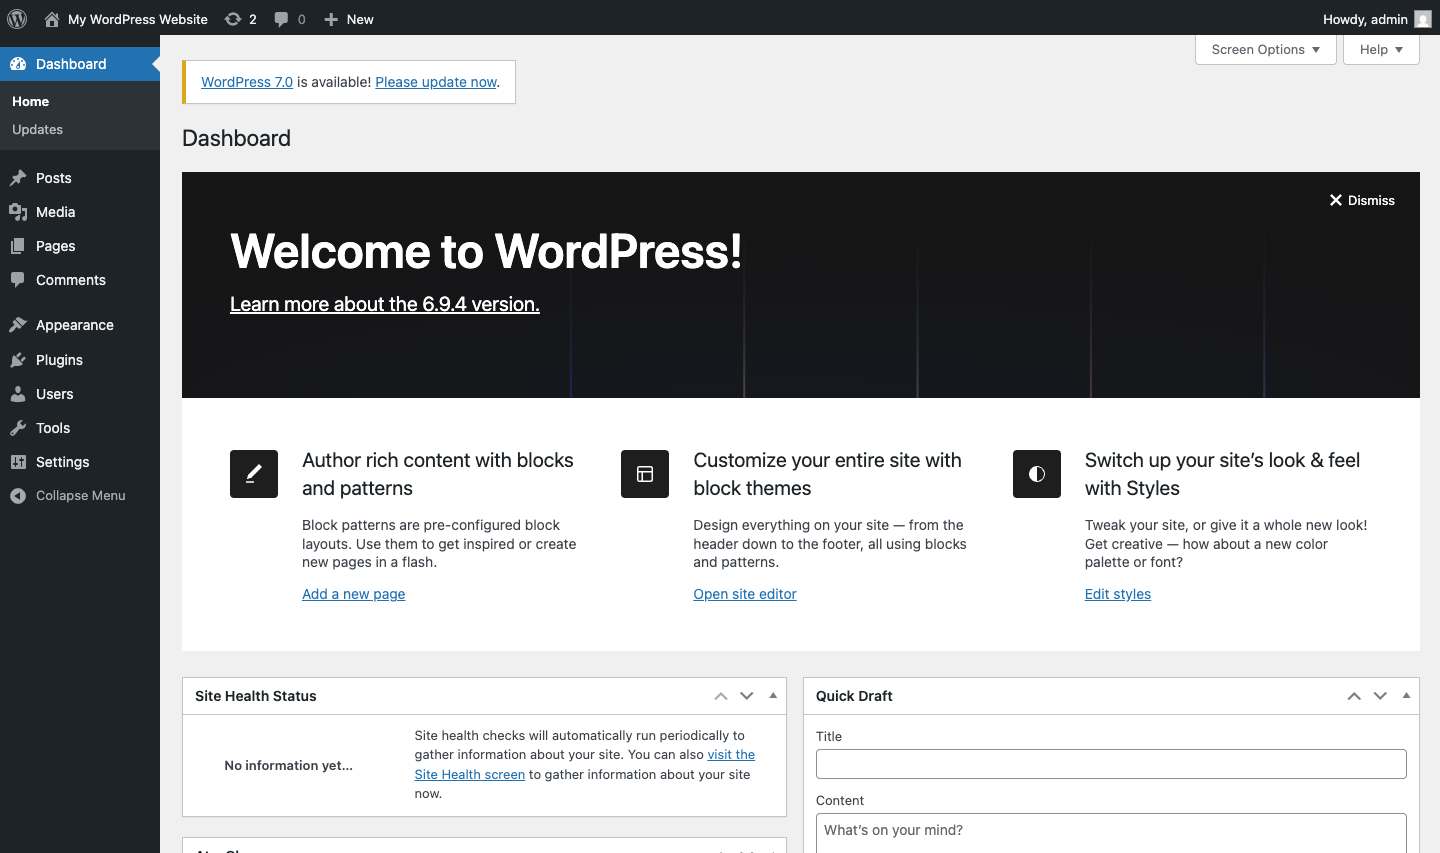
The current dashboard sidebar runs to more than a dozen items. The ones you will use most as a beginner are:
- Setup. A checklist of first tasks to get your site ready to launch.
- Home. Your overview, with activity, analytics snapshots, and next steps.
- AI Agents. Wix’s AI helpers, including Aria, for building and running the site.
- Sales, Catalog, and Getting Paid. Orders, the products or services you list, and how you take payment (these matter once you sell).
- Blog and Portfolio. Manage posts and showcase work, if you added those.
- Marketing. Email campaigns, social posts, SEO tools, and promotions.
- Site & Mobile App. Manage your website, SEO, and the Wix mobile app.
- Customers & Leads and Inbox. Your contacts and the messages people send you.
- Analytics, Automations, Apps, and Settings. Traffic numbers, automatic workflows, installed apps and the App Market, and domains plus billing.
You will not need all of this on day one. As a beginner, the parts that matter early are Setup, Home, Site & Mobile App, and Settings. The rest is there when you grow into it.
Step 7: Add more with apps, a blog, or a store
Wix sites are extendable, so you can bolt on features as you need them.
- Wix App Market. A catalog of add-ons for chat, forms, reviews, bookings, marketing, and plenty more. Many are free, some are paid. Install one and it plugs straight into your site.
- Wix Blog. Add a blog if you want to publish articles, updates, or news. It comes with categories, tags, and comments built in. A blog is one of the simplest ways to bring in search traffic over time.
- Wix Stores. Turn your site into an online store with products, a cart, and checkout. Note that selling online requires a paid plan (more on that in Step 10).
If you are still weighing what kind of site to build, browsing some common website types and examples can spark ideas for which of these features you actually need.
Step 8: Make it look right on mobile
More than half of web traffic is on phones, so your site needs to look good on a small screen. Wix builds a mobile version of your site automatically, but it is worth checking it yourself.
In the top bar of the editor, click the mobile toggle (the little phone icon) to switch from the desktop view to the mobile view. Here you can tidy up the layout for phones: hide elements that crowd a small screen, resize text so it stays readable, and reorder sections. Changes you make in mobile view do not affect your desktop layout, so you can tune the phone experience without breaking the full-size one. Give every page a quick look in mobile view before you publish.
Step 9: Publish your site and connect a domain
When your site looks the way you want, it is time to go live. Click Publish in the top-right corner of the editor. Your site goes online right away.
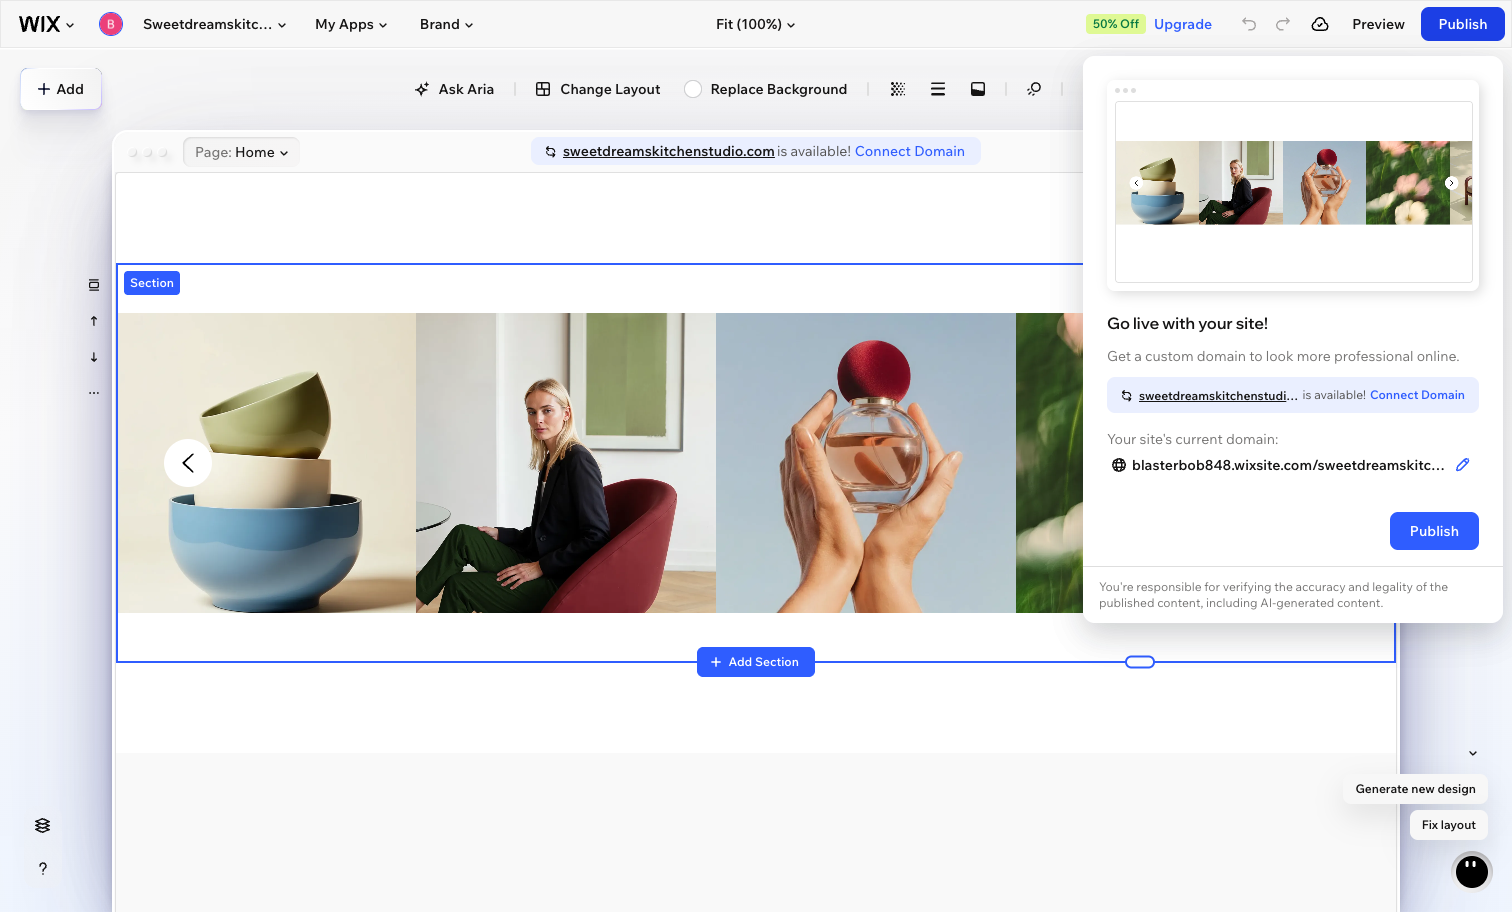
On the free plan, your site lives at a free Wix subdomain, which looks like username.wixsite.com/sitename. That works fine for testing and personal projects, but it is long and it puts “wixsite” in your address. For anything you want taken seriously, connect a custom domain like yourbusiness.com. You can buy one directly through Wix, or connect a domain you already own from another registrar. Connecting a custom domain requires a paid plan.
To get one through Wix, click Connect Domain in the publish dialog (or open Settings, then Domains). Wix suggests available names and lets you search for the exact one you want. A matching domain usually runs about $10 to $15 a year, and most annual premium plans include it free for the first year.
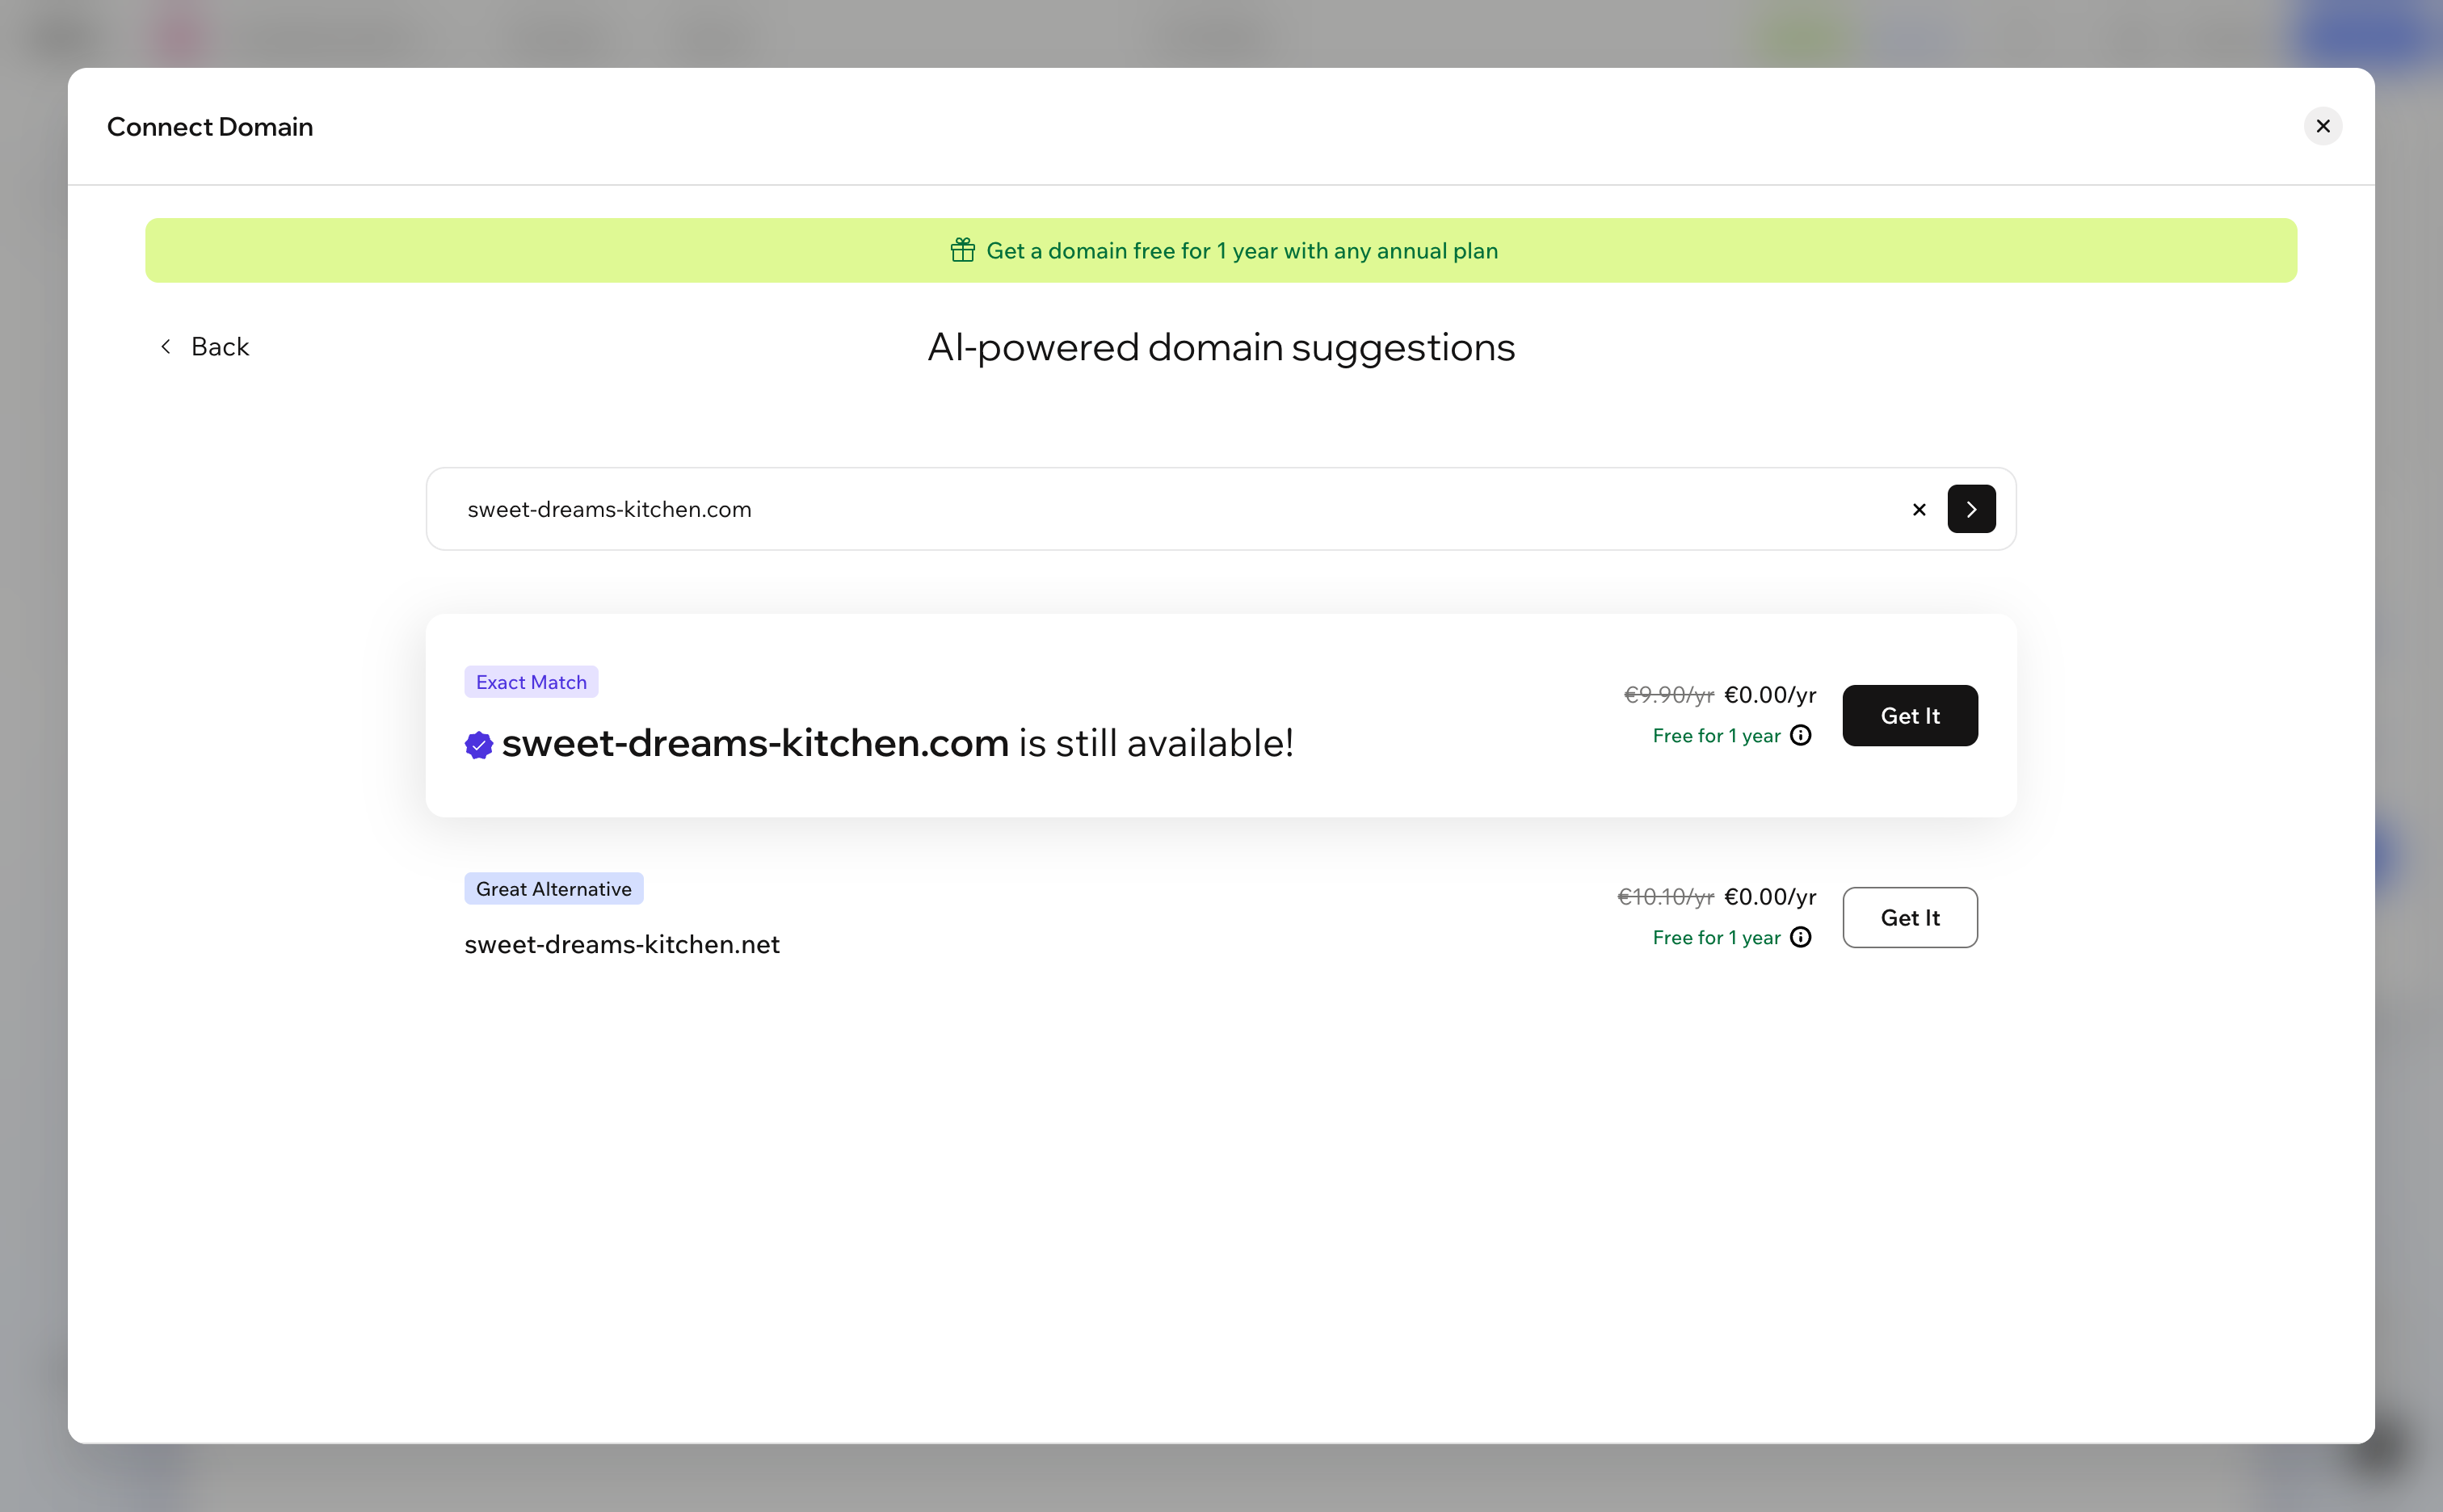
A custom domain makes your site easier to remember, more trustworthy, and better for search rankings. If you are building anything for a business or brand, it is worth doing early. If you want a broader walkthrough of the whole process from idea to live site, our step-by-step guide to making a website covers it start to finish.
Step 10: Pick a plan
You can build and preview a Wix site for free forever. The catch is that the free plan shows Wix ads on your site and keeps you on the wixsite subdomain, with no way to sell products. To remove the ads, connect a custom domain, and open up more features, you upgrade to a premium plan.
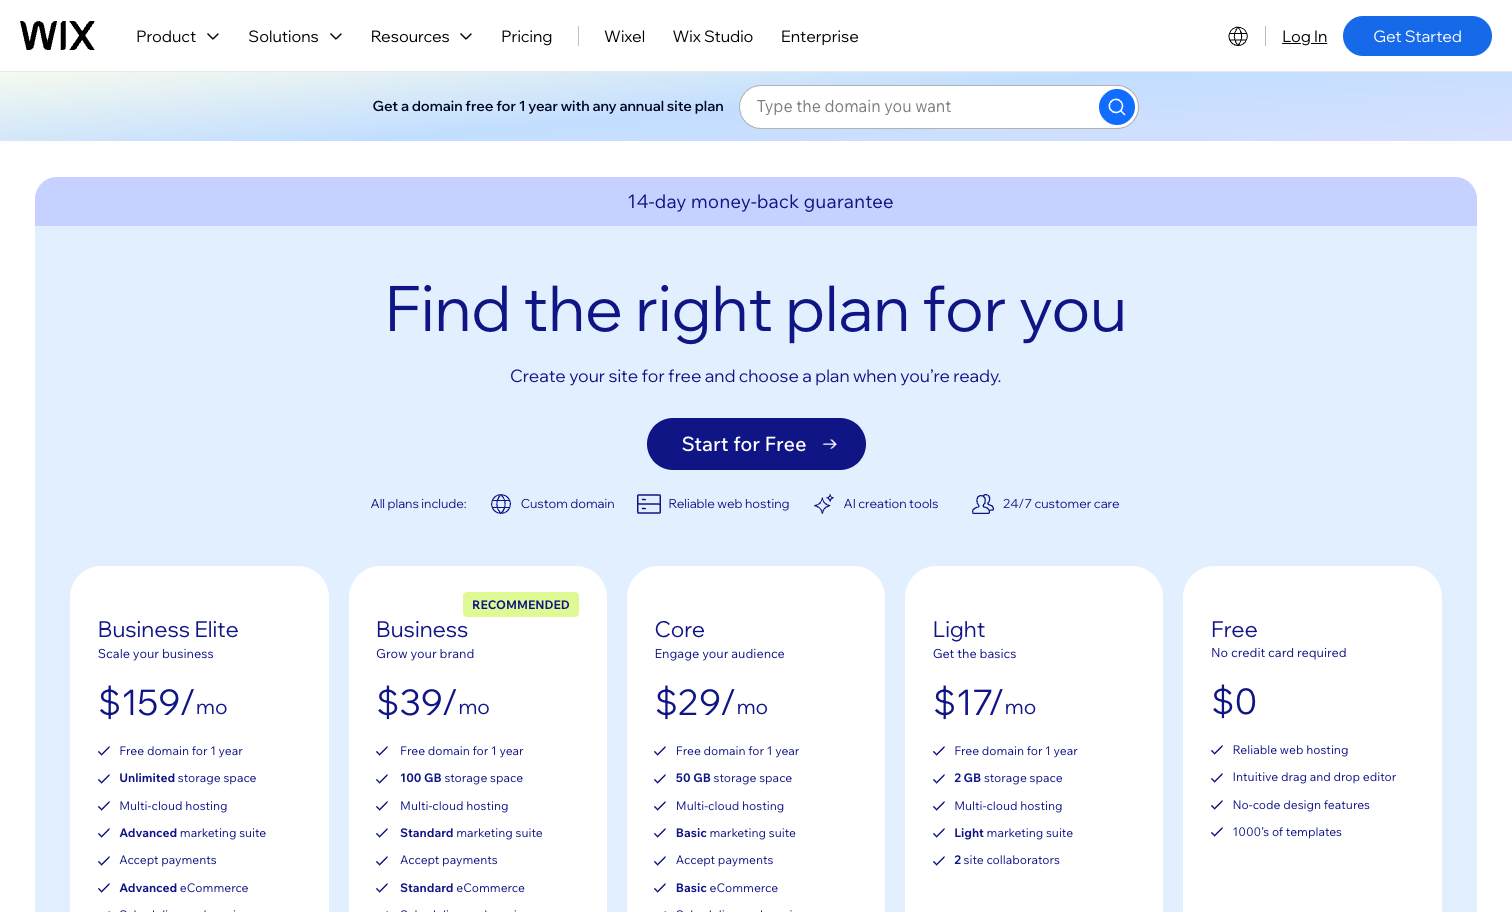
Here are Wix’s main premium plans, with US prices billed annually as of 2026. Prices change over time, so check Wix’s plans page for the current numbers before you buy.
| Plan | Price (annual, per month) | Best for |
|---|---|---|
| Free | $0 | Testing and personal projects (Wix ads, wixsite subdomain, no ecommerce) |
| Light | $17 | Simple personal or hobby sites with a custom domain |
| Core | $29 | The cheapest plan that lets you sell online |
| Business | $39 | Growing stores that need more ecommerce tools |
| Business Elite | $159 | High-volume businesses that need the most capacity |
For most first-time site owners who just want a professional-looking site with their own domain and no ads, Light or Core covers it. If you plan to sell products, start at Core, since that is the cheapest tier with ecommerce. When you are ready, you can pick a Wix plan and go live.
Wix Editor vs Wix Studio
You may run into a choice between the Wix Editor and Wix Studio, and it is worth a quick word so you do not pick the wrong one. The two are separate products.
The standard Wix Editor is what this whole guide covers. It is designed for regular users building their own site, with drag-and-drop editing and plenty of guardrails. Wix Studio is built for agencies, freelancers, and designers who build sites for clients. It offers more advanced layout control, responsive breakpoints, and workflow tools for teams.
If you are building your first website, use the standard Wix Editor. Studio’s extra power comes with extra complexity you do not need yet, and you can always move up later if web design becomes your job.
The pros and cons of Wix
Wix is a strong choice for beginners, but no builder is perfect. Here is an honest look.
What Wix does well:
- Very beginner-friendly, with a genuine drag-and-drop editor and AI setup that removes the blank-page problem.
- A large template gallery and a big app market, so you can start fast and extend as you grow.
- Everything lives in one place: hosting, editor, domain, email marketing, and store tools.
Where Wix falls short:
- It is a closed platform. You cannot export your site and move it to another host, so switching away means rebuilding.
- Once your site is live, you cannot swap to a completely different template without redoing your content.
- The free plan shows Wix ads and uses a wixsite subdomain, so a serious site needs a paid plan.
Frequently asked questions
Is Wix free?
Yes, up to a point. You can build, preview, and publish a site for free, and the free plan has no time limit. The trade-offs are that Wix shows its own ads on your site, you are stuck with a long wixsite subdomain instead of a custom domain, and you cannot sell products. To remove the ads, use your own domain, and add ecommerce, you need a paid plan starting at $17 per month (billed annually, as of 2026, and prices change).
Can you move a Wix site to another host?
No. Wix is a closed, all-in-one platform, which means your site is built to run on Wix and cannot be exported and hosted elsewhere. You can transfer a domain you bought away from Wix, but the site itself stays on Wix. If the ability to pick up your site and move it to any host matters to you, factor that in before you commit.
AI builder or template, which should I choose?
Both end up in the same editor, so it comes down to how you like to start. If you are facing a blank page and do not know where to begin, use the AI builder. It asks a few questions and hands you a full draft to edit. If you already have a clear picture of the layout you want, or you just enjoy browsing designs, start from a template. You can restructure either one afterward, so pick whichever gets you moving.
Can you switch templates later?
Not directly. Once you have picked a template and started building, Wix does not let you swap to a completely different template while keeping your content in place. You would need to start a new site with the new template and move your content over by hand. Because of this, it pays to spend a little time up front choosing a layout that fits, rather than planning to change it wholesale down the road.
Conclusion
Building a website with Wix in 2026 is about as approachable as it has ever been. You can describe what you want to an AI assistant and get a real site back, or pick from thousands of templates and shape one to fit. From there you customize in the editor, check how it looks on mobile, publish, and pick a plan when you are ready to drop the ads and connect your own domain.
The most useful thing you can do now is start. Create a free account, try the AI chat or a template, and click around the editor for twenty minutes. You will learn more by building than by reading, and nothing goes live until you press Publish. When you are ready, you can start building with Wix.