In 2018, WordPress moved away from its long-time editor to one it dubbed “Gutenberg”.
Unlike the editor of old, WordPress users now use a modern drag-and-drop block editor to build and customize websites, publish content, and sell their services and products online.
Whether you’re a long-time user trying to make sense of the new editor, or you’re brand new to WordPress, this guide will teach you the ropes. You’ll learn:
- How Gutenberg blocks differ from the classic editor.
- How to use the block builder to create and edit pages.
- What the Gutenberg blocks do.
- How to unlock extra settings with the sidebar.
- How to use the toolbar to be more productive.
The Classic Editor vs. Gutenberg Blocks
The switch from classic editor to Gutenberg blocks is a huge leap for WordPress. Let’s look at how the editor has evolved.
The Classic WordPress Editor
From 2003 until 2018, WordPress provided its users with a basic text editor.
The classic WordPress editor was your typical WYSIWYG (“what you see is what you get”) editor.
In other words, you typed your content into the open field, formatted it using the toolbar provided, and that’s more or less what your text looked like on your website.
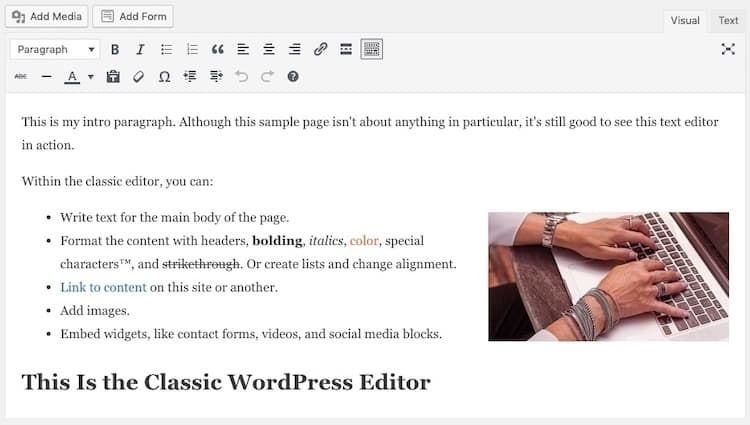
It’s a simple enough interface and one that many WordPress users grew accustomed to over the years. But it had its limitations.
For example:
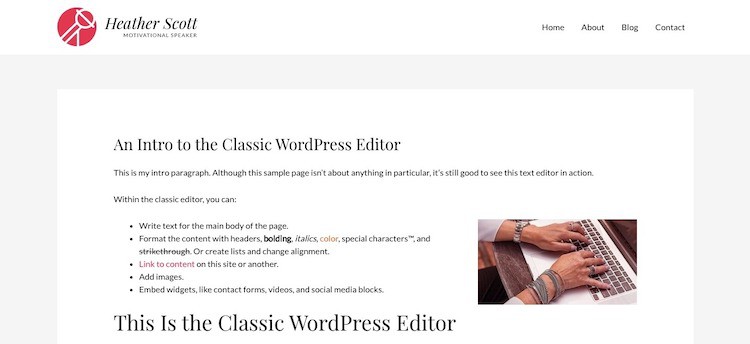
This is how the content would display on the website once published. But you would only be able to confirm that everything translated okay from the editor to the page by using the “Preview” function.
There was no way to write content within the actual context of the page. In addition, it took a certain familiarity with HTML or an over-reliance on plugins to be able to build more advanced designs and layouts.
In 2018, WordPress set out to rectify these limitations by releasing the new WordPress editor (i.e. Gutenberg).
The Gutenberg Block Editor
The new WordPress editor is a drag-and-drop block editor.
This means that content is no longer written in one main editor. Individual blocks are dropped into place to build out the content of a page.

When each block is selected, it comes with a unique toolbar. This allows for a more streamlined and customized editing experience as you’re only shown the editorial controls you need at that time.
The Gutenberg editor has also made it much easier to add the kinds of content and layouts that would otherwise be too time-consuming or difficult for a WordPress beginner to do on their own.
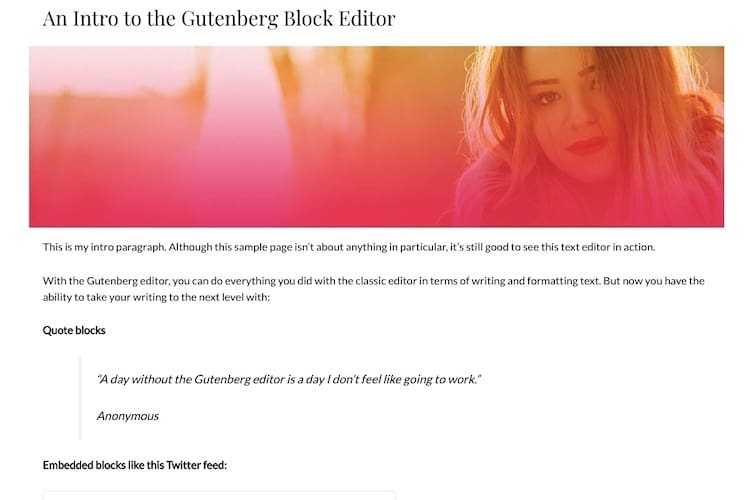
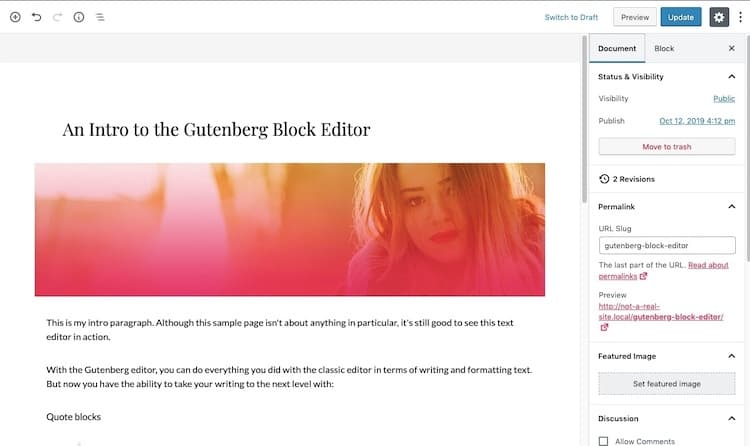
What’s more, there’s no guessing game anymore. What you create within the block editor is how it appears on your website. The fonts, styling, and layouts all match:
Is One WordPress Editor Better Than the Other?
As for which is better — the classic editor or Gutenberg — you’ll have to figure that out for yourself.
Although WordPress automatically comes installed with Gutenberg, users can install the Classic Editor plugin if they’re not ready to move to the block editor yet.
There are other editor add-on options available, too. Elementor and Beaver Builder are two of the more popular drag-and-drop editor alternatives, Block Categories
though they’re best suited for professional designers and developers who need to unlock more features.
For now, let’s take a deeper dive into Gutenberg and give you a better idea of what to expect from the WordPress drag-and-drop editor.
How to Use the Gutenberg Block Editor
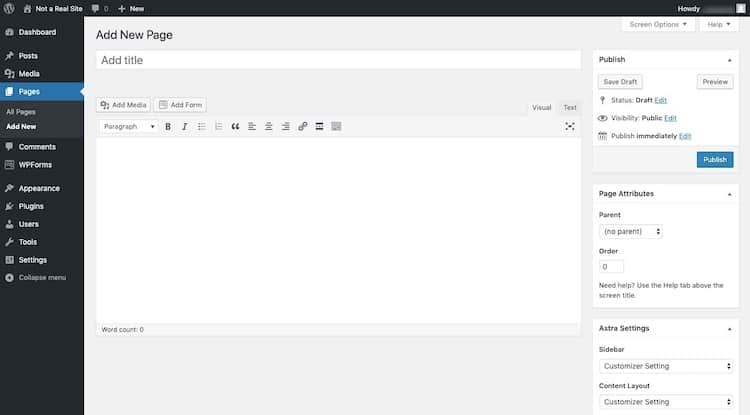
Let’s review the Gutenberg block editor by setting up a new page (or post).
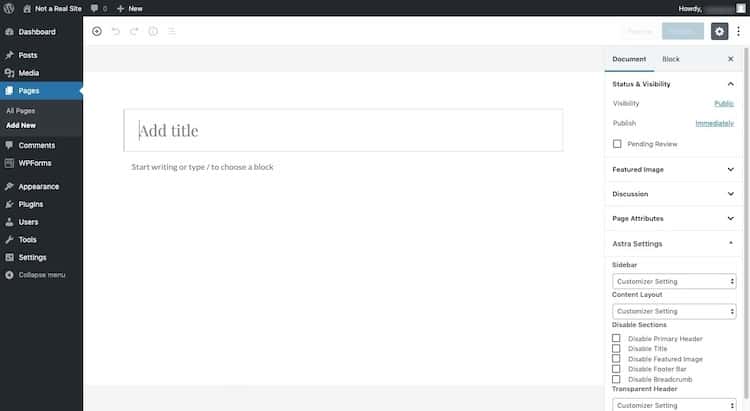
Start with the WordPress menu on the left side of the screen. If you want to create a new web page, hover over “Pages” and select “Add New”. If you want to create a new blog post, hover over “Posts” and select “Add New”.

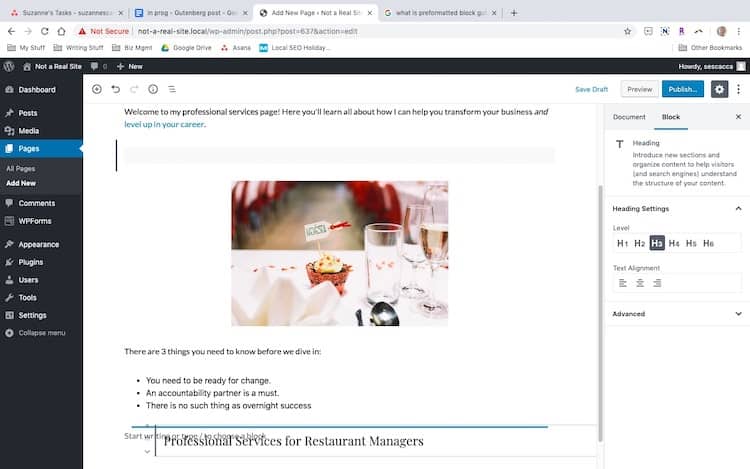
Add a Title
With your new page or post created, give it a title in the “Add Title” block:
Create Your First Block
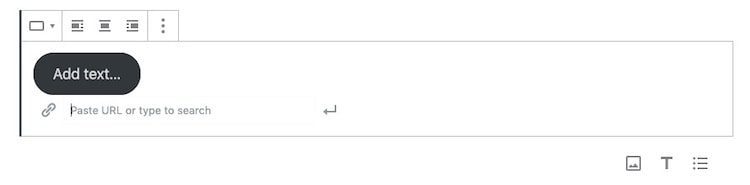
Paragraphs generally comprise the bulk of the content we put on a web page, which is why the first block Gutenberg gives us is always a Paragraph block:
If you want to start with a paragraph, add your cursor to the empty block that says “Start writing or type / to choose a block”. As you type, your content will fill the block.
Customize Content in a Block
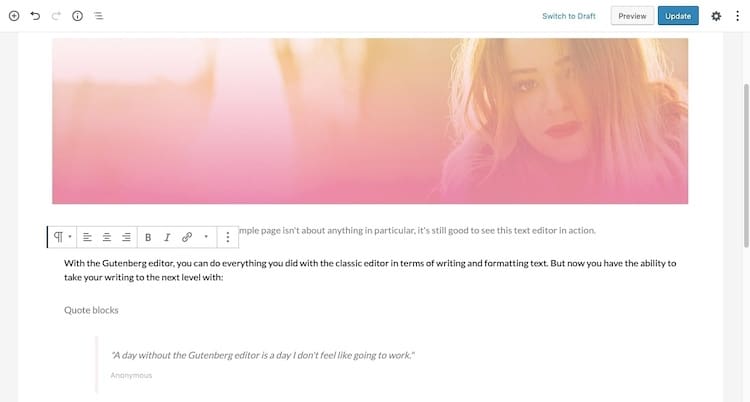
To customize the style of your paragraph, use the toolbar that appears just above it.
Alignment
With most Gutenberg blocks, you’ll have the ability to change the alignment of the content inside the block:
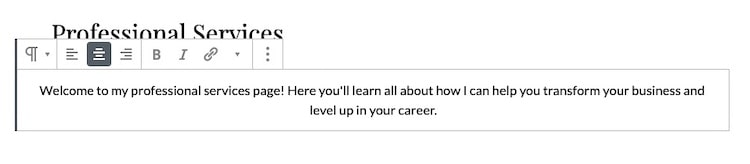
The left is the default. You may also choose to center-align or right-align your content.
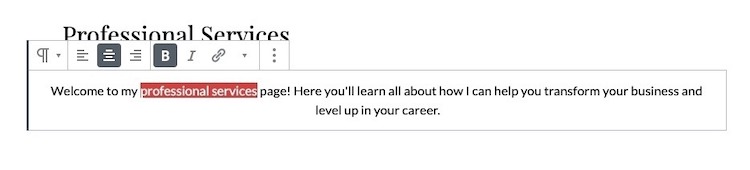
Formatting
Any time there is a text within a block, you can format it with bold:
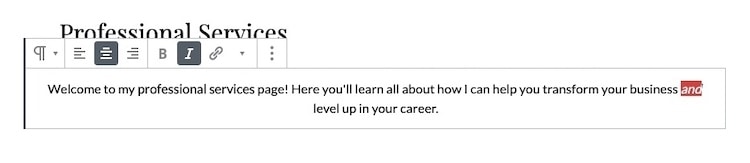
Make the text italic:
Or add a hyperlink:
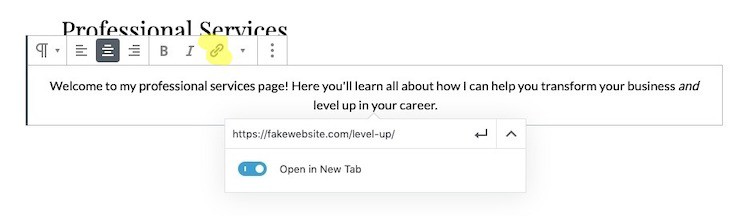
If you want to make your links open in a new browser window, click the down-arrow within the hyperlink bar. When you’re done making your changes, click the “Return” arrow to save the link.
Additional Style Options
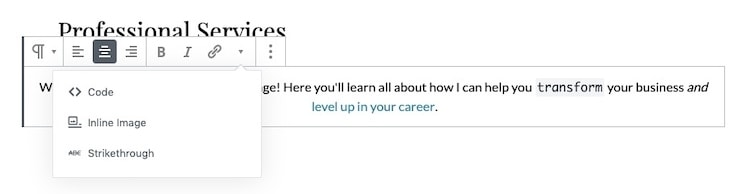
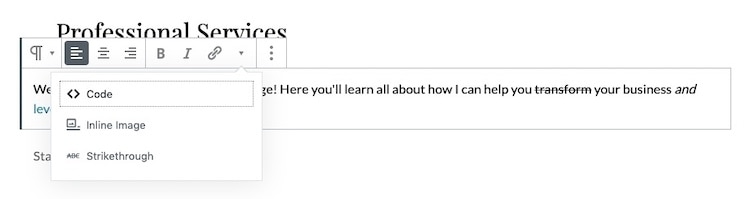
If you click on the down-arrow in the toolbar, you’ll find additional text stylization options:
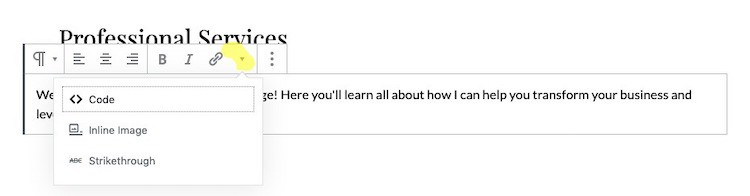
“Code” styles your text as if it were written in a code editor:
“Inline image” enables you to wrap your text around an image:
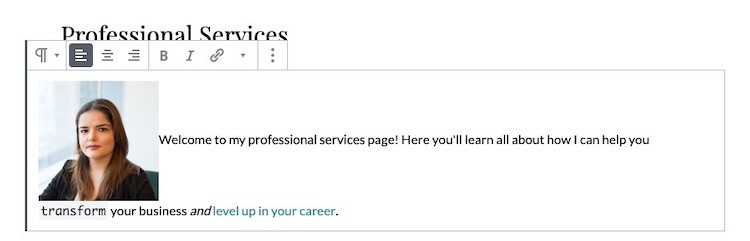
As you can see, this isn’t an efficient way to pair images and text beside one another in Gutenberg (we’ll review another way to do this later).
The last option here allows you to add a strikethrough through highlighted text:
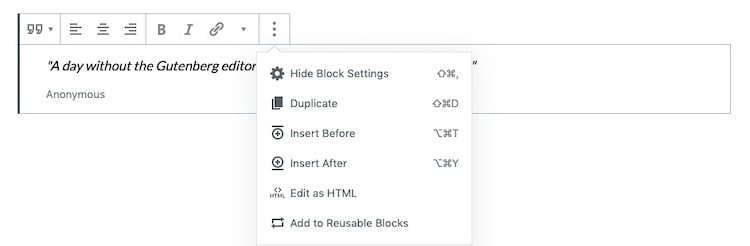
More Block Options
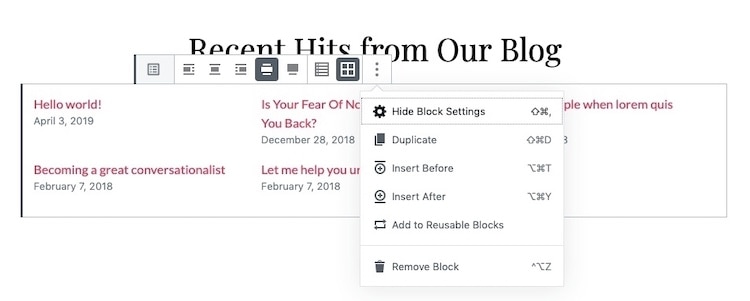
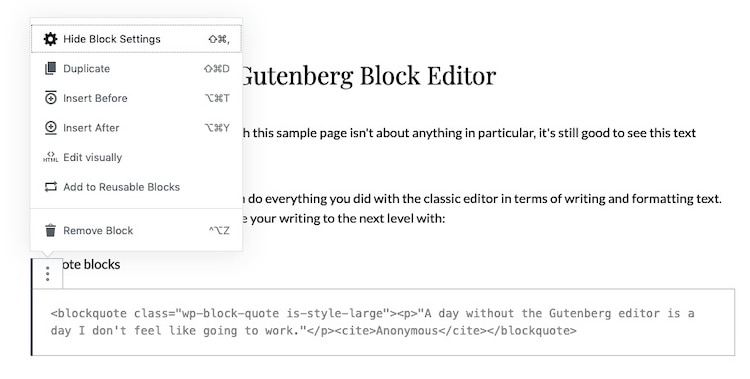
The last button in the toolbar always reveals more block options:
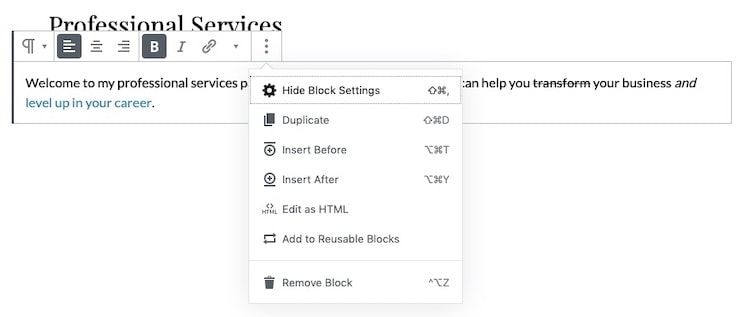
These options will be the same regardless of which kind of block you’re editing.
Let’s quickly recap what these do:
- Hide Block Settings: Makes the sidebar on the right disappear.
- Duplicate: Makes an exact replica of this block.
- Insert Before: Adds a new empty block above this one.
- Insert After: Adds a new empty block below this one.
- Edit as HTML: Turns the block into a code editor if you want to write in HTML.
- Add to Reusable Blocks: Saves the block so you can reuse it elsewhere on the site.
- Remove Block: Deletes the block.
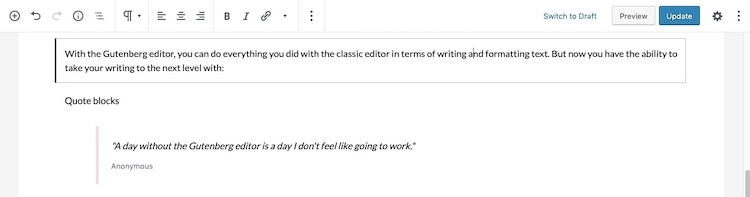
Transform Block
There’s one other button in the toolbar that you need to be aware of:
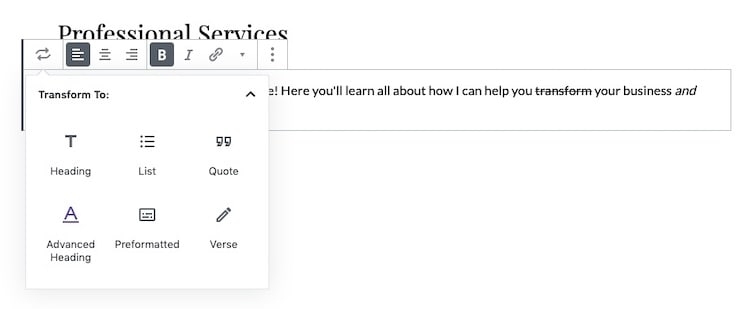
This button won’t always look this way though, so remember that the first button allows you to transform the current block into a related one.
For instance, you can turn a text-based block like Paragraph into Heading, List, or Quote. You cannot, however, turn something like a paragraph into an image or a separator line. You’ll need a new block for that.
Add a New Block
To add a new block to your page, you have a number of options.
Insert Before/After
You’ve already seen the Insert Before/Insert After options in your block’s toolbar. That’s one way to do it.
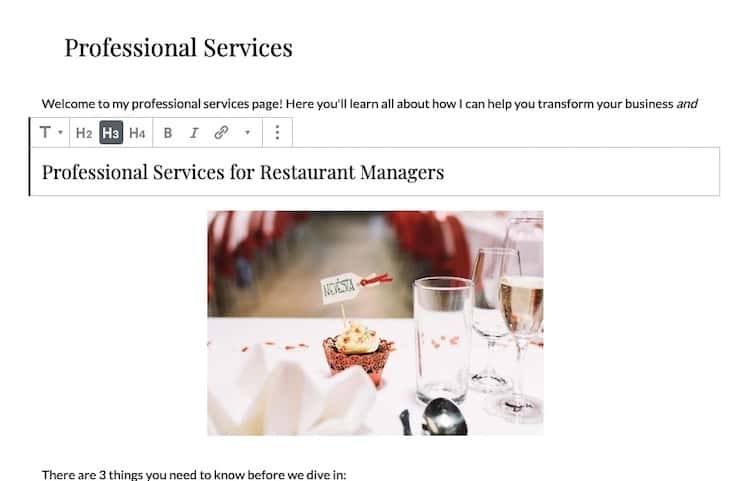
If you click away from your existing block and hover over the top of it, you’ll see a small plus-sign appear:
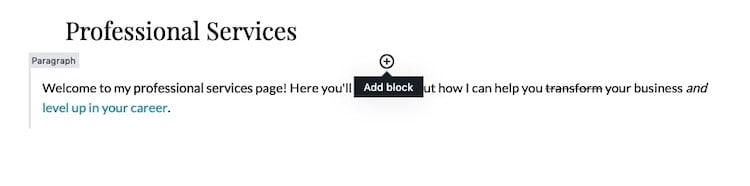
When you click it, it will reveal your blocks:
Choose the one you want to add the new block above the one you already have.
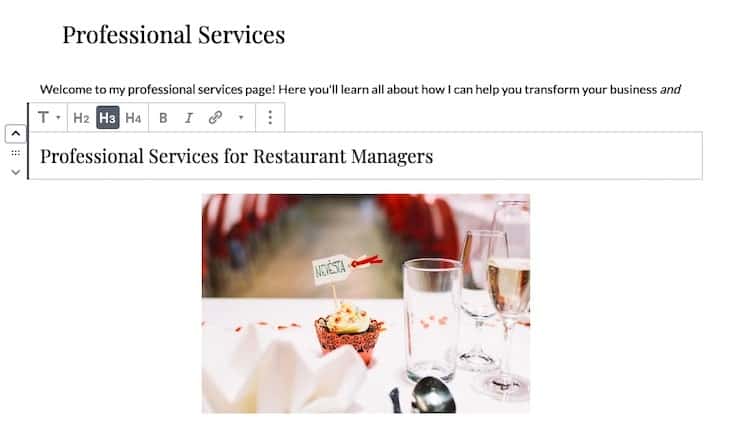
If you hover over the bottom part of the block, you’ll see the same plus-sign. The only difference is that it will add a new block below the one you have.
Use Your Keyboard
Another way to add a new block is by pressing the “Return” key on your keyboard:
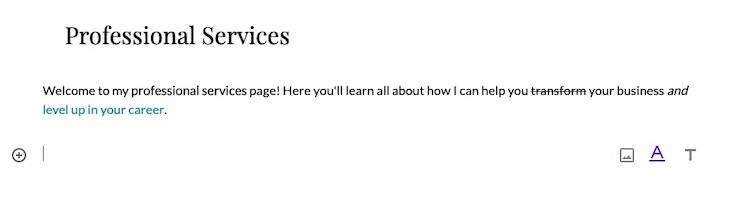
This will immediately add a new paragraph block to the page.
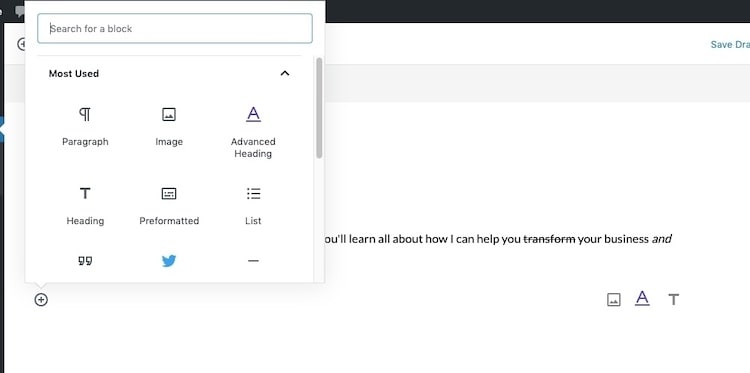
If you want to change it to a different kind of block, you can use the plus-sign to the left of the new block:
Or you can type a slash (/) followed by the name of the block you want to use:
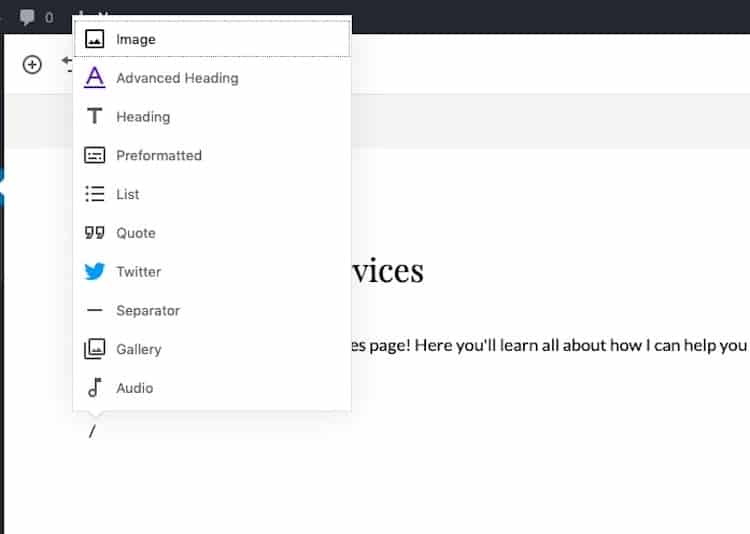
For example, if you wanted to add an image, you’d type “/image”. The block option will auto-populate as you type the matching name.
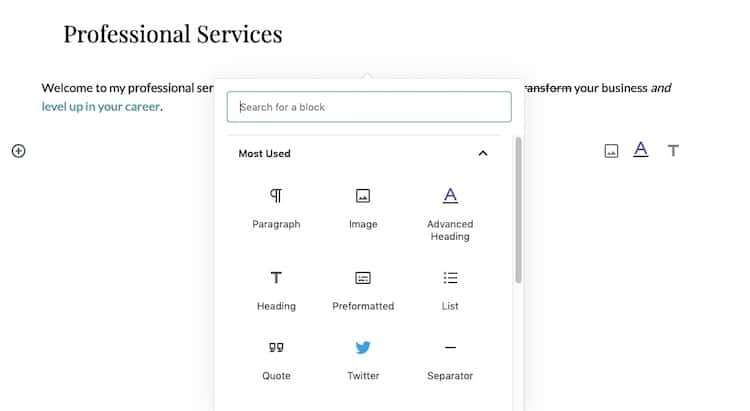
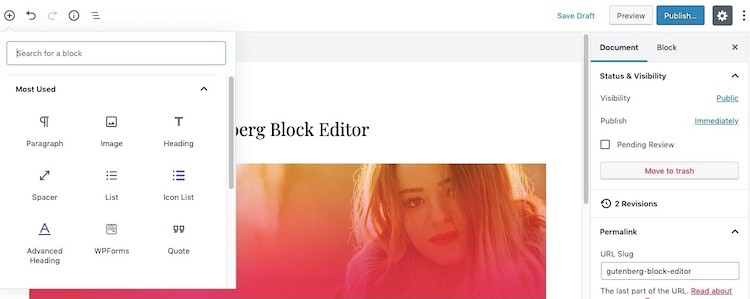
Add a Block From the Toolbar
You can always just use the basic add block feature in the toolbar:
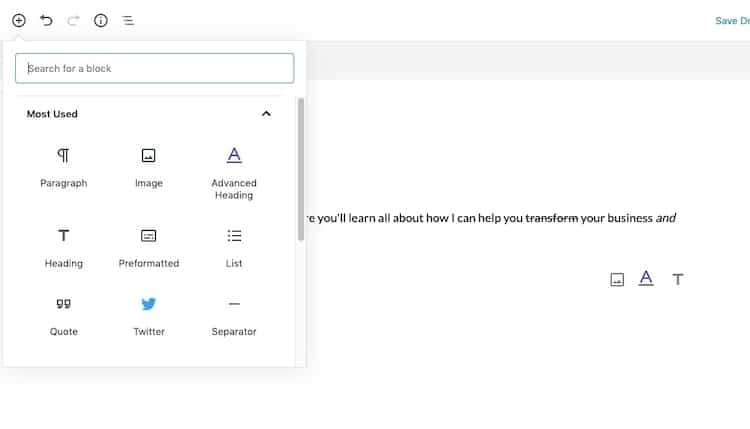
Scroll through the options or type the name of the block you’re looking for.
Move a Block
Once you’ve begun creating blocks, you might decide that you’re unhappy with the order in which they appear. Or maybe you added a block above when it should have been below.
There’s no need to delete blocks or cut-and-paste content from one block into another. The solution is simple.
Gutenberg is a drag-and-drop block editor. This means you can move your blocks wherever you want with ease.
There are two ways to do this.
Use the Move Arrows
The first option is to use the move-arrows on the left side of each block. Hover over the block you want to move and you’ll find an up- and down-arrow:
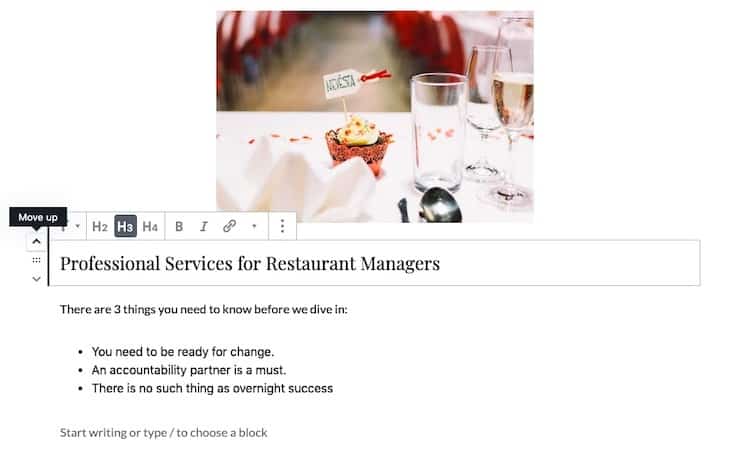
If all you want to do is move a block up or down once, this option works well.
Use the Drag-and-Drop
If you want to make a more drastic rearrangement of your blocks, you should use the drag-and-drop.
It’s located in the same place as the arrows. Hover over the block you want to move and grab ahold of the dots that appear in the middle. You’ll see your cursor change to a hand when you do:
When moving the block to a new part of the page, make sure you see a dark line appear before you drop it down:
This lets you know that you’re moving the block to available space. Without that line, the drag-and-drop won’t work.
Delete a Block
If you decide that you want to remove a block altogether, you have options with this as well.
You’ve seen one of these already. It’s inside your block’s additional options. Just click “Remove Block” and it will be deleted.
You can always delete it in an old-fashioned way, too. Place your cursor inside the block and use your keyboard’s “Delete” button to remove it.
Note, however, that if it’s a text-based block, you’ll have to remove the content first before you can delete it this way. For anything else — an image, embedded widget, etc. — you can just use your “Delete” key.
You can also highlight the block (by dragging your cursor over it) and then hit the “Delete” key. This is useful if you want to highlight and delete more than one block at a time.
Create a Reusable Block
Reusable blocks come in handy when you want to create an element that can be used site-wide, like a promotional block for your blog posts or a call-to-action.
Rather than try to recreate the block on the pages it needs to go on, open your block options, and click “Add to Reusable Blocks”. Then, give it a name:
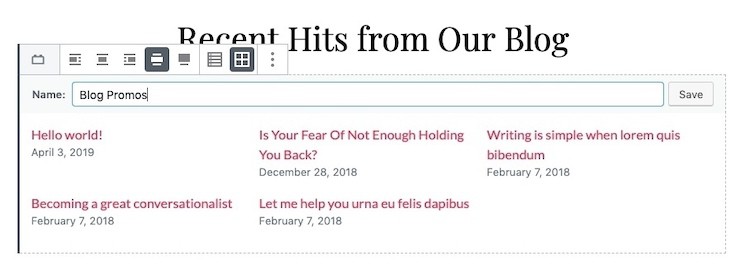
Once saved, you’ll be able to retrieve and use it the same way you would any of Gutenberg’s blocks. You’ll find it in a new category called “Reusable”:

A Tour of Gutenberg Blocks
The classic WordPress editor left much to be desired in terms of helping users create complex content and layouts. Gutenberg blocks do away with that roadblock.
Let’s get acquainted with the blocks:
Block Categories
WordPress has done a nice job of organizing its blocks into categories.
Common Blocks
These are your common blocks:
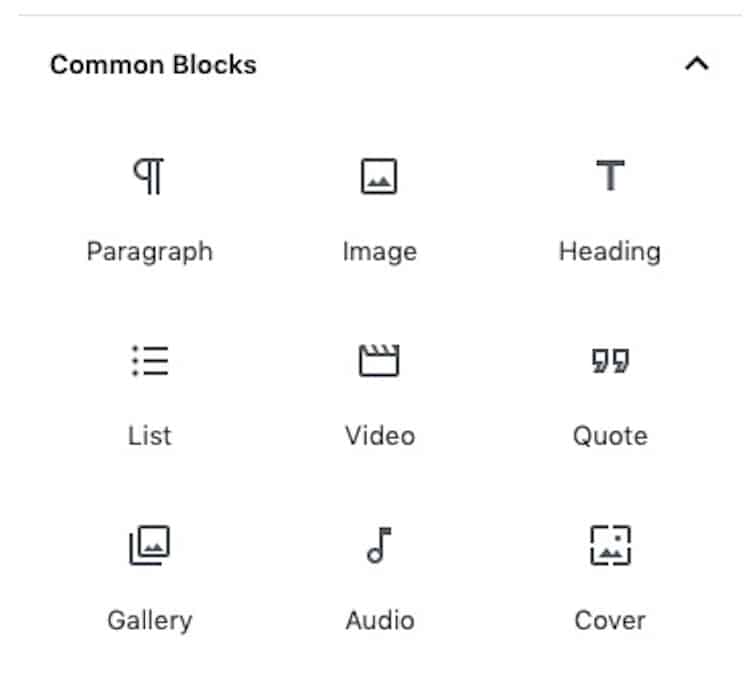
The basic text and visual elements you use on a page will be here.
Formatting Blocks
These are your formatting blocks:
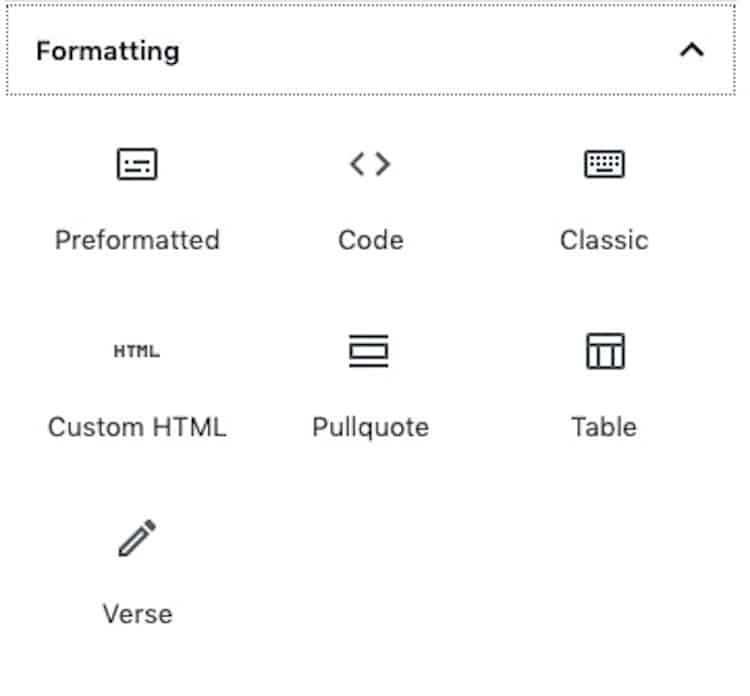
Most of these are developer-friendly blocks, so you might not need these much. The table and pull quote blocks might come in handy.
Layout Blocks
These are your layout blocks:
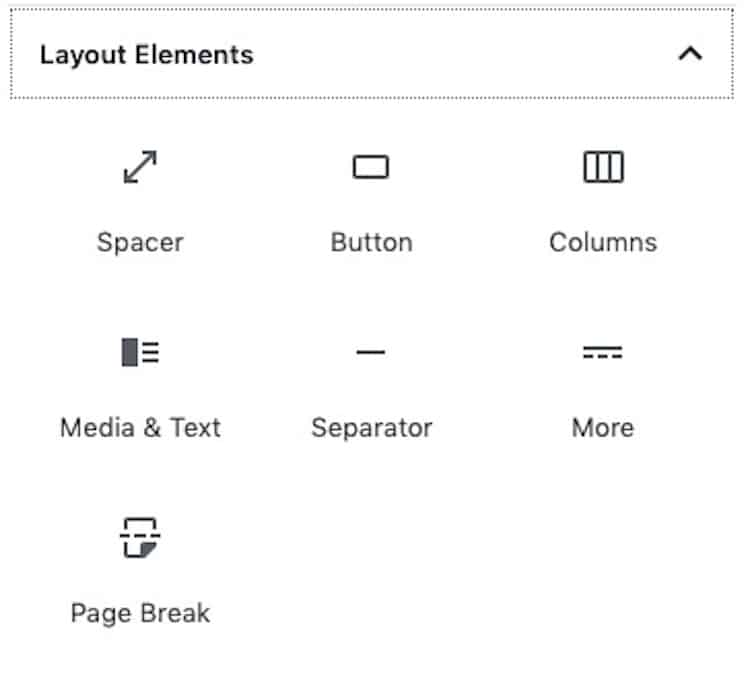
If you want to add breaks to your content (like with big space or separator line) or special elements (like a button), you’ll find those things here.
Widgets Blocks
These are your widgets:
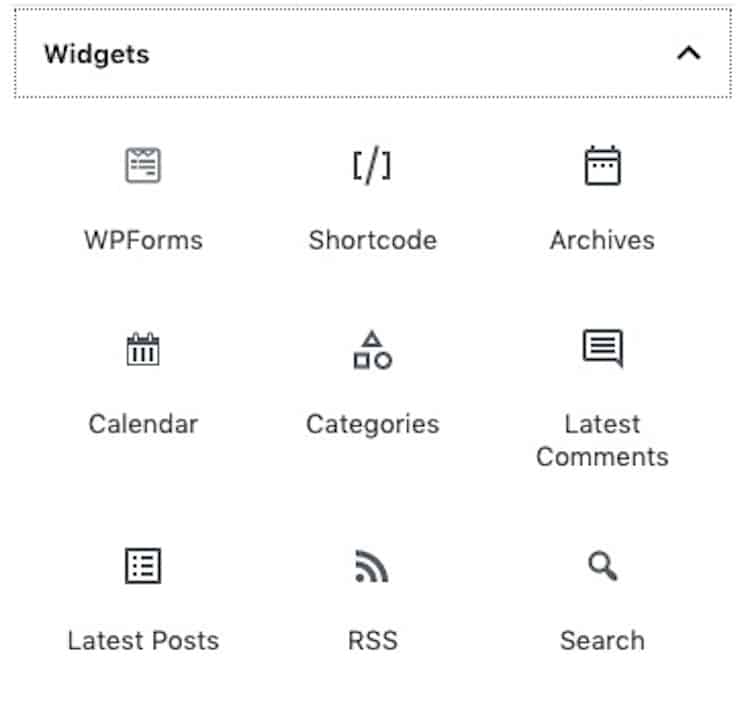
For the most part, these are the elements that should go inside your blog’s sidebar, not appear on your pages. The only exceptions you’ll find are blocks created by other plugins, like this WPForms example.
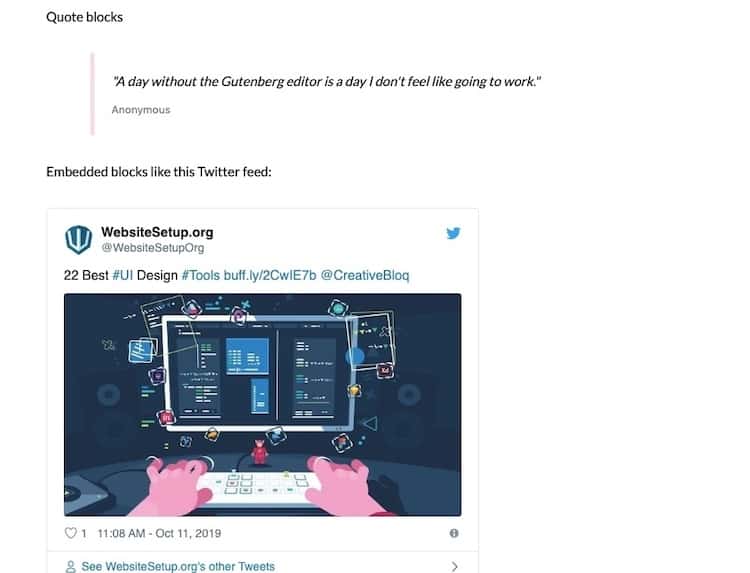
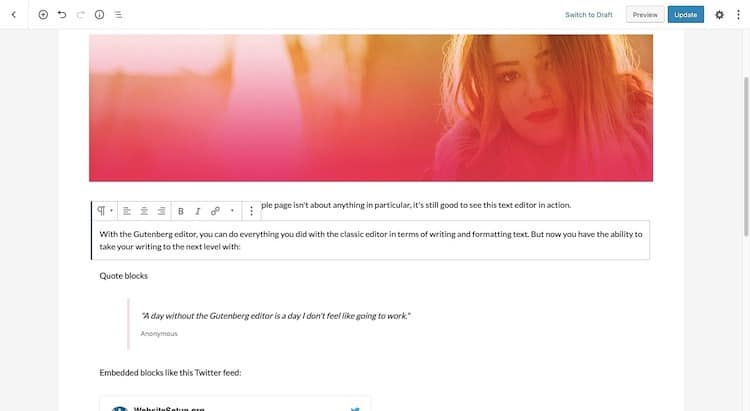
Embeds Blocks
These are your embeds:
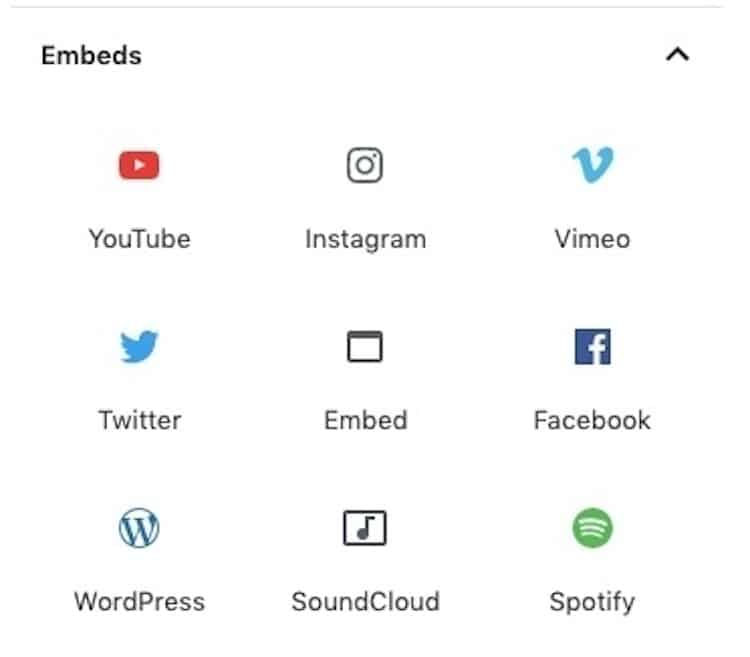
You’ll use these to bring content from other platforms. This is good for embedding things like YouTube videos, SoundCloud clips, and Twitter posts.
Most Commonly Used Gutenberg Blocks
As you can see, there are dozens of Gutenberg blocks available. That said, there are certain elements everyone uses to create pages or posts in WordPress, so start by learning the basics:
Paragraph Block
Use the Paragraph block to add plain text to your page.

Heading Block
Use the Heading block to add a header to your page.

These allow you to introduce new topics on the page while making your content easier to read. The H2, H3, and H4 buttons let you establish a hierarchy to the page headings, too.
List Block
Use the List block to add a bulleted or numbered list to the page:

This is also useful for improving readability.
Image Block
Use the Image block to add an image to your page.
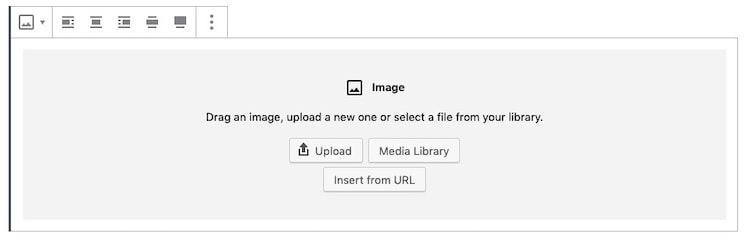
You can upload an image from your drive or select one that already exists in your media library.
Video Block
Use the Video block to embed an image on your page.
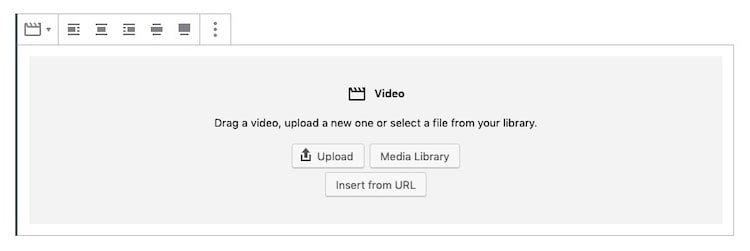
You can upload a video file, choose one from your library, or pull it in from a link.
Because videos take up a lot of space, the best option is to save your file to a video-sharing platform like Vimeo or YouTube. Then, embed it with a link.
You won’t use the Video block for this. Instead, look for the corresponding embed.
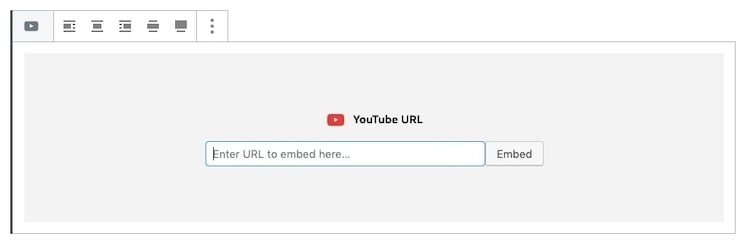
YouTube has one:
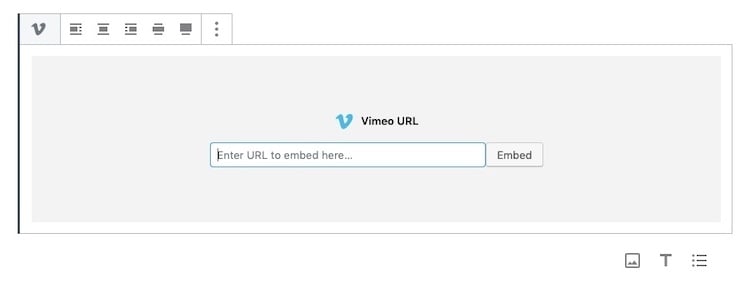
As does Vimeo:
You should do the same for any audio files (like podcasts or soundtracks) you want to add to the page. Either use the Audio block or the corresponding embed (like for Spotify) to do this.
Button Block
Use the button block to direct your visitors or readers to take action:
This might direct them to: “Schedule Now”, “Sign Up”, “Read More”, etc.
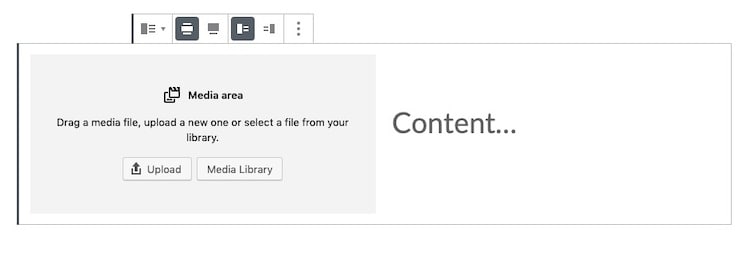
Media and Text Block
As mentioned earlier, the Inline image option in the paragraph block is an inefficient way to merge text and images. Instead, use the Media and Text block to do this:
Columns Block
Another way to place two different blocks (of the same or differing type) beside one another is by using the Columns block:

To add additional columns to the right or left, hover over the blocks inside the column and press the plus-sign. It’s the same as adding a new block, only this will add them horizontally.
Social Media Embedding Blocks
Rather than use the embed code from social media to place a post on your page, add the link to the post here:
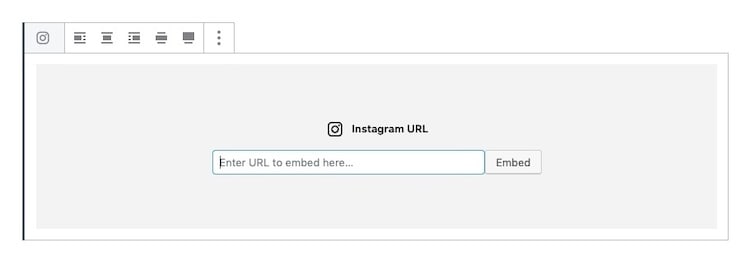
There are embed blocks for Facebook, Twitter, and Instagram, so find the Embed block that corresponds to your social media post.
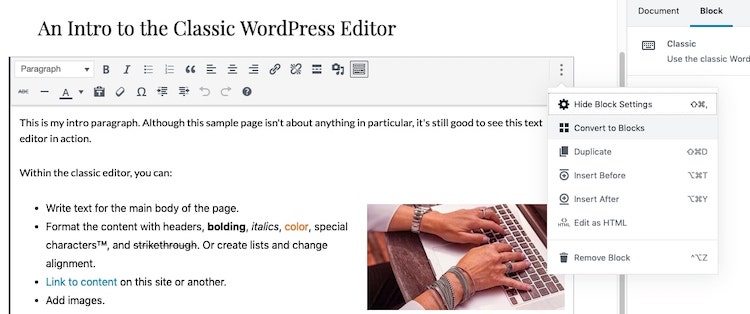
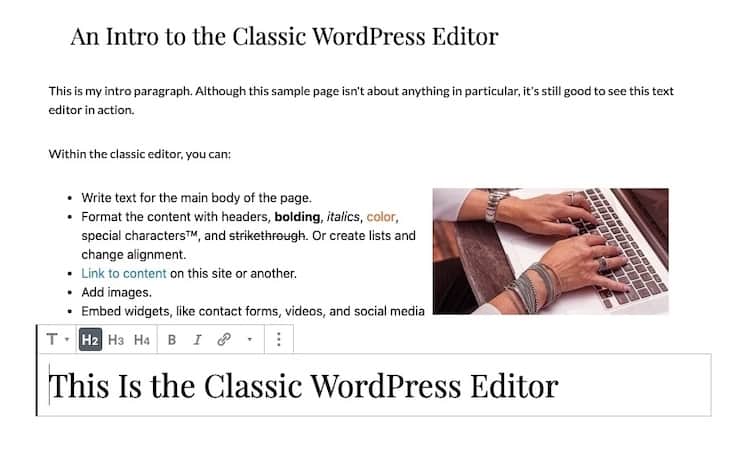
Classic Block
The classic block lets you continue to create content in WordPress using the classic editor:
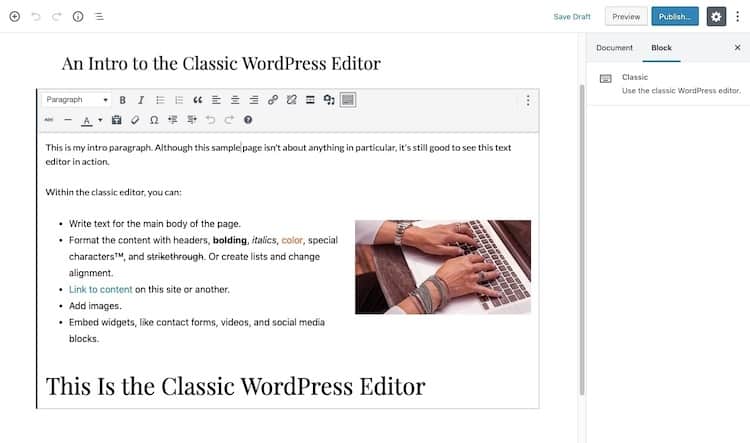
The classic block also comes into play whenever a website moves from the classic editor to the Gutenberg editor. Gutenberg won’t automatically try to convert your text into its own blocks. It just puts them into the classic editor interface.
If you want to convert your classic block into Gutenberg blocks, go to “More Options” and choose “Convert to Blocks”:
It will do its best to convert each element in your editor to a corresponding block:
Just remember to review the outputted blocks for any errors before you save your changes.
WordPress Plugin Blocks
Most of the popular plugins used by WordPress users are Gutenberg-compatible. In some cases, these plugins have created special blocks that show up in your editor.
For example, if you’re using a contact form plugin like WPForms, you should find a corresponding block for it:

Just create your form in the plugin and then locate it in the dropdown provided here. No need to track down and paste your form shortcodes anymore.
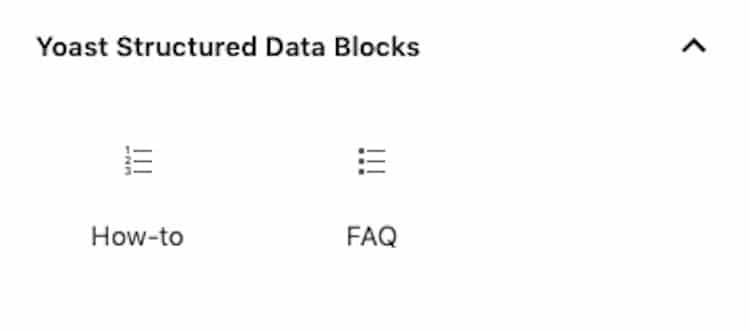
Yoast, a popular SEO plugin, is another one that’s added new blocks to Gutenberg:
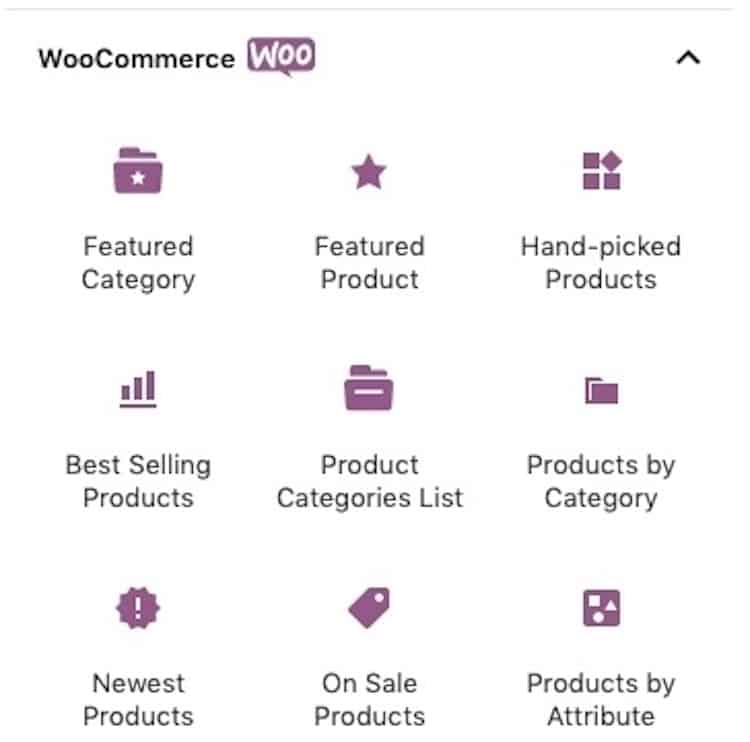
WooCommerce, WordPress’s eCommerce solution, has done the same and their shortcodes save your time from writing long lines of code.
There are also “ultimate” Gutenberg plugins that add a bunch of new blocks to your builder, like Ultimate Addons for Gutenberg:
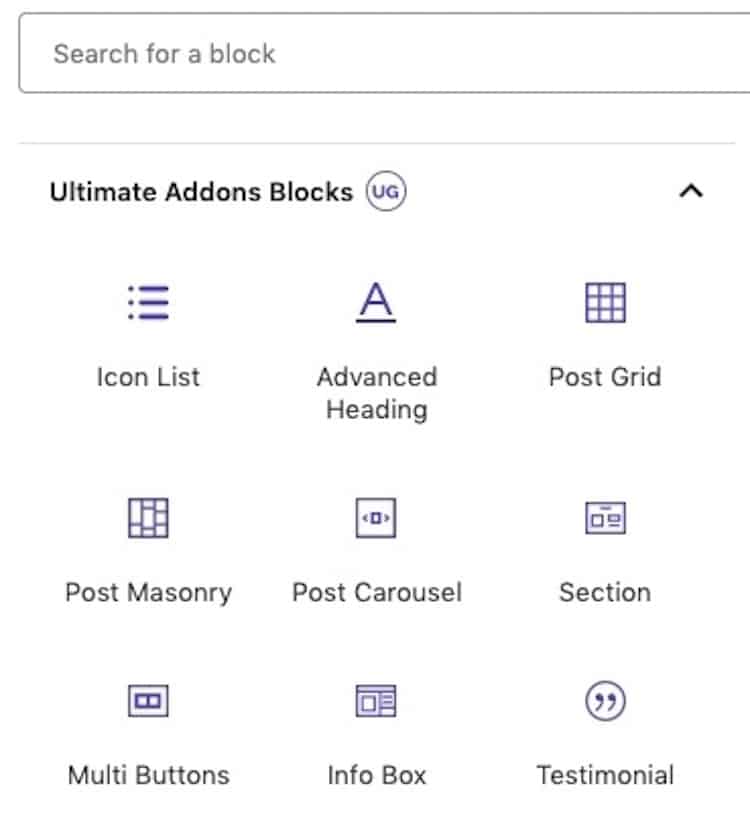
These types of plugins extend the functionality of your block builder. If you’re building a website that needs special elements — like Google Maps, testimonial blocks, or eCommerce functionality — you can add them to Gutenberg with plugins like these.
An Overview of the Document and Block Sidebar
Now that you’ve got the block editor down, let’s turn our attention to the document and block sidebar.
The Document Sidebar
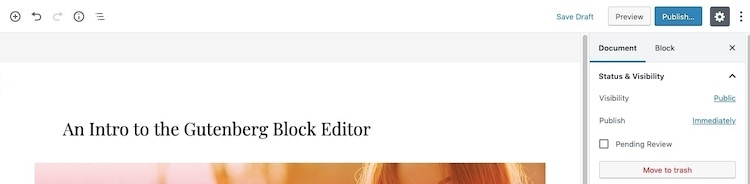
When your cursor is in the title block or somewhere on the page where a block doesn’t exist, the sidebar will point to the Document settings:
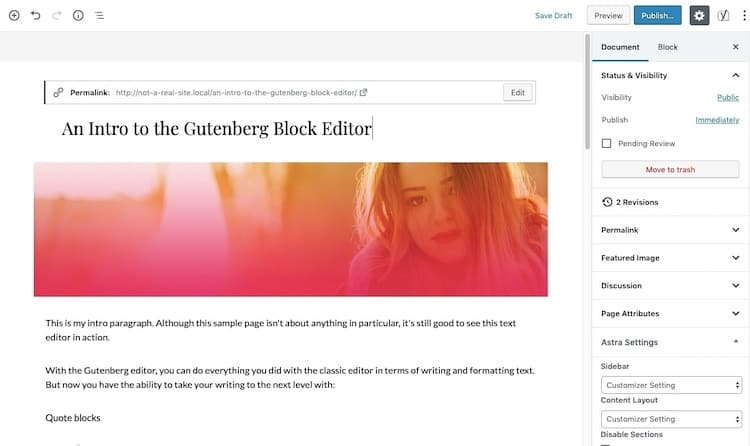
These allow you to control things like the status and appearance of the page.
Here are the main ones you need to know:
Status and Visibility
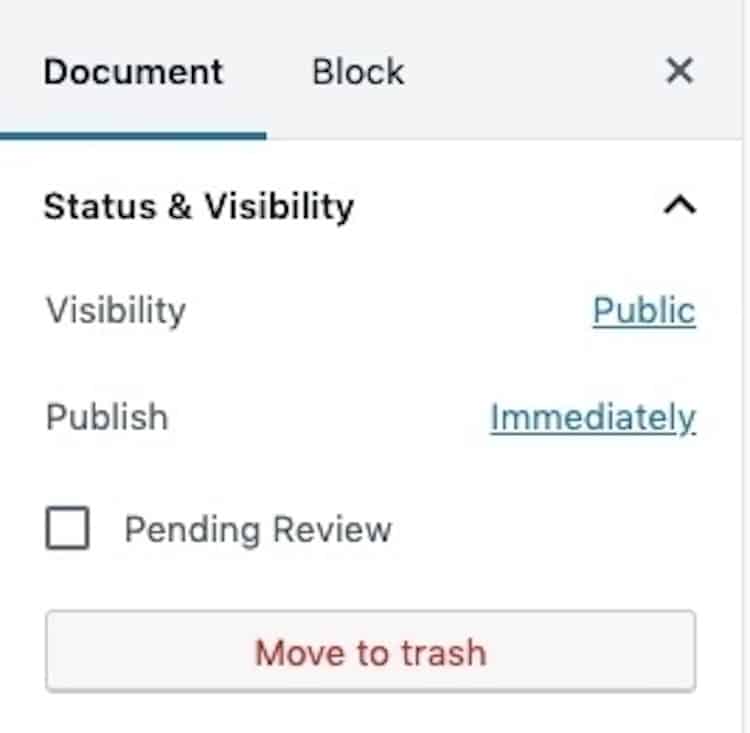 In this panel, you can adjust who may see the page (Public, Private, or Password-protected) as well as when it gets published (if not immediately). If you want to delete the page entirely. You can do that here, too.
Permalink
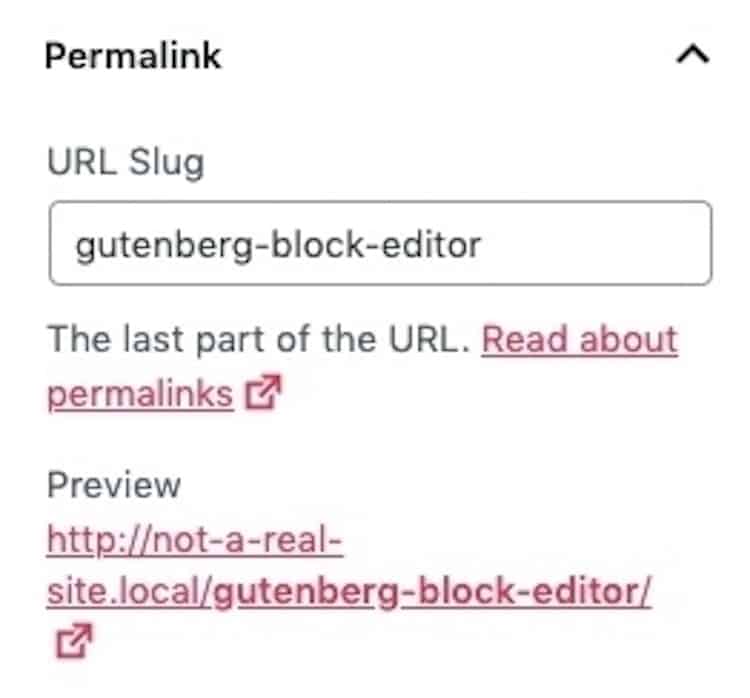 Use this panel to change the slug (the identifying piece of the URL). For instance:
https://mywebsite.com/gutenberg-block-builder/
Featured Image
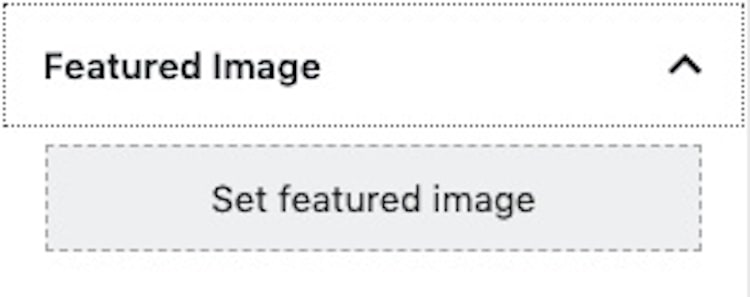 The featured image is the thumbnail image people see when your blog posts show up in your main blog feed. It’s also what social media platforms use when showing previews of your links.
Categories
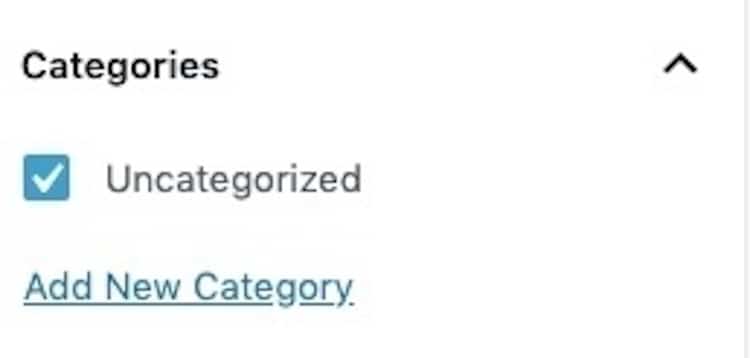 This is only available for blog posts. Use this to keep your topics organized.
Tags
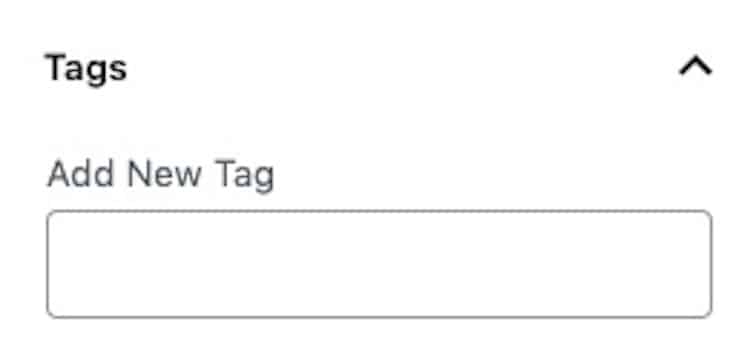 This is another setting only available for blog posts. Use this to add keywords that appear in your post and help readers find content on related topics.
The Block Sidebar
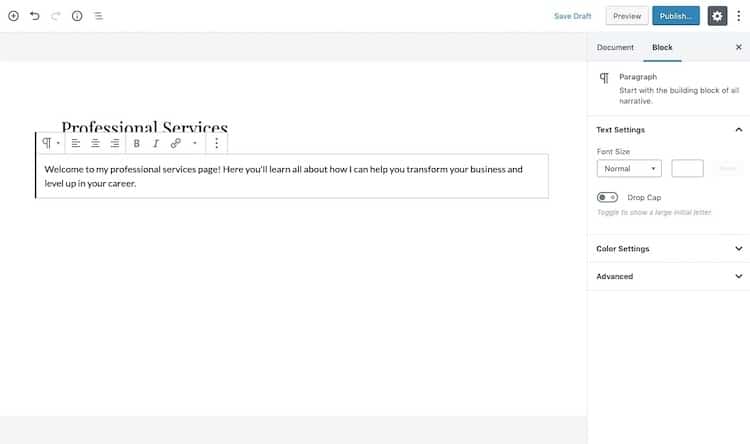
When your cursor is placed inside any of the blocks on your page (except the title), the sidebar will switch to a block editor:
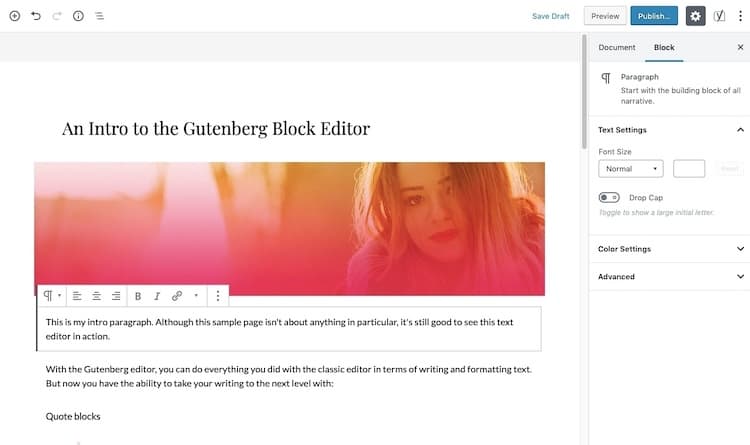
This sidebar gives you additional editing options for your blocks if you want them. The block sidebar will change based on the kind of block you’re working on.
For instance, the paragraph sidebar shows editing options for:
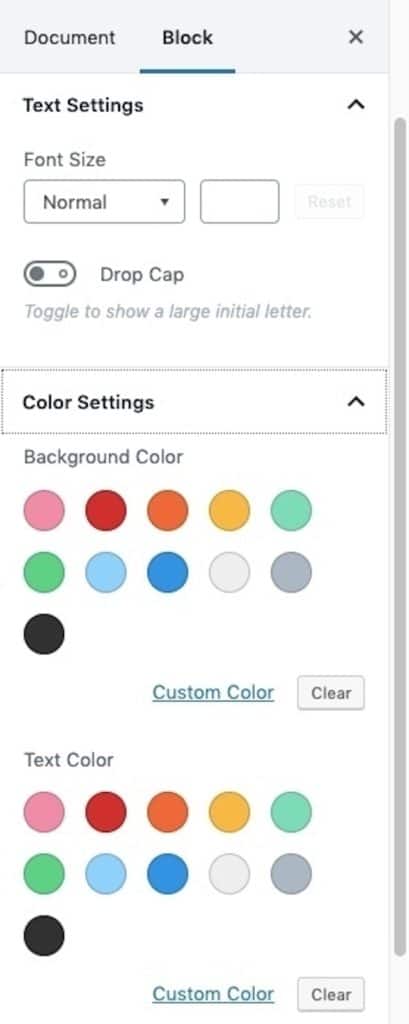
You can adjust the size of your text as well as the color of the text or background of the block. If you know how to use CSS classes, you can further customize the look of the block using “Advanced Settings”.
The image sidebar, on the other hand, gives you these settings:
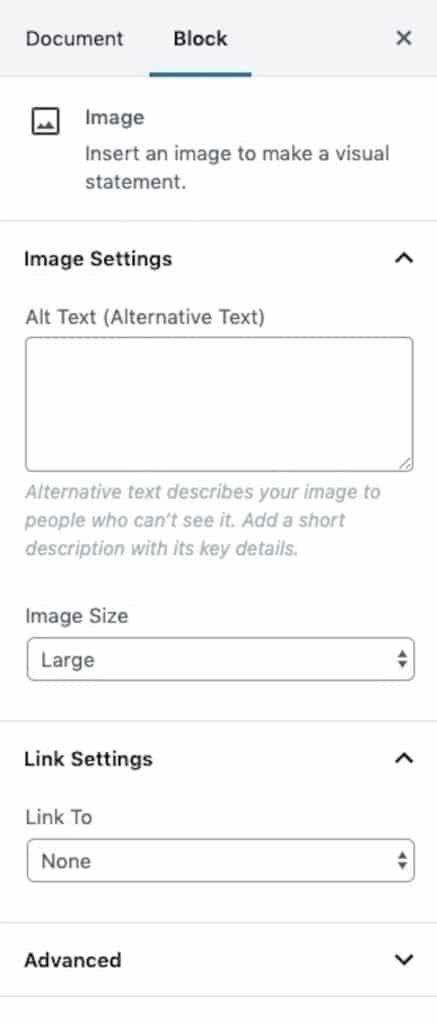
You can add alt-text to the image ( important for SEO), change the image size, and link the image out to a web page.
Some blocks don’t offer any additional settings in the sidebar like the Twitter embed:
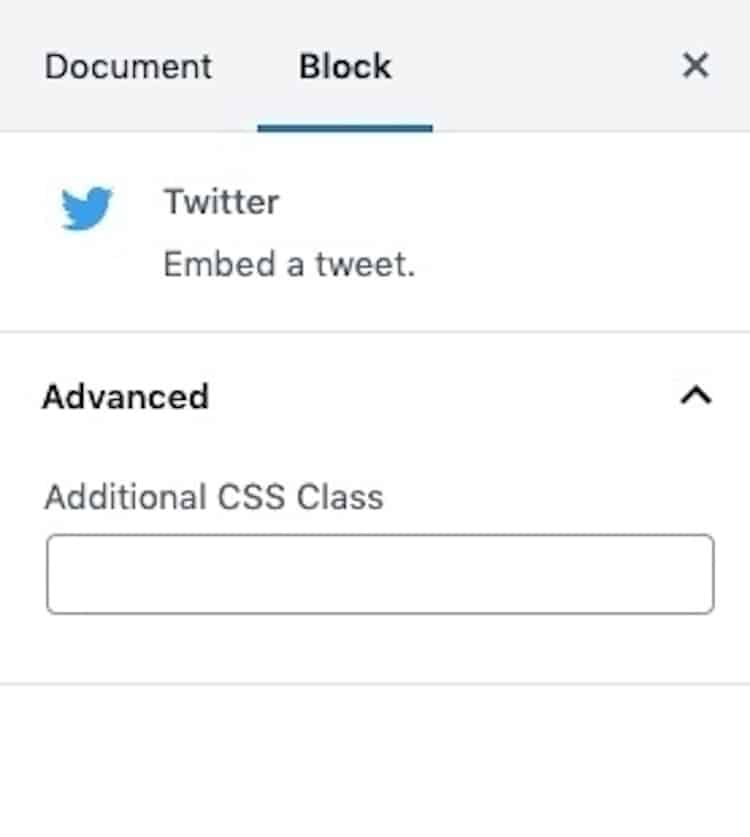
The only thing you can do is create a custom CSS class under “Advanced Settings”.
Bottom line: if you ever feel like you can’t edit your block fully with the block toolbar, check the sidebar for additional options.
What to Do With the Toolbar
The last part of the editor you need to familiarize yourself with is the toolbar that sits along the top of it:
This might look like nothing more than a place to store the “Preview” and “Publish” buttons, but there’s much more you can and should use the toolbar for.
Let’s review the essentials:
Blocks
The first button in the toolbar is, where you can access new blocks:
Undo/Redo
The next two buttons allow you to undo (the arrow pointing left) or redo (the arrow pointing right) the last change you made to the page:

Page Info
For those of you wanting to create pages that are easy for your visitors to scan through, the “i” (info) button gives you an overview of your content:
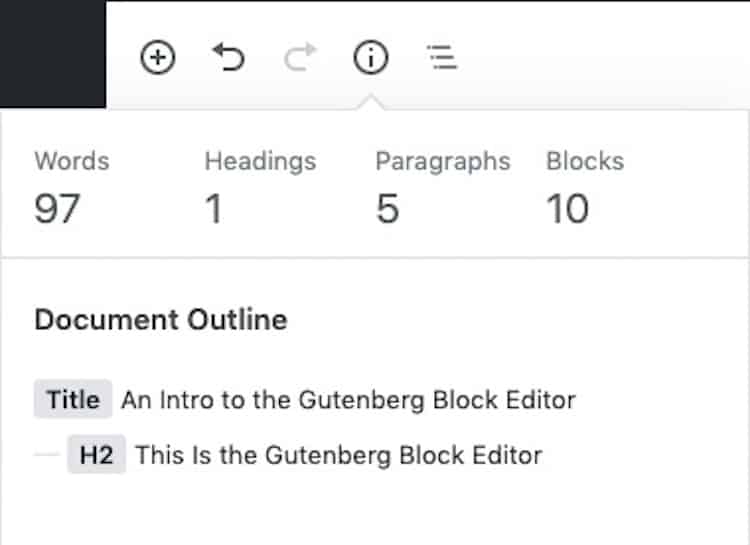
You’ll see:
- How many words you’ve written.
- How many headings there are, with a breakdown of the titles below it.
- How many paragraphs there are.
- How many blocks you’ve used.
It’s the word and heading count that are the most important pieces of information to focus on here.
Page Structure
The next part of the toolbar reveals each of the blocks you’ve used to create your page:
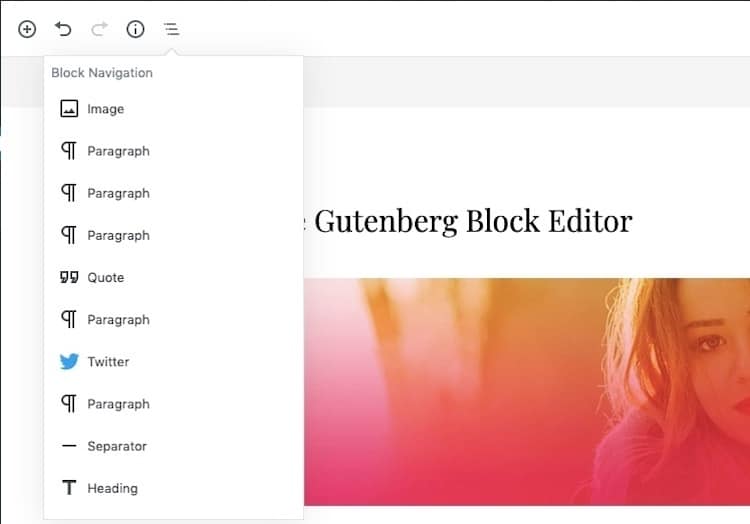
Use this to instantly scroll to the block you want to work on. This is helpful for editing content on longer pages and posts.
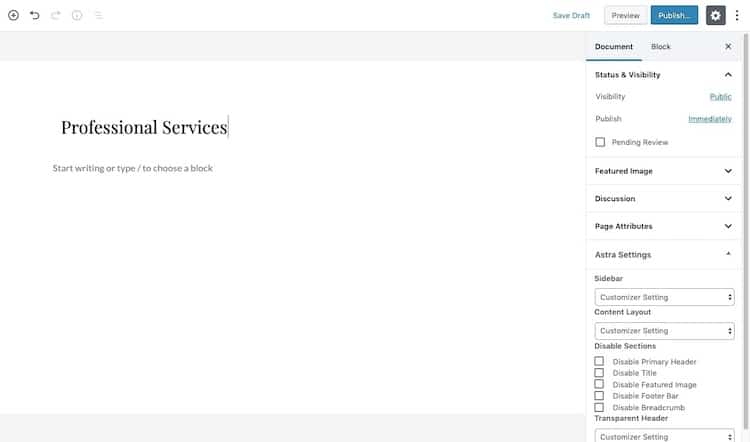
Save Settings
You’ll use these first three buttons with every page or post you create:

Use “Save Draft” to save your changes privately while working on a page.
Use “Preview” to view the page on your website.
Use “Publish” to push your page to the live website. Once the page is published, this button will change to “Update”. Use this to save and push new versions of your pages to the site.
Settings
When the gear (settings) icon is clicked, it hides or shows the Gutenberg sidebar. This is what it looks like when disabled:
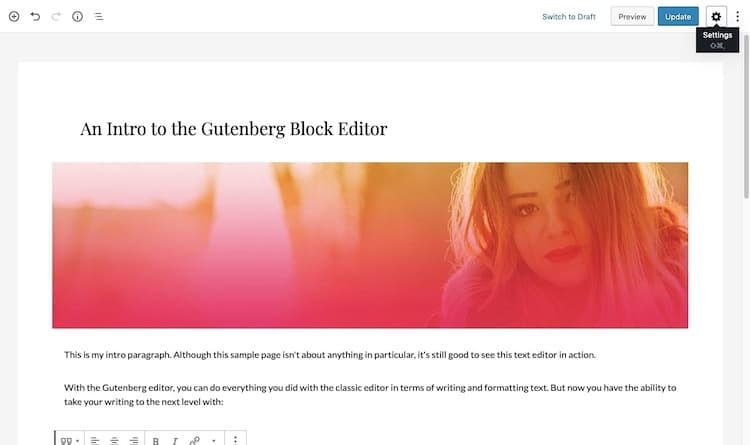
This is what it looks like when enabled:
More Options
The last button in the toolbar reveals additional options and tools. Use this if you want to personalize your Gutenberg workspace.

View
The first set of options pertaining to the “View”:

“Top Toolbar” moves the toolbar out of your blocks and sticks it to the top of the screen:
The editing options still change based on the block you’ve selected. The only difference is that it’s only located at the top of the page now.
“Spotlight Mode” fades out any blocks that aren’t in use:
If you want help focusing on one block at a time, this is a useful tool to enable.
“Fullscreen Mode” is Gutenberg’s distraction-free writing mode:
It removes the WordPress menus on the top and left as well as the Gutenberg sidebar on the right.
Editor Mode
The next set of options are for editor mode.
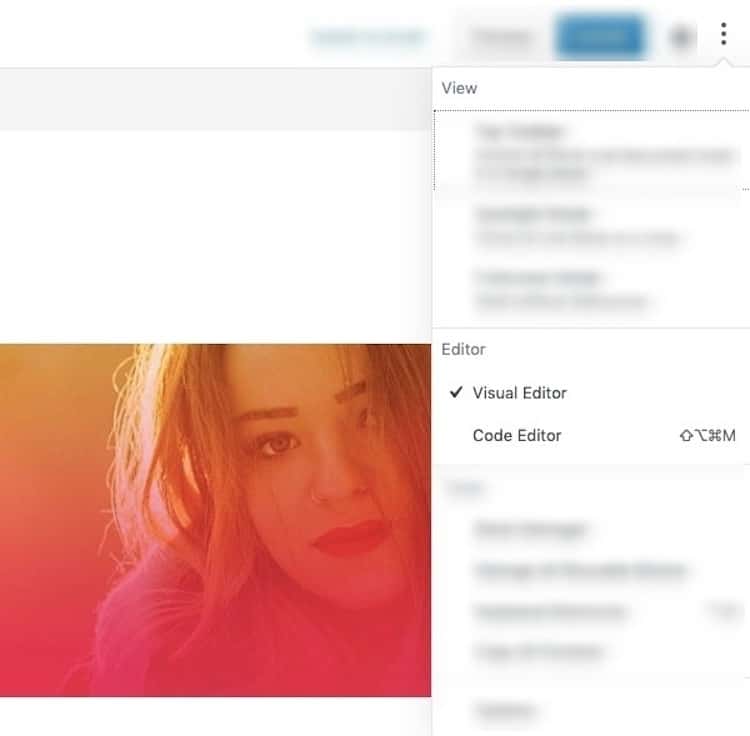
By default, Gutenberg puts users into the “Visual Editor”.
If you’d prefer to compose your page in HTML, you can switch to “Code Editor”:
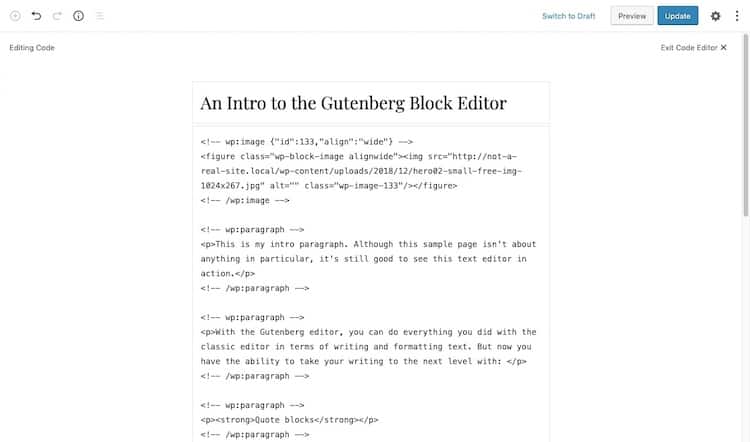
However, a more effective and cleaner way to edit your blocks in HTML is to handle it individually (since you probably don’t need to edit the entire page’s code).
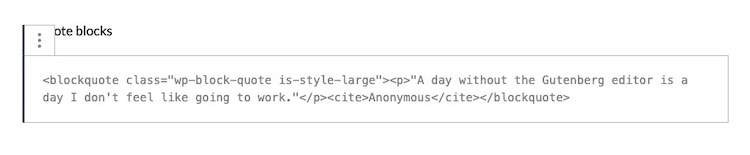
You can access the code editor under “Edit as HTML”:
This will convert the block to HTML:
Edit it as you see fit. If you want to convert it back to visual mode, open the block options and choose “Edit Visually”:
Tools
Gutenberg also comes with a set of tools that allow so you can streamline your experience in the editor:

The first tool is the “Block Manager”:
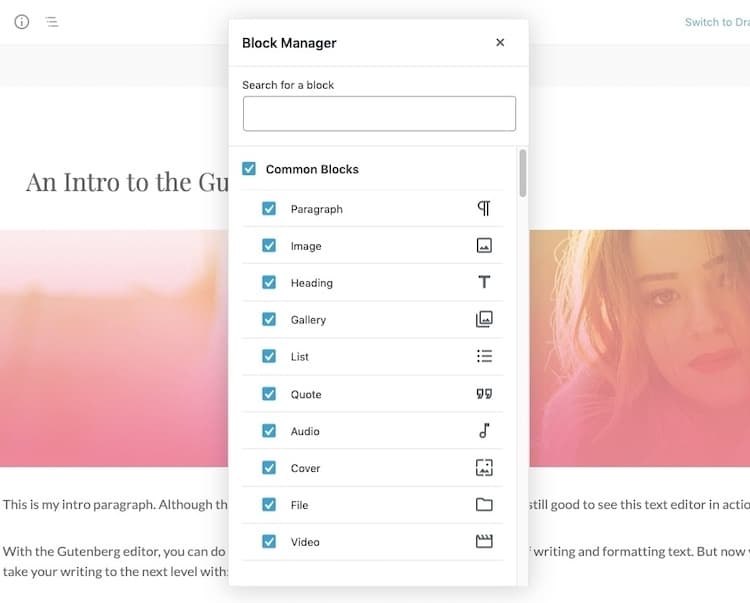
Unlike the block navigation tool we saw earlier, this one lets you disable any blocks you don’t use. That way, when it comes time to search for a new block, you’re not having to sift through blocks you’ll never use.
“Manage Reusable Blocks” will take you to the reusable blocks editor:
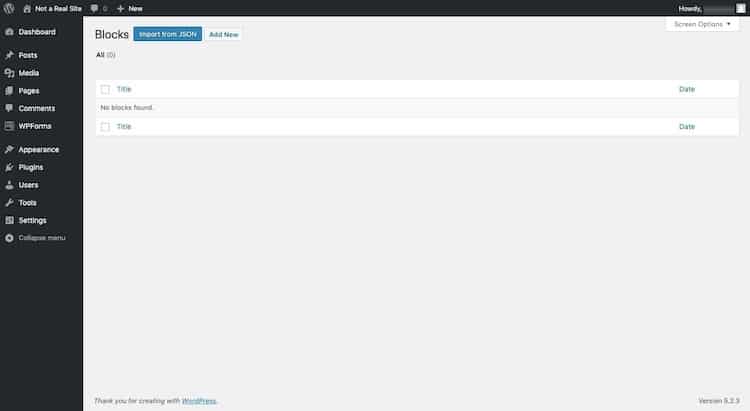
This is where your saved blocks will be stored. To edit the parent copy of the block (or create a new one altogether), do so here.
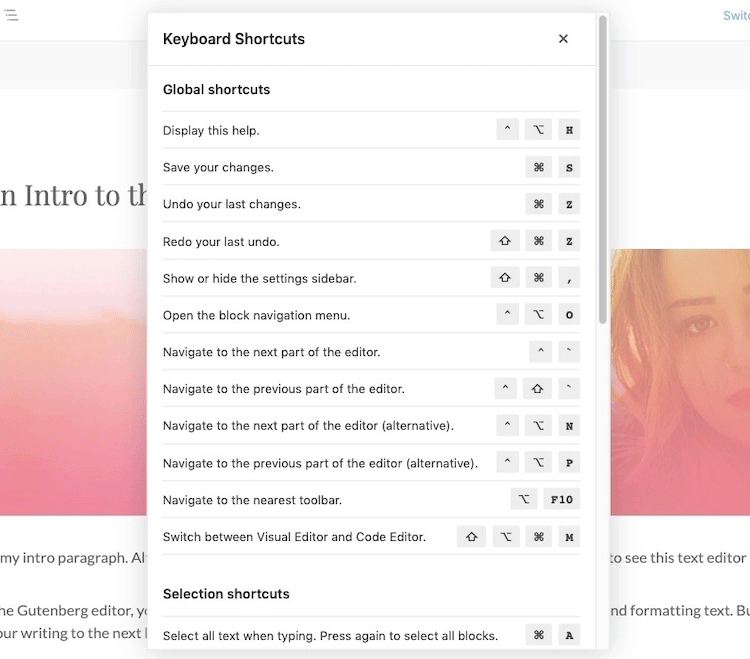
While Gutenberg has certainly made it easier to create content in WordPress, some of the actions can get tedious. By using Gutenberg’s “Shortcuts”, you can do things like undo your last edit, duplicate a block, italicize highlighted text, and save your changes with just your keyboard.
All the “Copy Content” option does is highlight and copy all of the blocks on the page. Use this to create a new page that’s similar in content and design. Just go to Pages > Add New and then paste your blocks into the empty page.
The last option here is called “Options”. What it really does, though, is enable you to deactivate certain parts of the document settings on the sidebar:
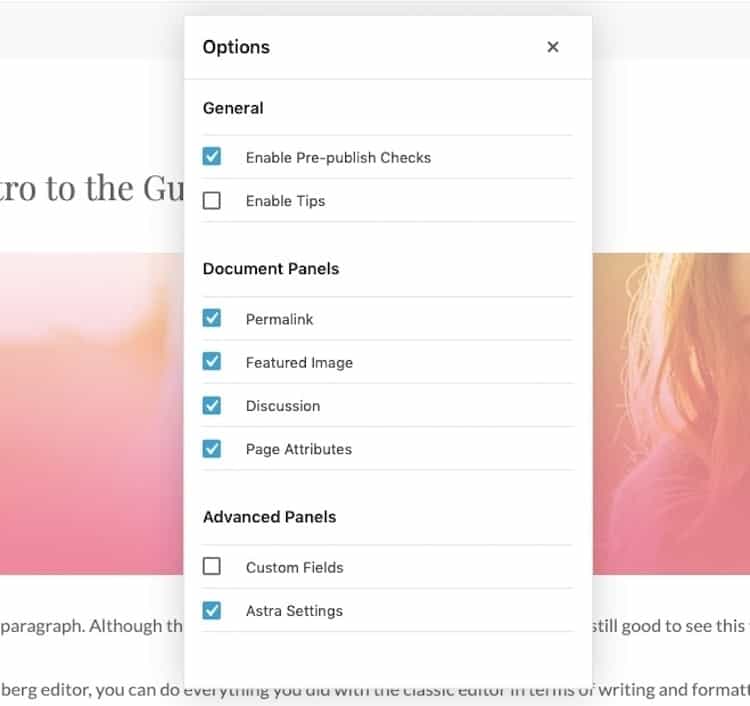
Again, if you find that there are certain parts of the editor you don’t use (like Page Attributes), disable them here so they don’t distract from the elements you need to use.
Wrap-Up
Because WordPress had used the same editor since Day 1, there was some backlash when Gutenberg was first introduced.
But if you look at the drag-and-drop competition piling up around WordPress (Wix, Shopify, Squarespace, etc.), it was time for a change.
This editor evolution has paid off, allowing WordPress to serve users at all levels. Its users now reap the following benefits that come with building websites with a block editor:
- A personalized editor view that makes you more productive.
- Easier to create and customize content.
- More advanced content creation without the technical know-how previously needed.
- Reusable blocks speed up design and ensure consistency site-wide.
- Easier to add and configure conversion elements (like call-to-action buttons and forms).
- Popular plugins and themes are Gutenberg-compatible.
- Faster time to launch.
Starting in 2022, the classic editor will no longer be available. So, now is the perfect time to figure out how you’re going to make Gutenberg work for you.
Previous Chapter: How to Make a Website
Next Chapter: Customizing WordPress 101
Next Chapter: 25 Best Free Plugins for Your WordPress Site