Joomla is an open-source content management system (CMS) for publishing web content. Like many other CMS platforms, Joomla lets you build a website without writing HTML or CSS. That – combined with its zero price tag – makes it a favorite option among businesses, non-profit organizations, and individual creators.
In this step-by-step Joomla tutorial, we will learn how to use the platform to create whatever website you need. We will cover how to install Joomla on your server, give you an overview of its functionality, and walk you through creating content, choosing a template, and extending your site.
In the end, we want you to feel comfortable to start exploring Joomla by yourself and keep building on your knowledge.
- Get a domain name and web hosting service
- Install and set up Joomla
- Get familiar with Joomla basics
- Select a template for your site
- Install your Joomla template
- Customize the design
- Create content using Joomla modules
- Assign modules to positions
- Create new pages
- Assign pages to the Joomla navigation menu
- Add a blog section
- Install extensions
Total time to create a website using Joomla: ~2-3 hours Skill level: Beginner/Intermediate
Ready? Let’s start.
1. Get a Web Hosting Plan and Choose a Domain Name
Hint: If you already have a domain name and web hosting, skip to step 2.
Before you can start building your Joomla site, you’ll need a domain name and web hosting. If you don’t even know where to start on this topic, read our post on how to choose a domain name and our comparison of web hosting services.
We recommend choosing something affordable to get started with your project. Yet, whichever web host you pick, make sure it meets Joomla’s technical requirements. At a minimum, you’ll need:
- PHP 8.3.0 or higher
- MySQL 8.0.13+, PostgreSQL 14.0+ or MariaDB 10.6+
- Apache 2.4+, Microsoft IIS 10 or Nginx 1.26+
Most modern shared hosting plans meet these requirements out of the box.
2. Install and Set Up Joomla
The first step of the tutorial: how to install and set up Joomla. There are two ways:
2a. Using Bluehost and Quick Install
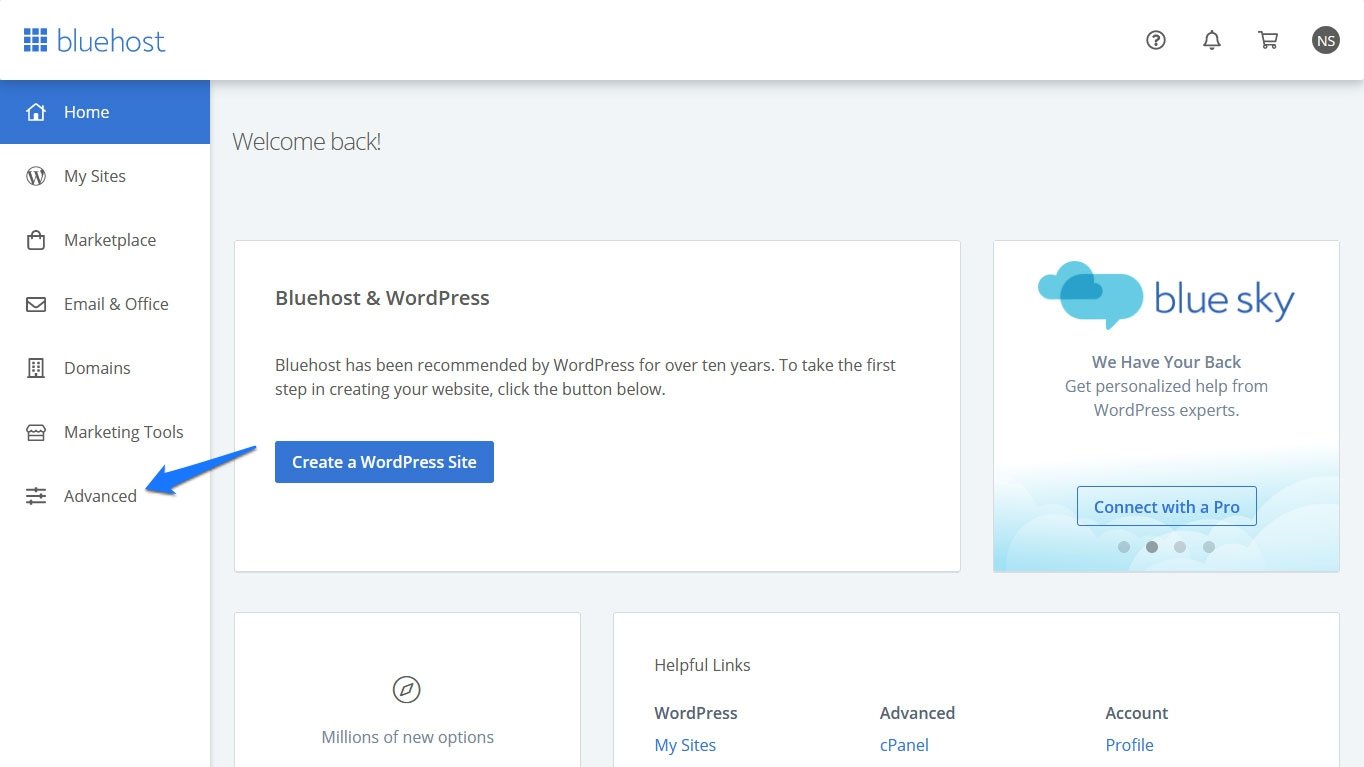
Once you’ve signed up and grabbed a domain at Bluehost, log into your account and click on Advanced in the left column.
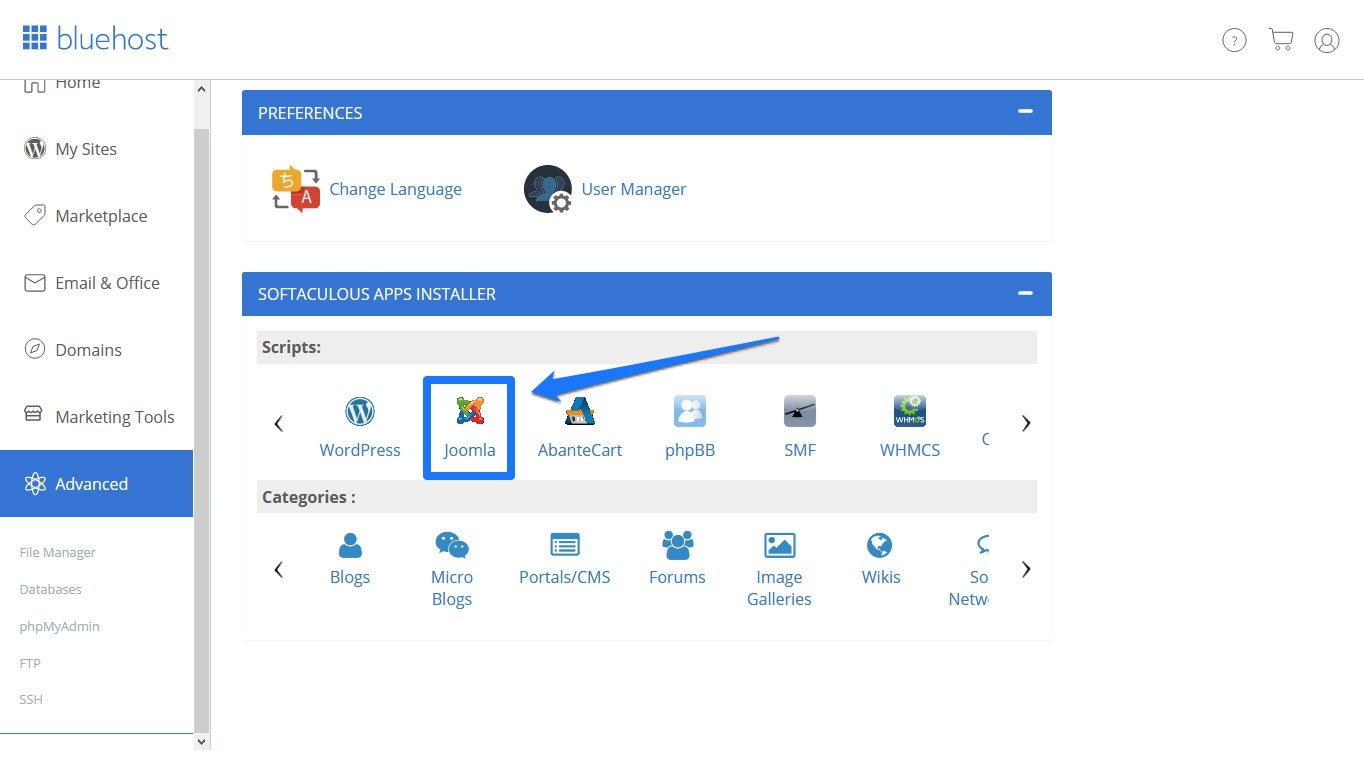
Scroll down to the bottom, look for the Joomla icon and click on it.
In the next screen, press Install Now.

This will take you to the installation screen.
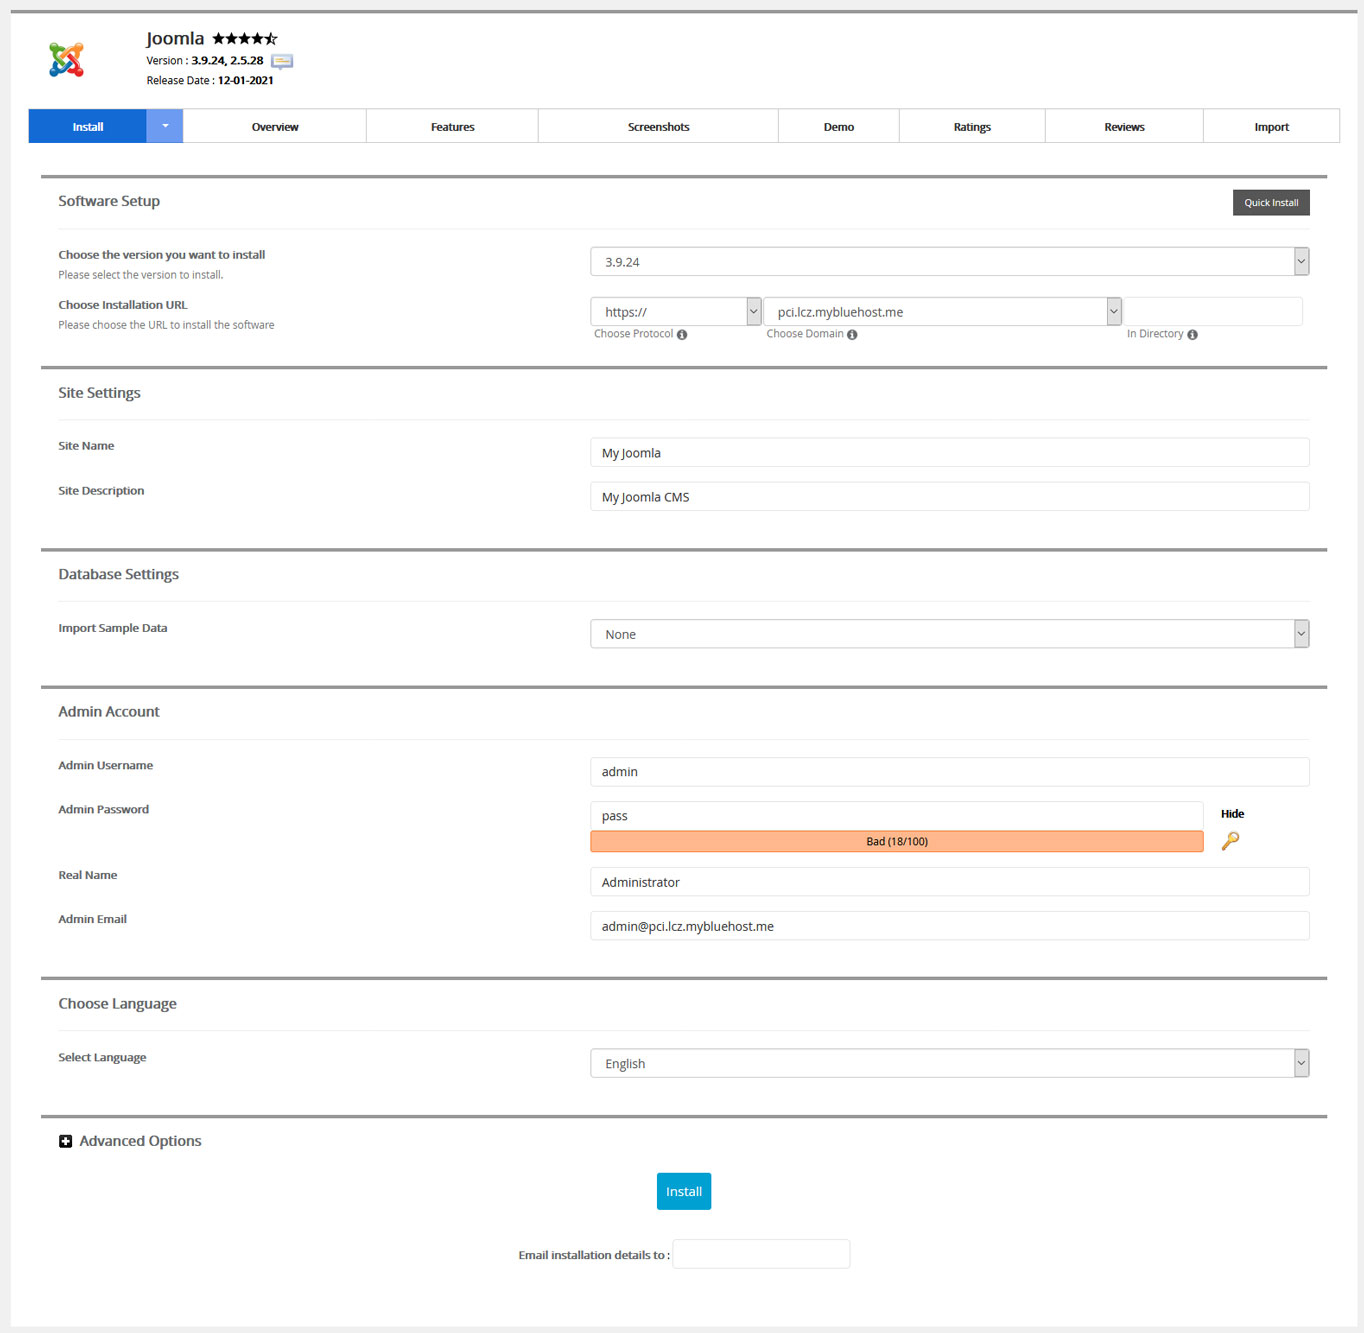
Here’s how to fill it in:
- Software Setup – You’ll notice that your Bluehost domain has been included by default. Unless you have a good reason to change it, just leave everything as is.
- Site Settings – This is the site name and description that will appear in search engines. It’s a good idea to change the default, but you can also do it later inside Joomla itself.
- Database Settings – This is an option to include sample data on your site. Since we want to learn Joomla from scratch in this tutorial, leave it at None.
- Admin Account – Make sure to choose a secure username and password for your administration account and enter your real name and email address.
- Choose Language – If you want your Joomla installation in any other language than English, you can change it here.
- Advanced Options – Here you can modify your database name, table prefix, disable email notifications for available updates, and control whether Joomla should automatically update or not. These settings are all optional and you can usually leave them as they are.
Once you are done, click Install at the bottom. When you do, you might run into a warning about overwriting the default index.php page.

Don’t worry about it. Just check the box and click Install again. After that, the installation will run until you see a success screen.
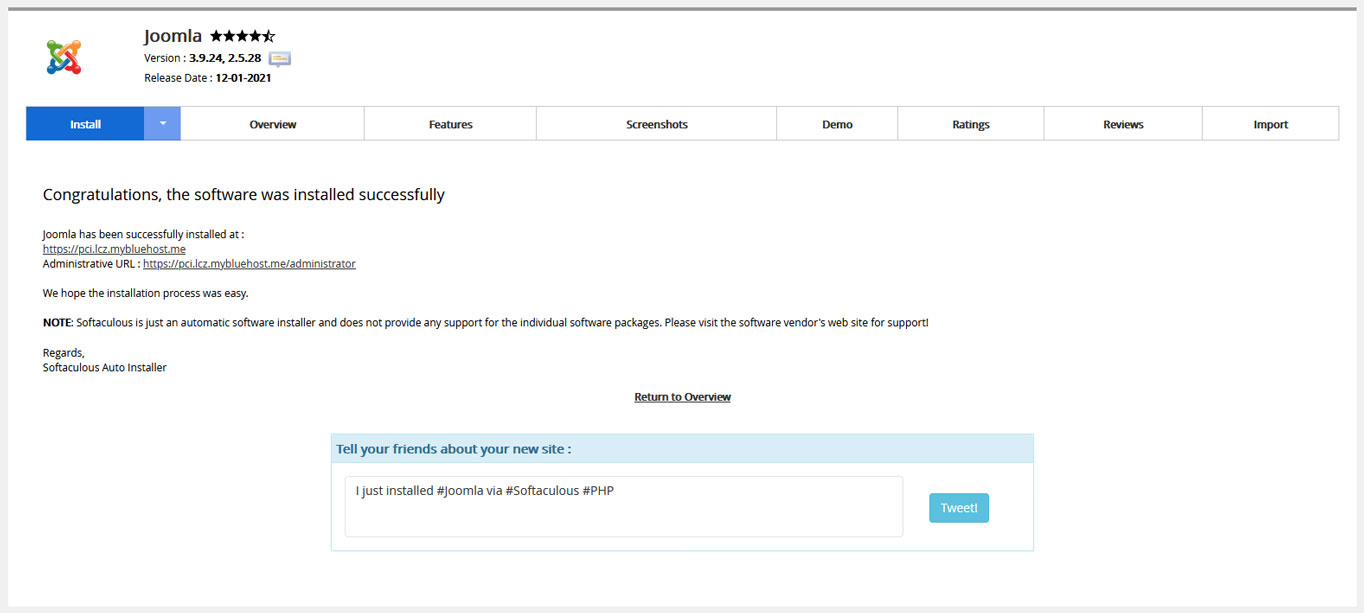
Congratulations! You’ve just installed Joomla on your Bluehost domain.
2b. Manual Installation (Any Web Hosting)
If you are with a hosting provider that does not have the quick-install option above, you will have to install Joomla manually. Don’t worry, it’s straightforward.
1. Create a Database and Upload Files
The first step is to create a MySQL database. This is where Joomla stores all of your content and it is a vital part of any website built with the CMS. You should find options to create one in your host’s control panel.
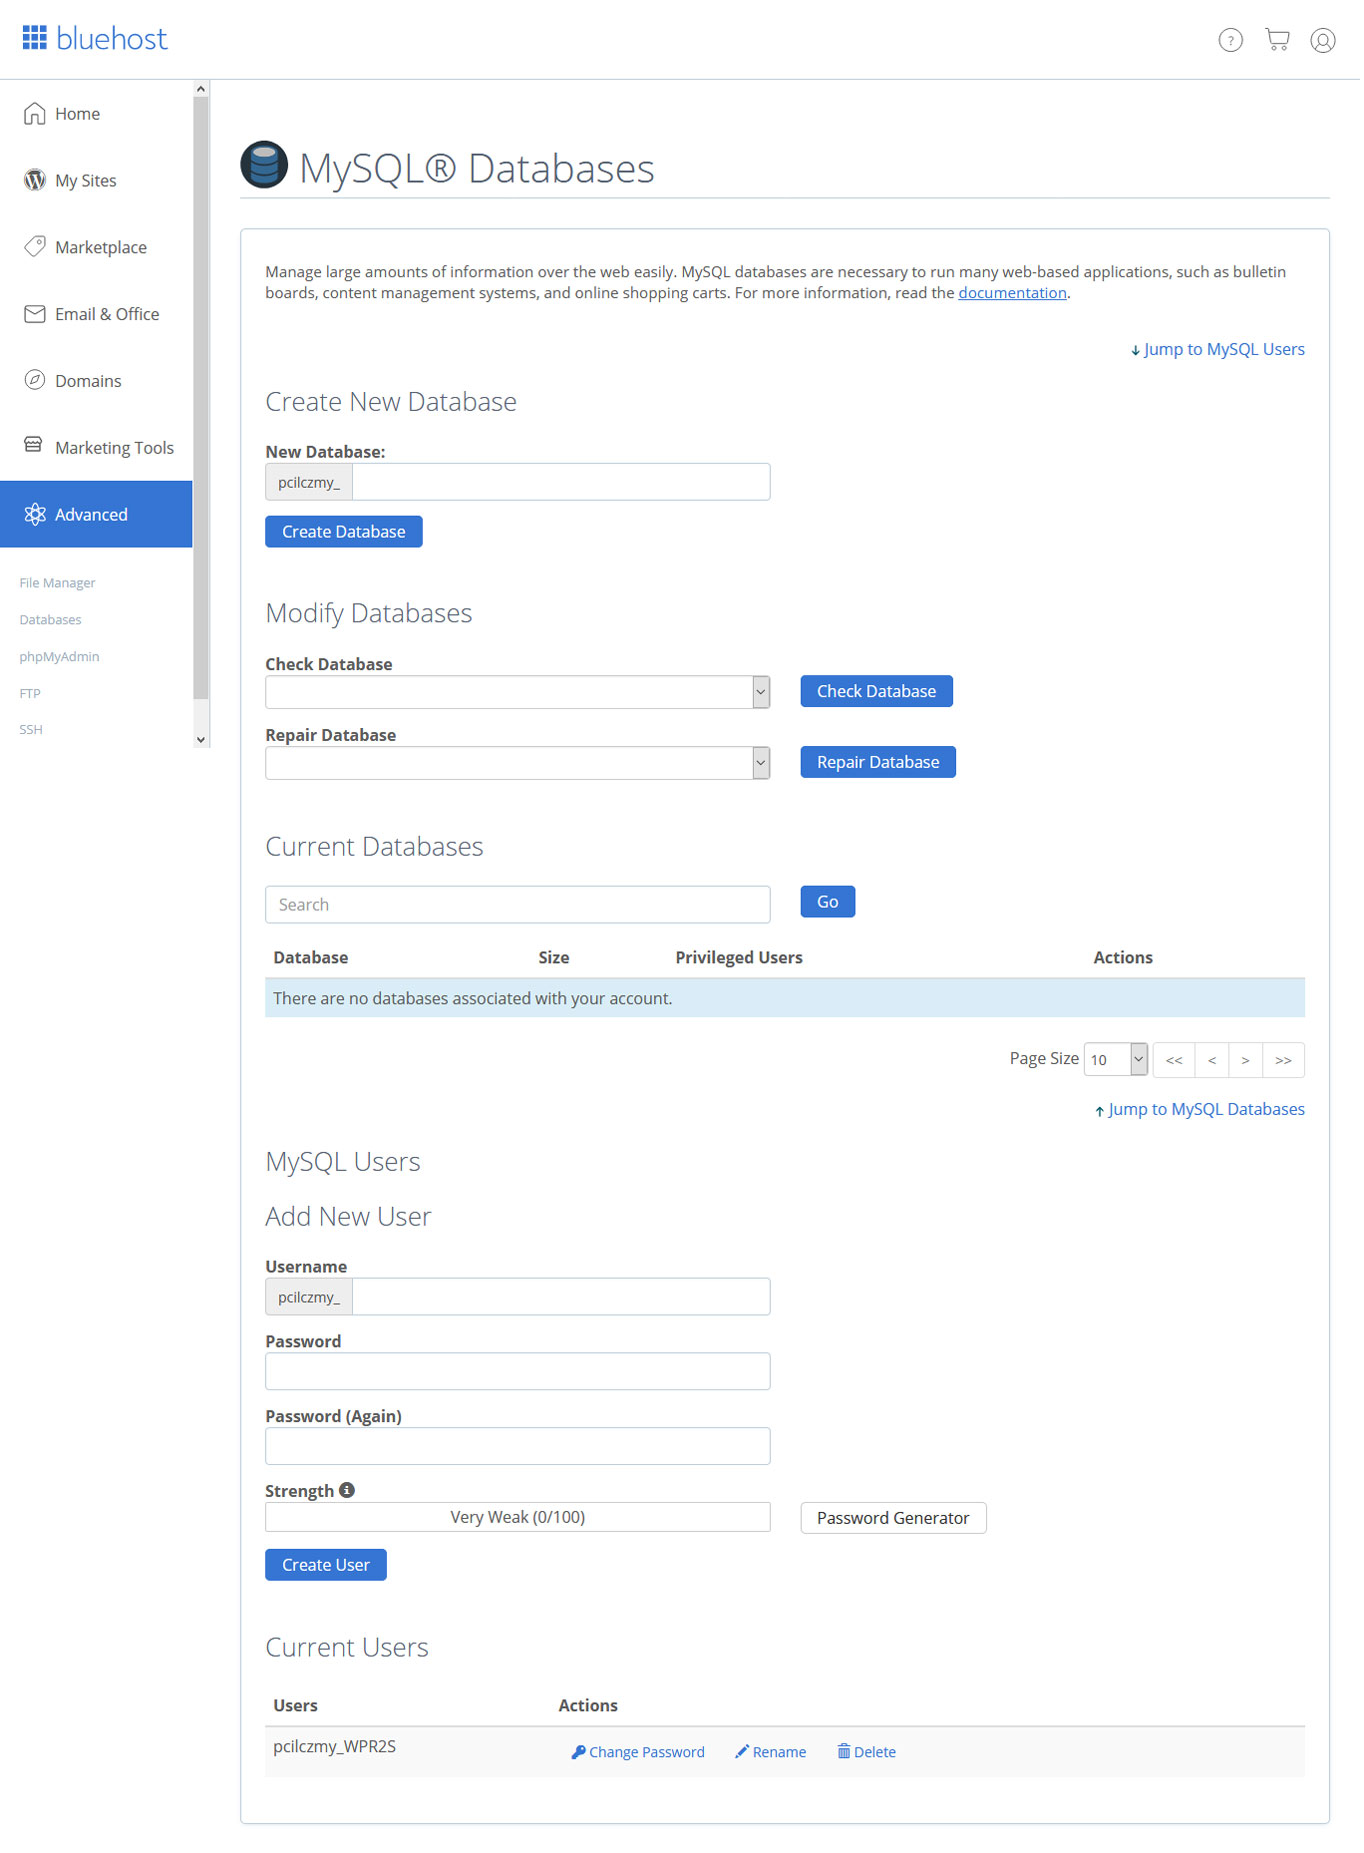
To install Joomla, you need the following information:
- The name of an (empty) database
- Name of a user associated with that database
- The password of that user
- Your database server address
Once you have that, it’s time to upload Joomla to your server. Head over to the download section of the Joomla website and hit the green Download button to get the latest stable version (Joomla 6.0.3 as of 2026).
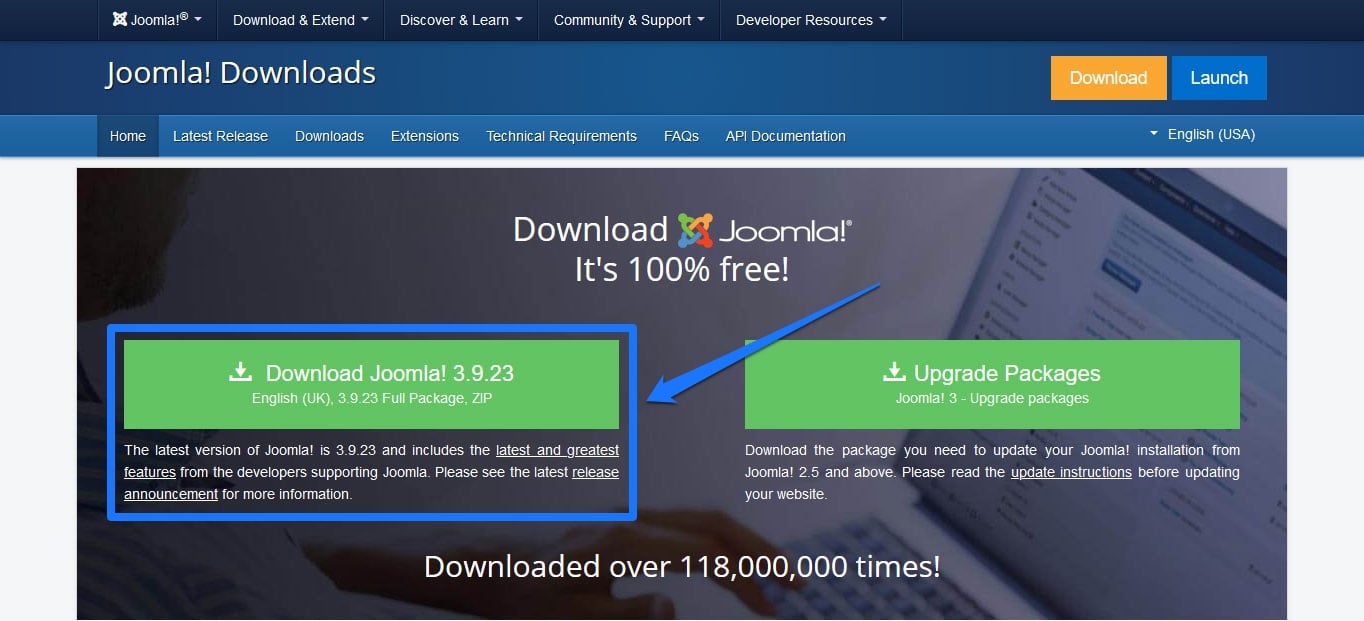
Save the zip file to your hard drive and extract all files. After that, connect to your server via FTP (e.g. through FileZilla) and upload the extracted files to where your domain is pointing (usually the root directory, often called public_html or htdocs). Once that is finished, it’s time to move on to the next step.
2. Run the Manual Installation
When all files are on your server, open a browser window and input your site URL. If you have done everything right, this should start the Joomla installation process.

The installer will first ask you to select the language for your site. Below that, enter your site’s name. On the next screen, you’ll set up your Super User account – the main administrator. Be sure to enter a valid email address, a username that isn’t easy to guess, and a strong password.
Note: The Joomla 6.0.3 installer streamlines this process into fewer steps than older versions. The exact screens may vary slightly depending on your version, but the information required is the same.
3. Connect Joomla to Your MySQL Database
The next screen asks for your database information. Fill everything in like so:
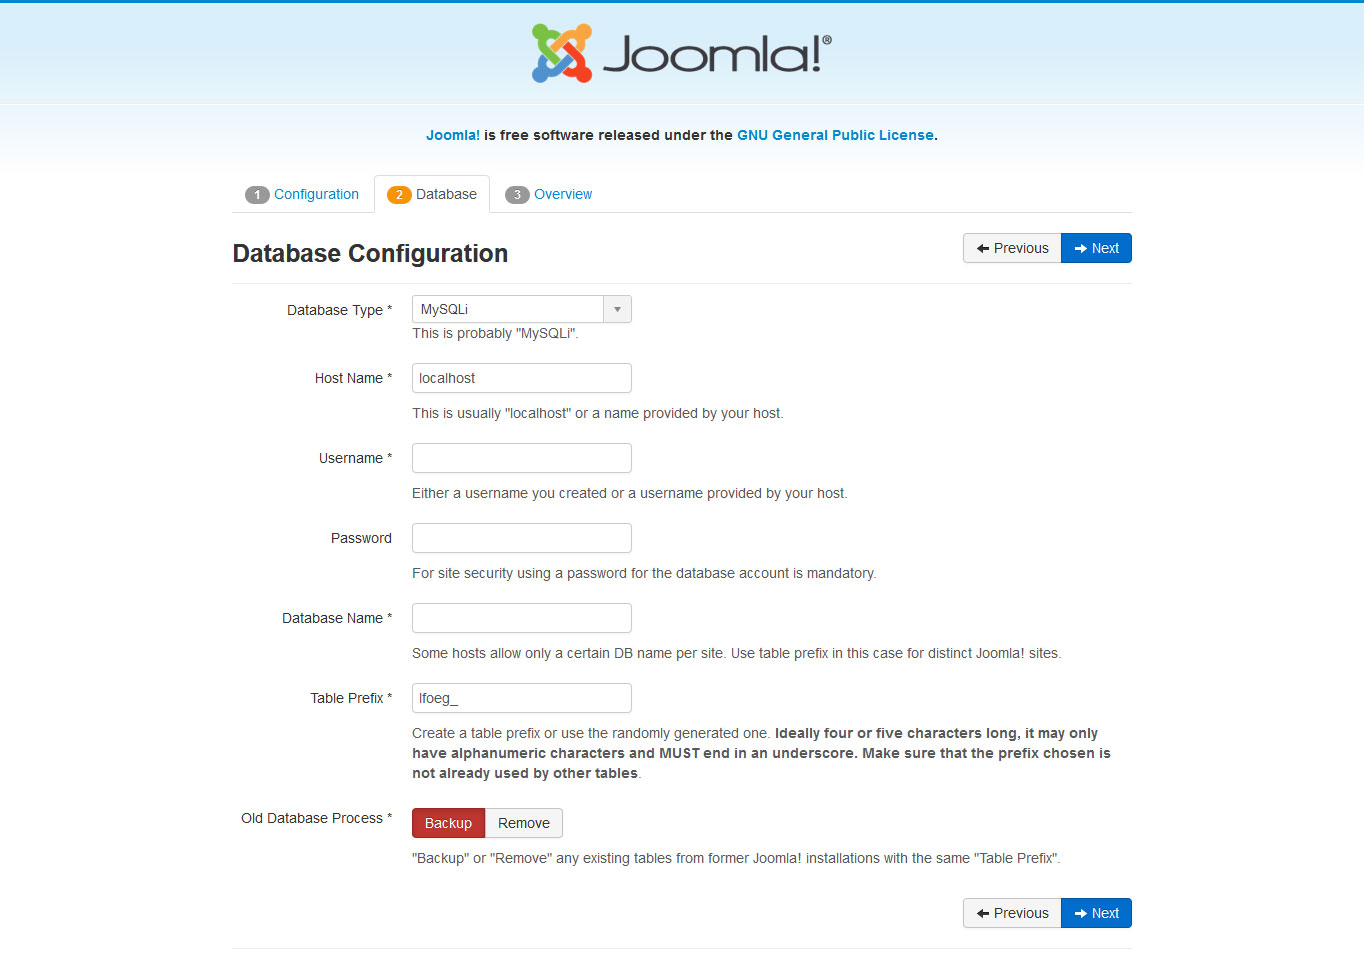
- Database Type In most cases, you can leave this as is (MySQLi is the default).
- Host Name – This is the hosting location of your database. Change it if it’s anything other than localhost.
- Username – The username associated with your database.
- Password – The password for your MySQL database.
- Database Name – The name of the database you want to connect to your Joomla website.
- Table Prefix – Unless you have good reason to change this, use the randomly generated prefix offered by the installer.
Once you are ready, hit the Install button.
4. Finish the Installation
Joomla will set up the CMS on your server. Once finished, you will see a success screen confirming the installation is complete.
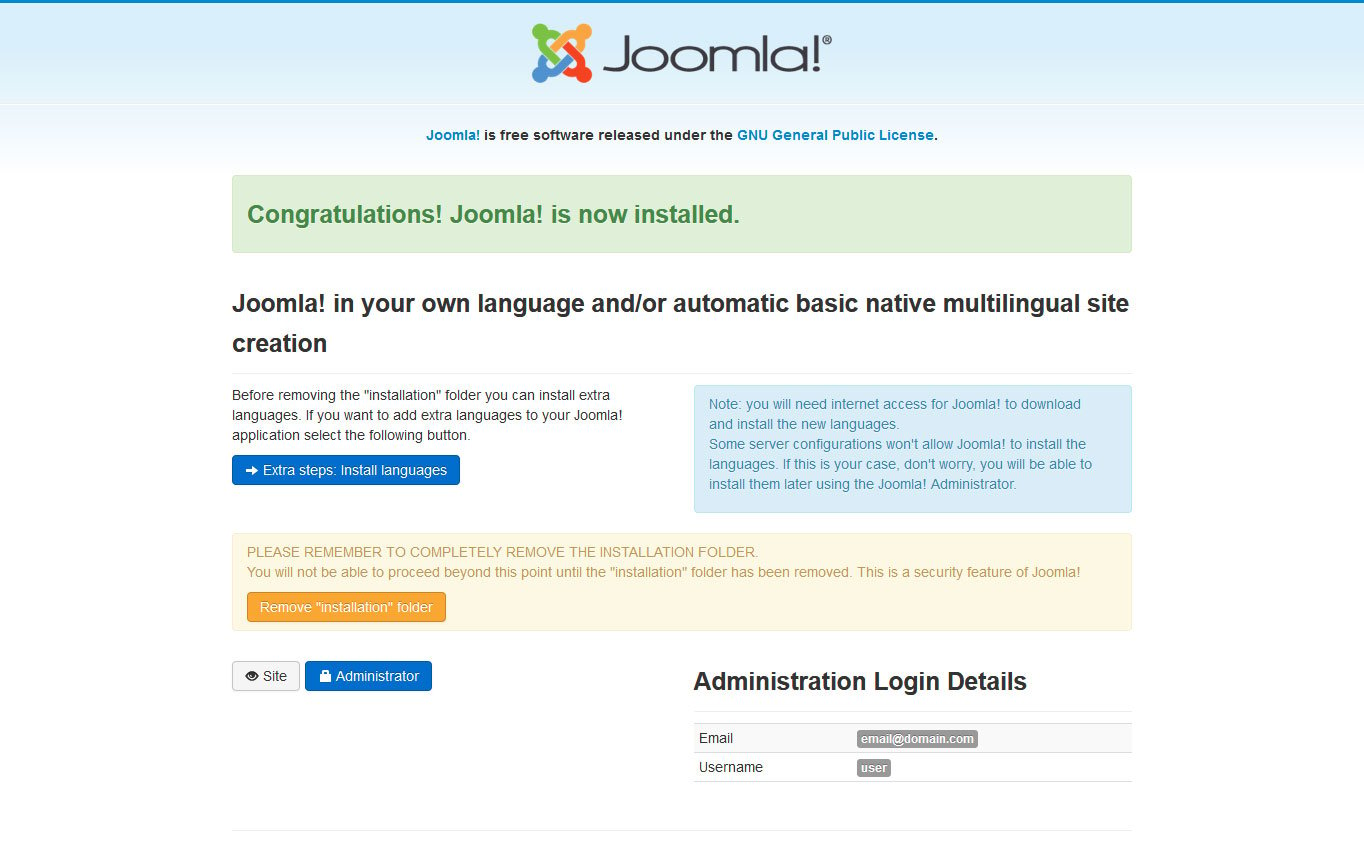
You also have the option to add more languages. Joomla 6.0.3 automatically removes the installation folder for security, so you don’t have to do that manually as in older versions.
That’s it! You just installed Joomla by hand.
3. Get Familiar with Joomla Basics
At this point, when you go to the address where your new Joomla website lives, the front end will show the default Cassiopeia template – Joomla’s built-in responsive template.
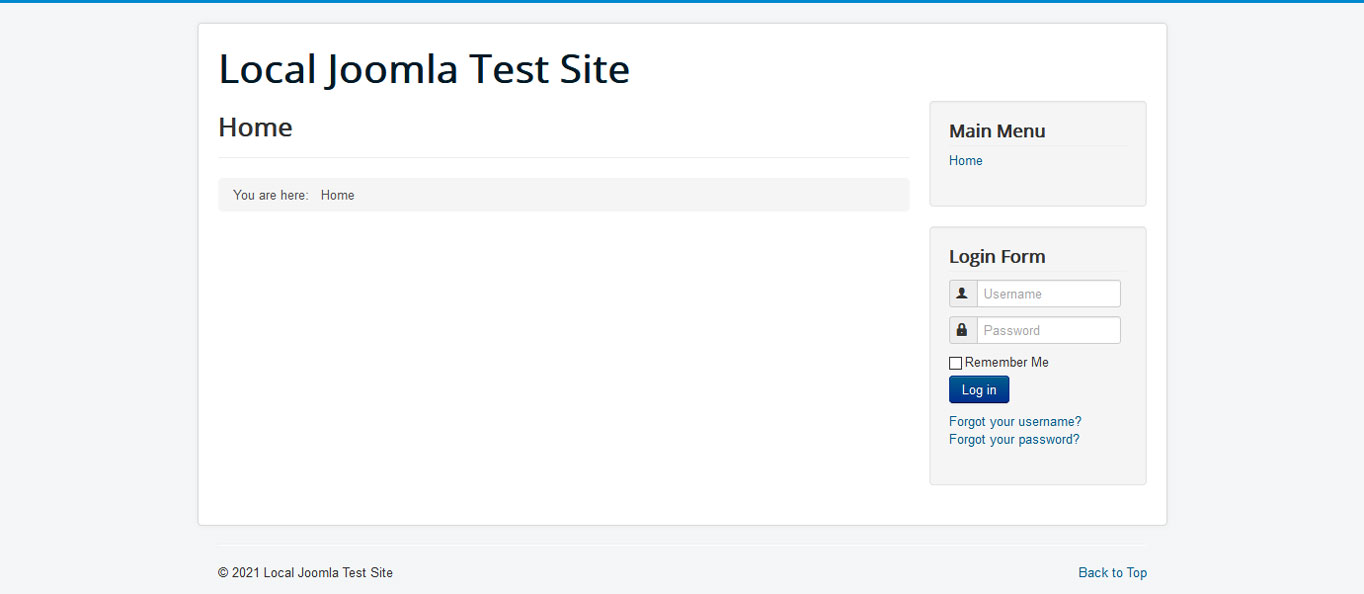
Not super impressive, right? To make any changes, we first have to log into the Joomla back end. For that, go to yourdomain.com/administrator.
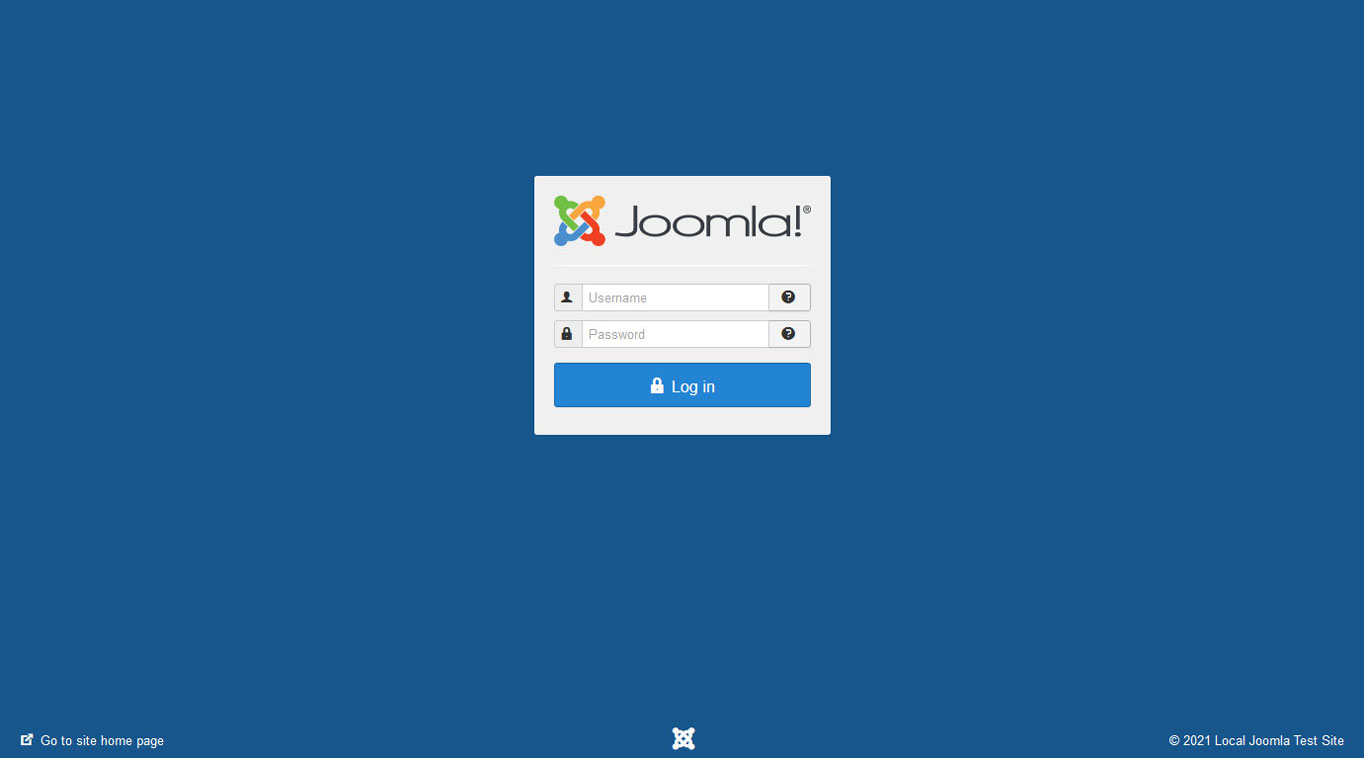
Enter your chosen username and password to land on the Joomla dashboard.
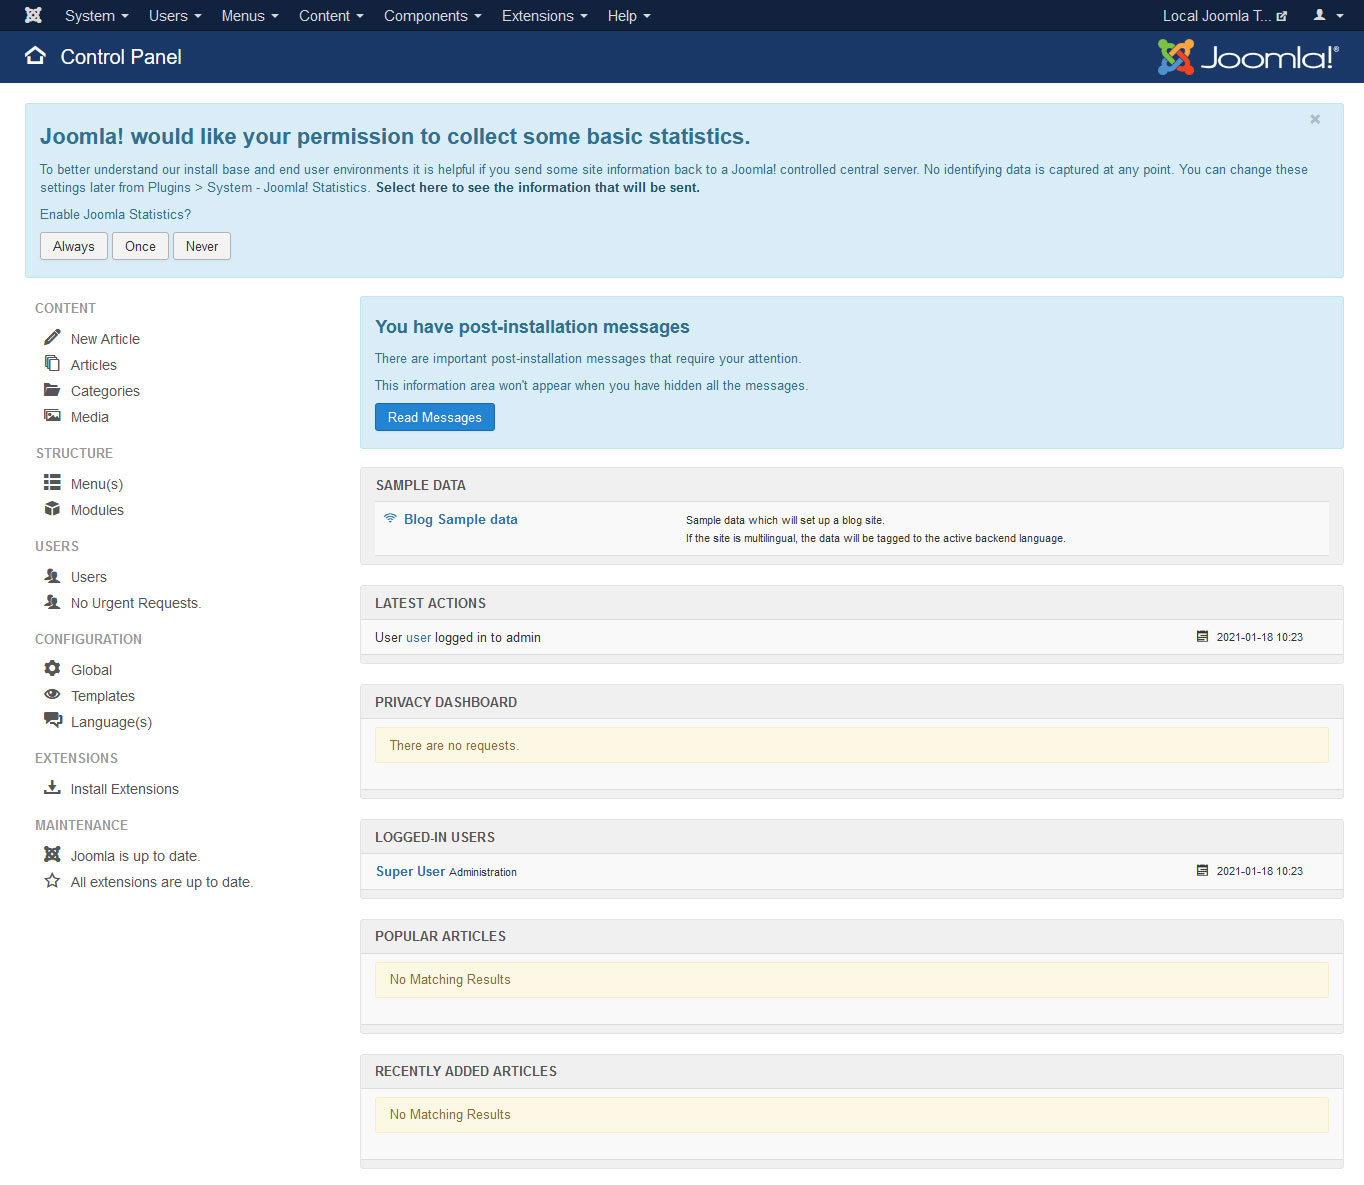
We will use many of the menus you see here throughout this Joomla tutorial. Let’s start with a quick overview.
The Joomla 6.0.3 dashboard gives you an at-a-glance view of your site’s status, including recent activity, logged-in users, and system information. On the left side, you’ll find the main navigation sidebar that replaces the top taskbar used in older Joomla versions.
The Heart of Joomla: The Sidebar Navigation
In Joomla 6.0.3, the main navigation lives in a sidebar on the left side of the admin panel (in Joomla 3, this was a top taskbar). Here’s what the different menus contain:
- Home Dashboard – Your central hub with quick-access panels, site info, and recent activity.
- Content – Add articles and categories, assign featured content, and manage your site’s media files.
- Menus – All options for creating and managing navigation menus.
- Components – Manage banners, contacts, news feeds, tags, smart search, and redirects.
- Users – Manage user accounts, user groups, access levels, and permissions.
- System – Access global configuration, install extensions, manage templates, clear cache, and view system information.
- Help – Direct access to important help topics in the official Joomla documentation.
Joomla 6.0.3: What’s New
If you’ve used an older version of Joomla before, here are the key changes in Joomla 6.0.3 that affect this tutorial:
- PHP 8.3+ requirement – Joomla 6 requires PHP 8.3 or newer.
- Automatic core updates – Joomla 6 can now update itself automatically to the latest minor version, keeping your site secure without manual intervention.
- Cassiopeia Extended child template – Joomla 6 ships with a new built-in child template based on Cassiopeia. It lets you customize colors and fonts directly from the admin panel without writing any CSS or risking your changes being overwritten on update.
- Improved versioning – Version history now includes custom fields, tags, and categories, meaning you can fully restore a previous version of content including all its associated field data.
- New custom field types – Two new field types have been added: a Notes field (for adding inline guidance between fields) and a Numbers field (with optional currency formatting).
- Improved Media Manager – Thumbnails are now shown for all file types, not just images.
- Smoother admin and frontend navigation – Both the Cassiopeia frontend template and the Atum admin template now use CSS transitions, making page navigation feel more fluid.
Configure Basic SEO Settings
Before you start adding content, it’s worth taking a minute to configure Joomla’s built-in SEO settings. Go to System > Global Configuration and look for the SEO Settings section on the Site tab:
- Search Engine Friendly URLs – Set this to Yes. This turns ugly URLs like
index.php?option=com_content&view=article&id=1into clean, readable ones. You may also need to rename thehtaccess.txtfile in your Joomla root to.htaccess(for Apache servers). - Use URL Rewriting – Set this to Yes as well for the cleanest URLs.
- Adds Suffix to URL – Optional. This adds
.htmlto the end of URLs. Most people leave this off. - Site Meta Description – Enter a short description of your website (under 160 characters). This is the default text search engines will show in their results.
- Robots – Leave this at the default (index, follow) so search engines can find and index your pages.
Click Save & Close when you’re done. These settings apply site-wide, but you can override the meta description on individual articles later.
All clear so far? Then let’s move on.
4. Select a Template for Your Site
Like other CMS platforms, Joomla offers a way to change your site’s design without coding. In Joomla, your entire website’s look, feel, and functionality depend on templates.
Joomla 5 ships with Cassiopeia as the default frontend template. It’s modern, responsive, and customizable enough for simple sites. However, if you want a more distinctive design, there are both free and premium (paid) Joomla templates available.
Finding templates can be tricky since Joomla does not have a central directory like WordPress does. You’ll need to browse third-party template shops. Here are a few places to get started:
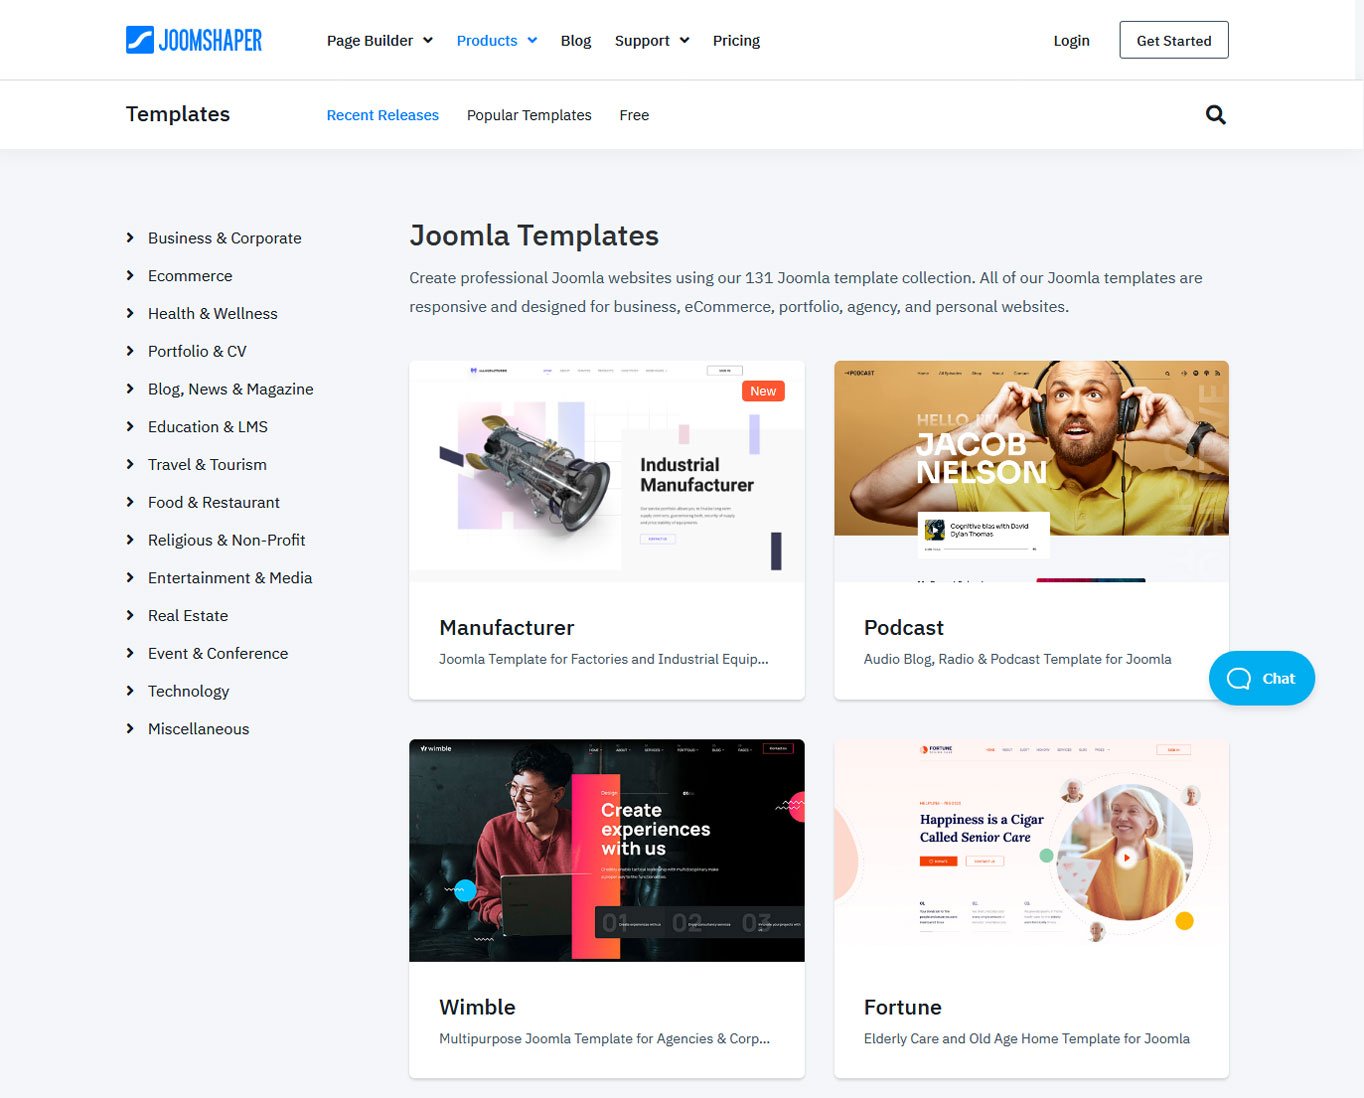
When selecting a template, besides your own taste, pay attention to a few important characteristics:
- Joomla 6.0.3 compatibility – Make sure the template explicitly supports the current Joomla version. Templates built only for Joomla 3 will not work.
- Support – It’s great to have technical support included to help you with issues.
- Updates – Joomla constantly updates their system. Make sure your template provider does the same with their products.
- Documentation – From time to time, you’ll need to check some features to learn how they work. Be sure there is documentation available.
- Customizability – Check out which template features can be customized by yourself. For example, look for templates that have many module positions (more on that soon).
5. Install Your Joomla Template
Installing a template in Joomla is quite easy. Once you have made a choice, you usually get it in the form of a zip file. Upload it under System → Install Panel → Extensions.
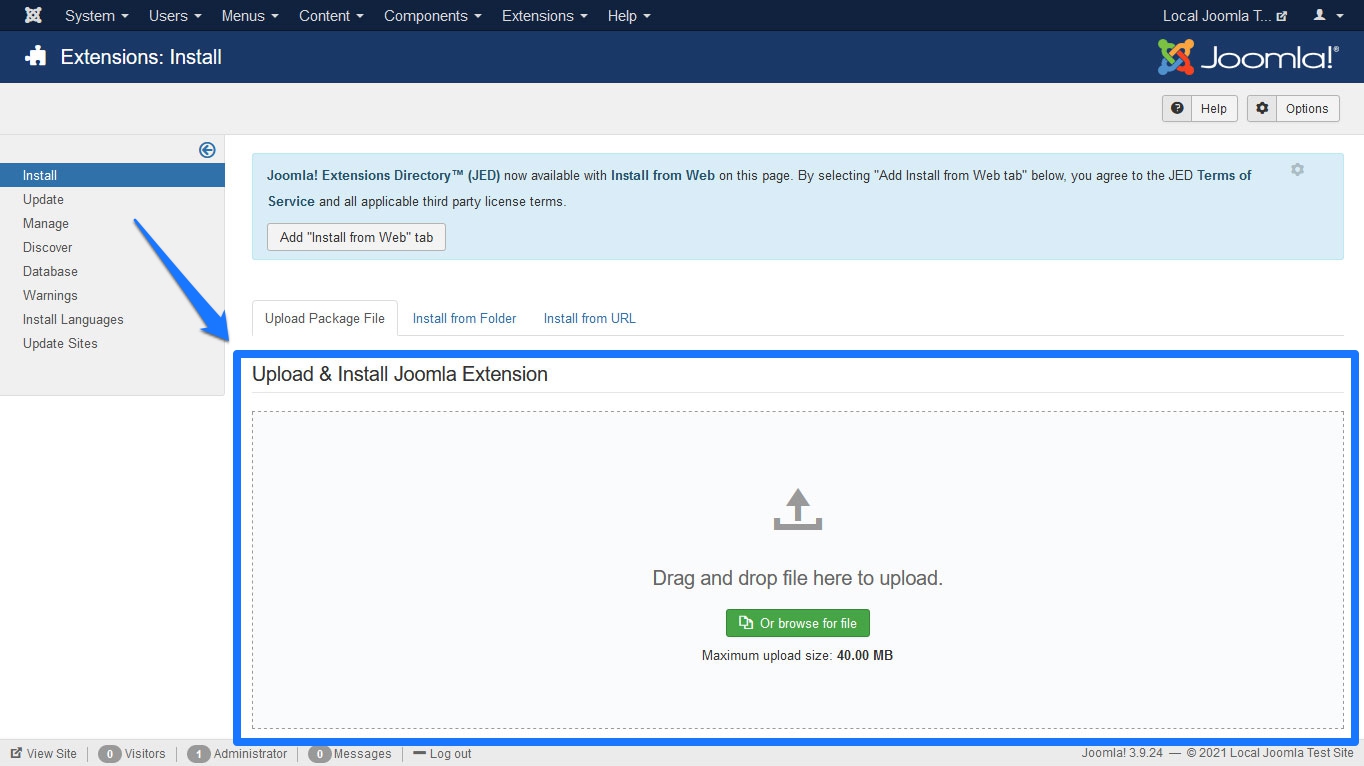
Either drag and drop the file into the upload field or click the browse button to find it on your hard drive. Select it and Joomla should do the rest. Alternatively, you can install the template via its URL if you know where the package is located.
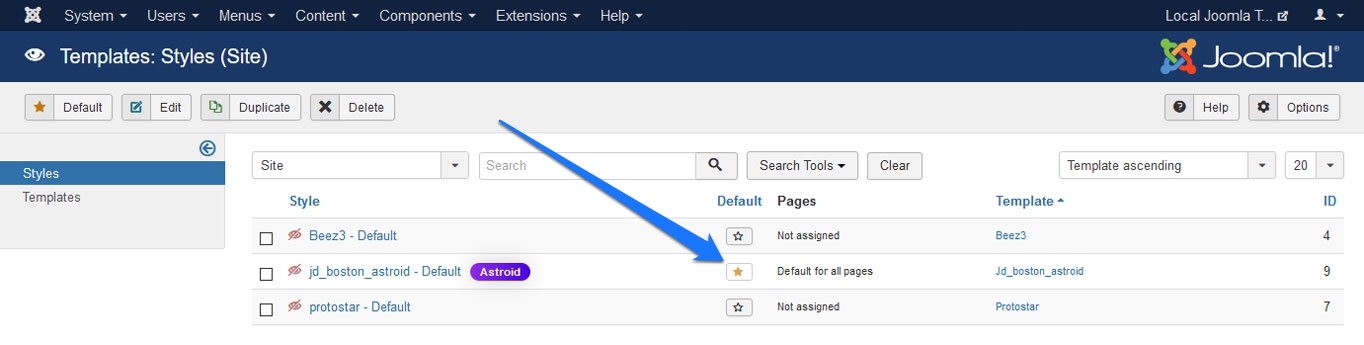
After that, you still need to activate the template. Go to System → Site Template Styles. Here, click the star icon to the right of the template name to make it the default for the entire site.
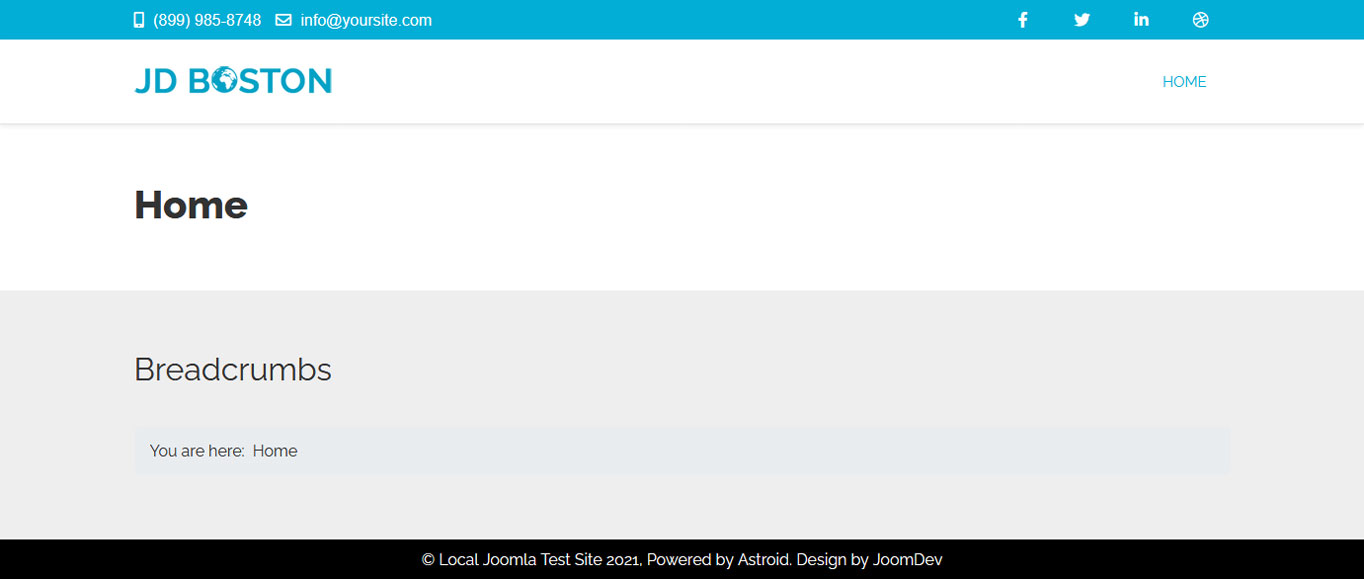
 When you now go back to the front end of your site, you will see that its entire design has changed. Such is the power of templates.
Note that when downloading your template, you might get additional files such as quickstart, settings, and extension.
The quickstart package is a complete version of Joomla including the template and demo content. When you install that, your new design is ready to go – all you need to do is swap in your own content. It’s a shortcut when you want the exact design shown in the template preview.
The other files typically refer to additional features you saw in the template demo, such as sliders, page builders, or custom modules.
6. Customize the Design
Most templates come with at least some customization options. You can access them by clicking on the template name in the styles list.
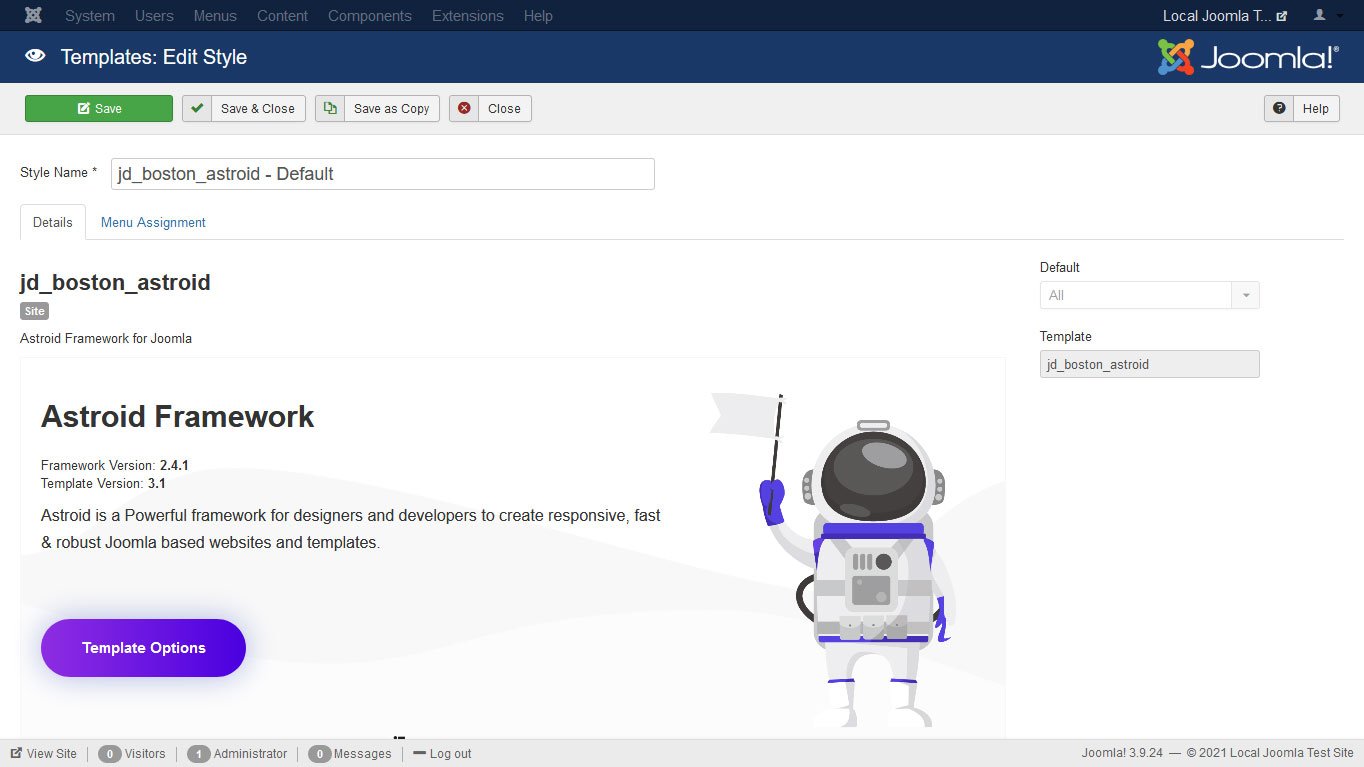
In the settings, you can make adjustments to things like colors, fonts, logos, sizes, and much more. Many premium templates come with their own settings page or even a visual page builder for more advanced customization.
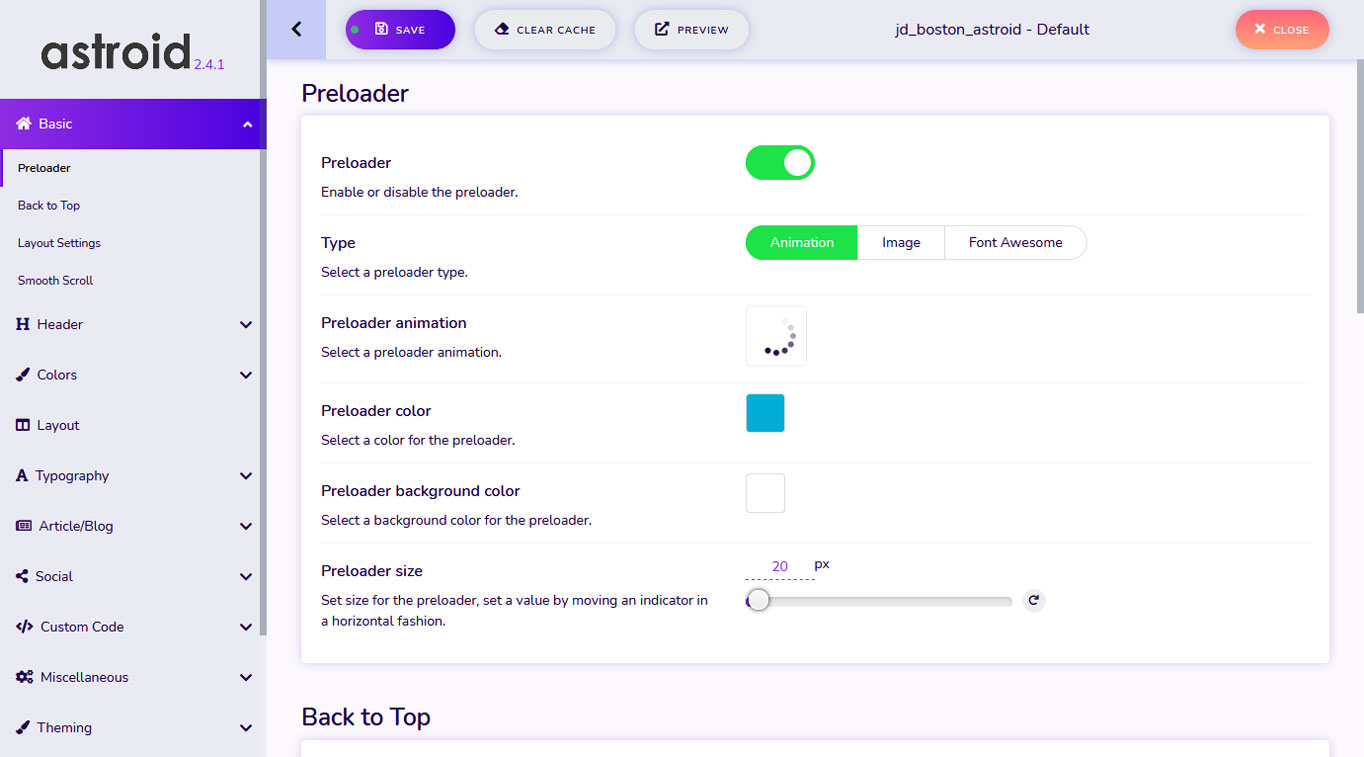
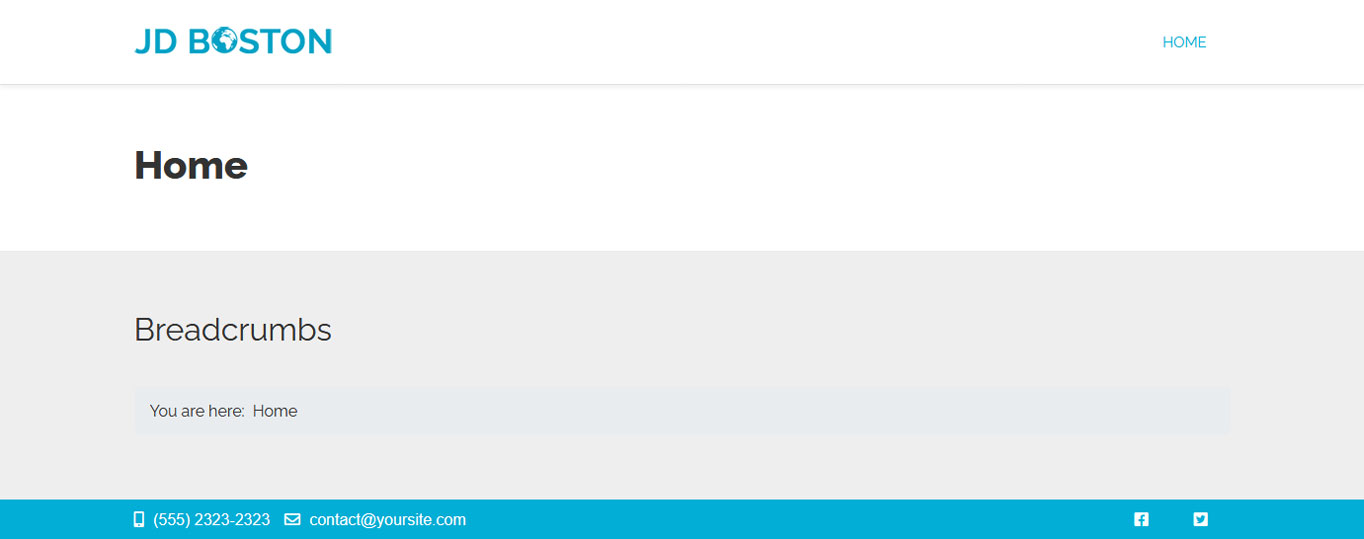
Some Joomla templates also have a preview option where you can see changes in real-time. In either case, don’t forget to check out what your template has to offer and to save any changes you’ve made. For example, below we have changed the social profiles and contact information, disabled the branding at the bottom, and adjusted the layout options.
7. Create Content Using Joomla Modules
Right now, even if it looks better, your site is still pretty empty. Time to change that. At this point in our tutorial, we will go over how to use Joomla to create content.
We have to start with one of the more complex topics: modules. These are small content units that can appear in many places on a page, like building blocks. Using them takes some getting used to, so let’s try it out on the homepage.
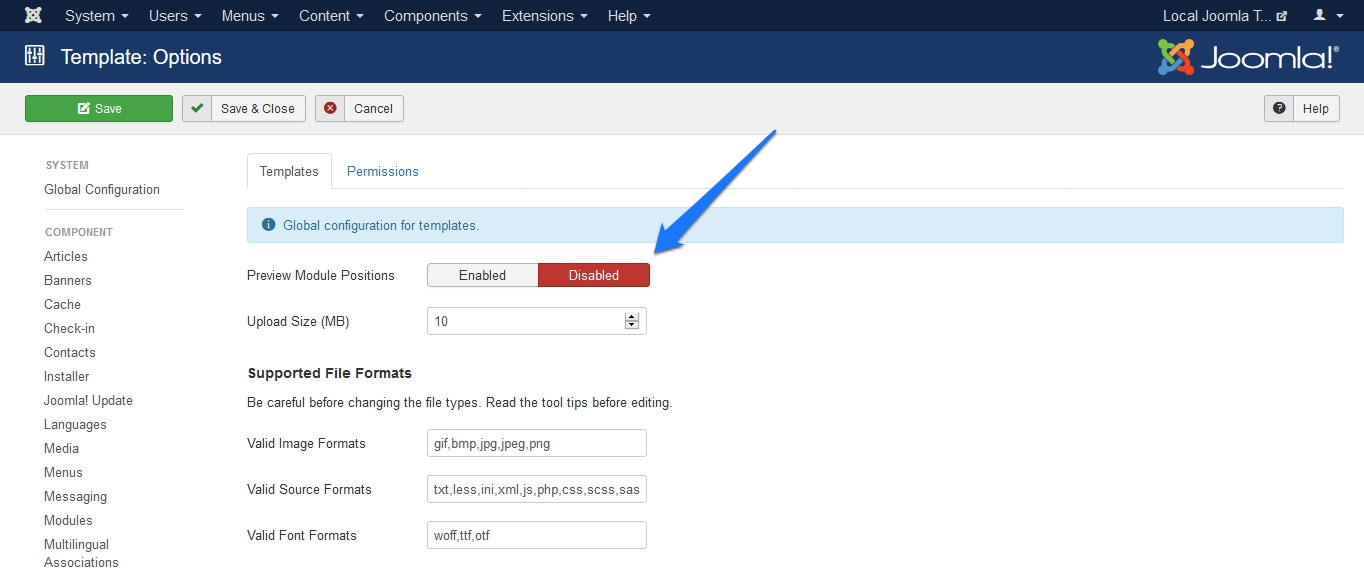
To understand your options, it’s best to start by enabling the preview mode for module positions. Go to System → Site Templates, then click the Options button in the toolbar. Set Preview Module Positions to Enabled, save, and close.
Then, go back to your list of templates and click the Preview button (the eye icon). This will display all available positions on your page where you can place modules, along with the position names.
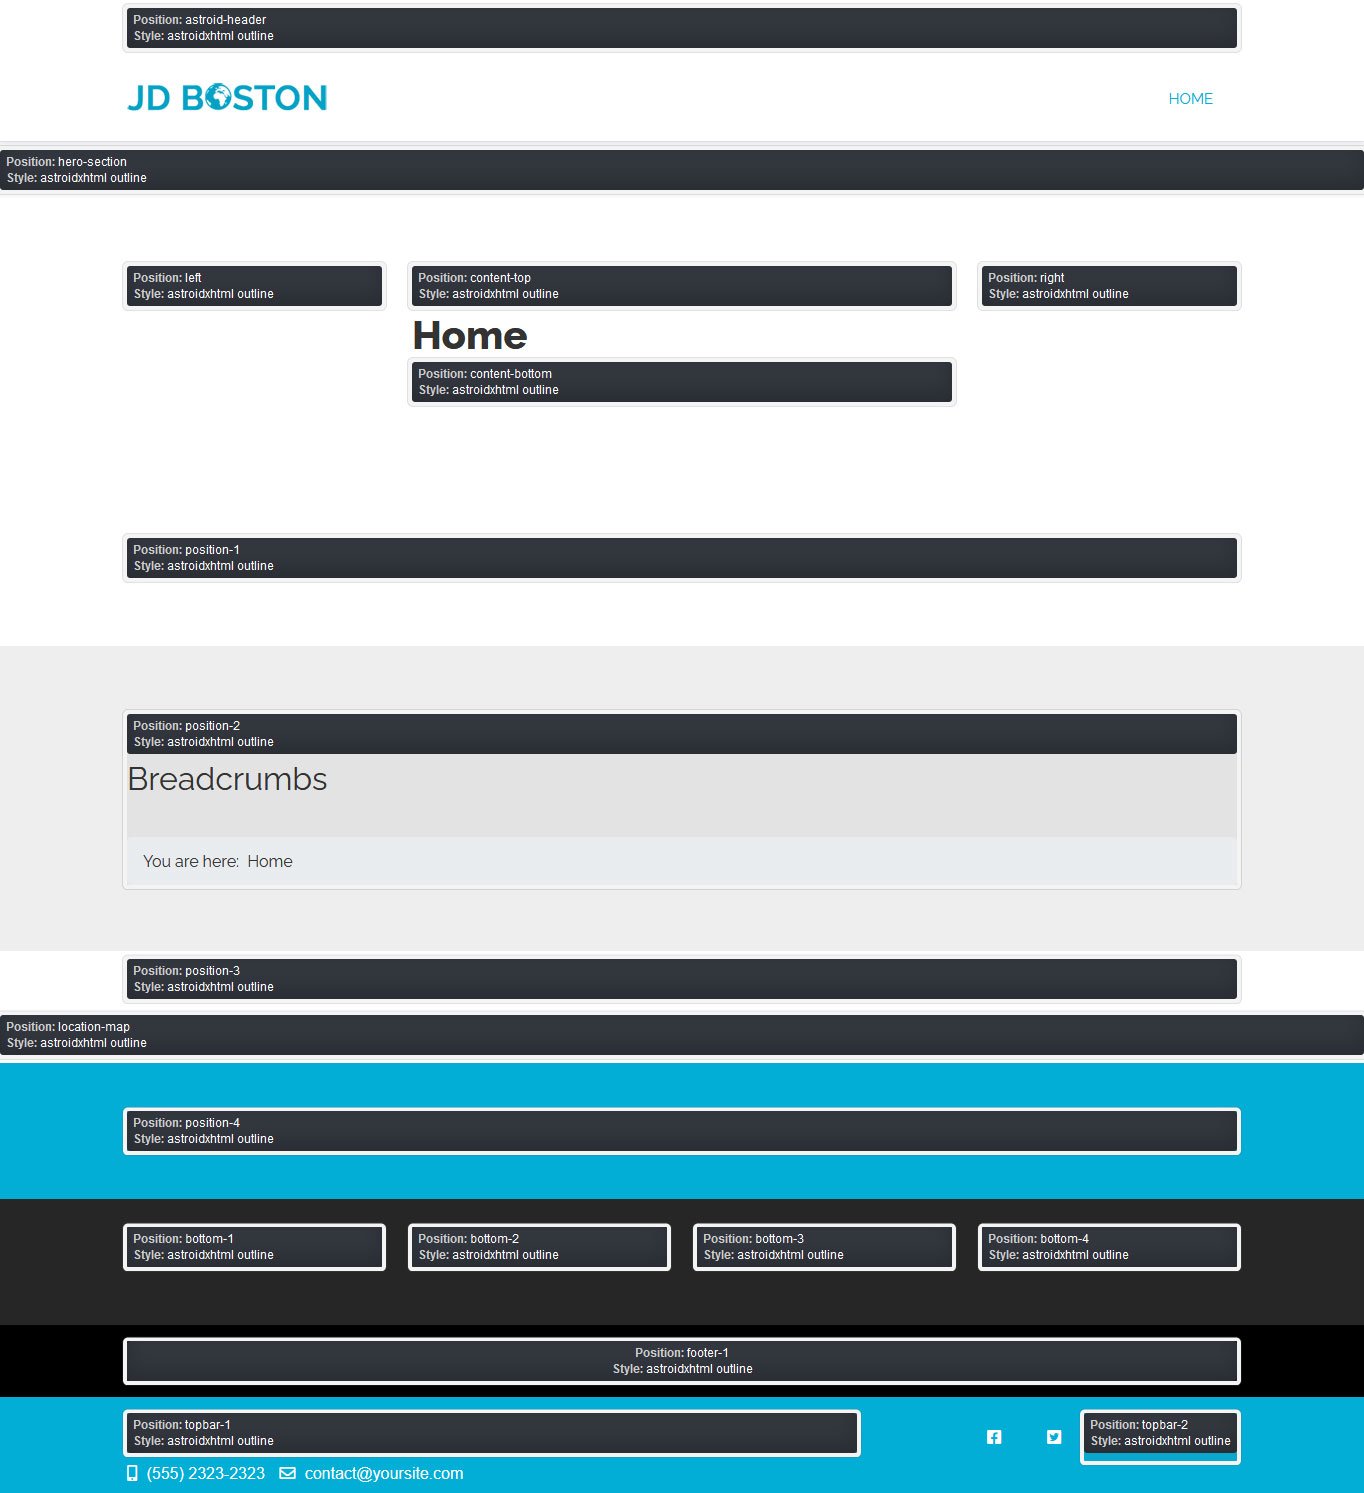
Quick note: Don’t forget to switch the preview off when you are done assigning modules.
8. Assign Modules to Positions
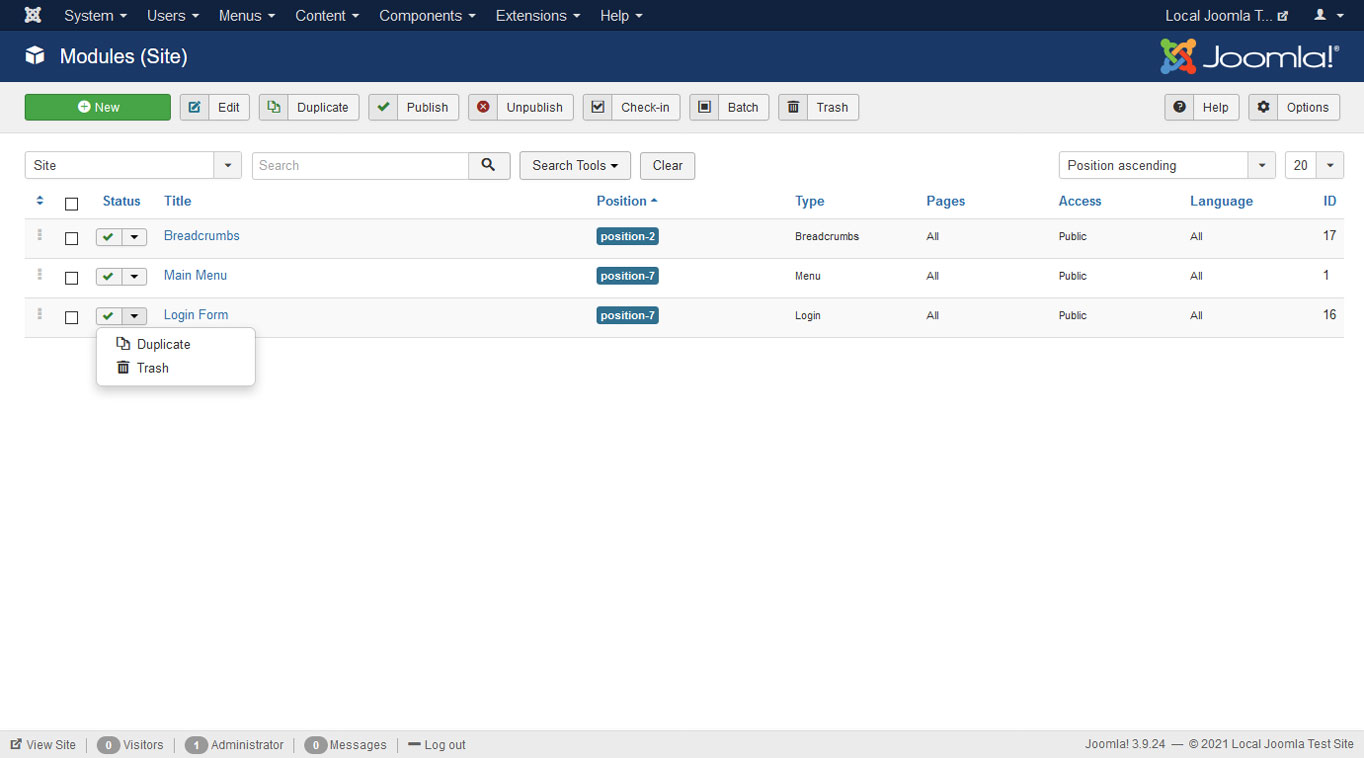
Now that you know where your modules can go, how do you assign them to those positions? All of that happens under Content > Site Modules.
Here, you can see all modules currently active on your site plus the positions, pages, users, and languages they are assigned to. To remove anything you don’t need (such as the login form or breadcrumbs), select the module and change its status to Trash.
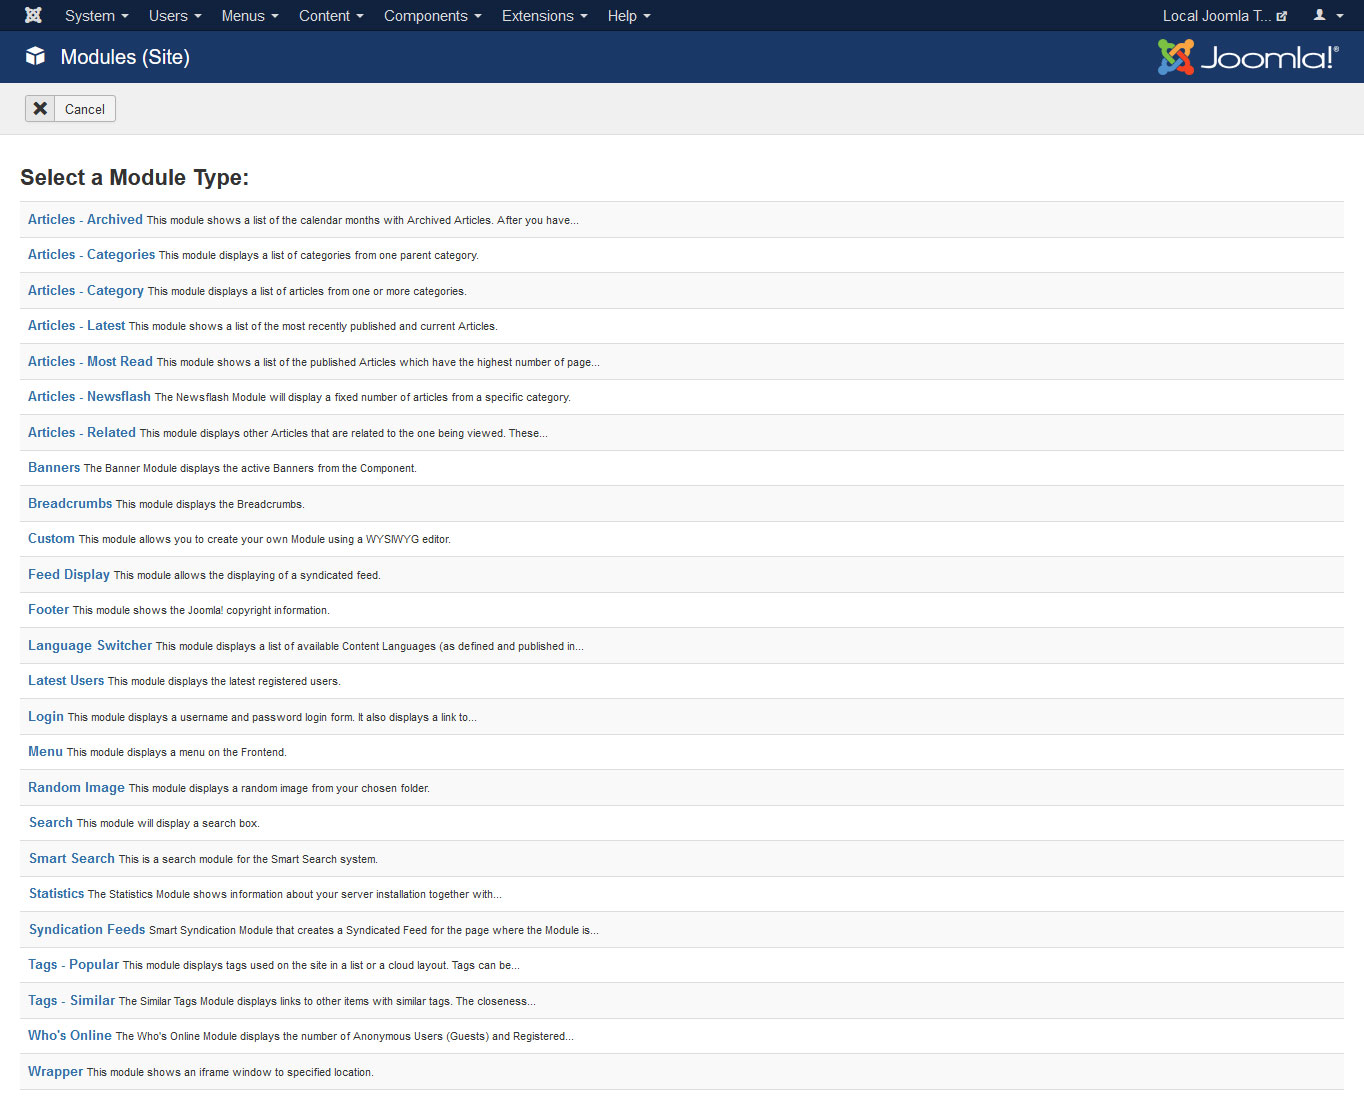
If you want to add more modules to your site, click the New button in the upper left corner. You’ll find a selection of module types.
Let’s say you want to include some text about you and your site on the homepage. First, check where on the page it should go using the module positions preview from the previous step.
Then, go to the modules list, create a new module via the green New button, and choose Custom as the type. This lets you create your own content block using a WYSIWYG (what you see is what you get) editor.
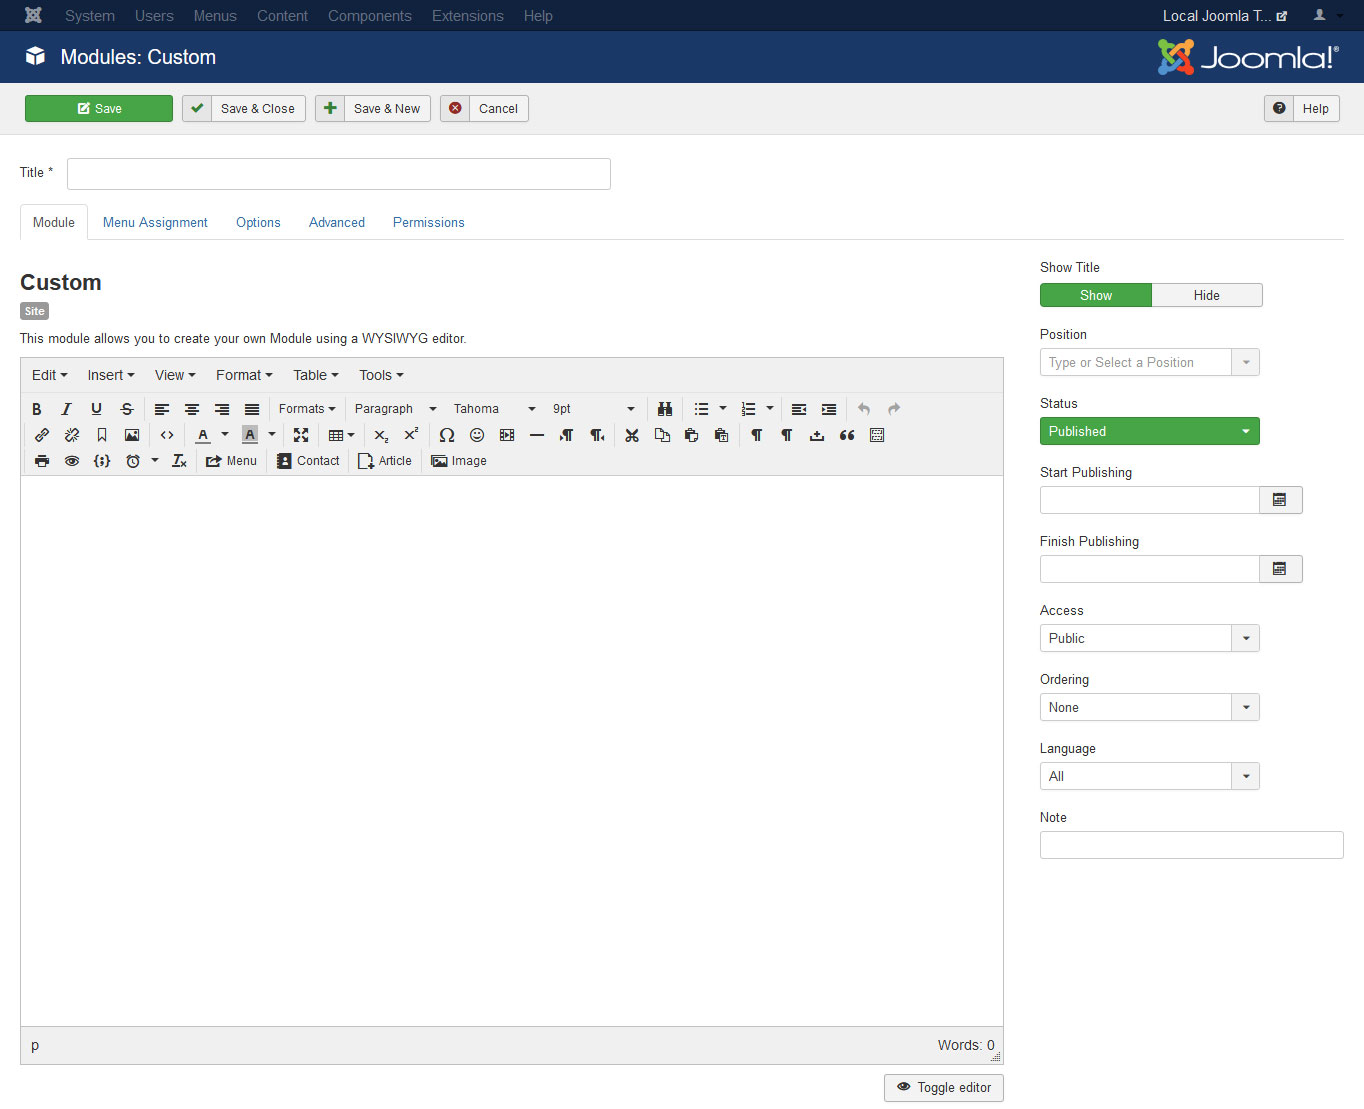
The default editor in Joomla 6.0.3 is TinyMCE, which works like a simple word processor. You can write and format text, insert headings, images, and other media. Hover over any of the toolbar icons to see a description of what it does.
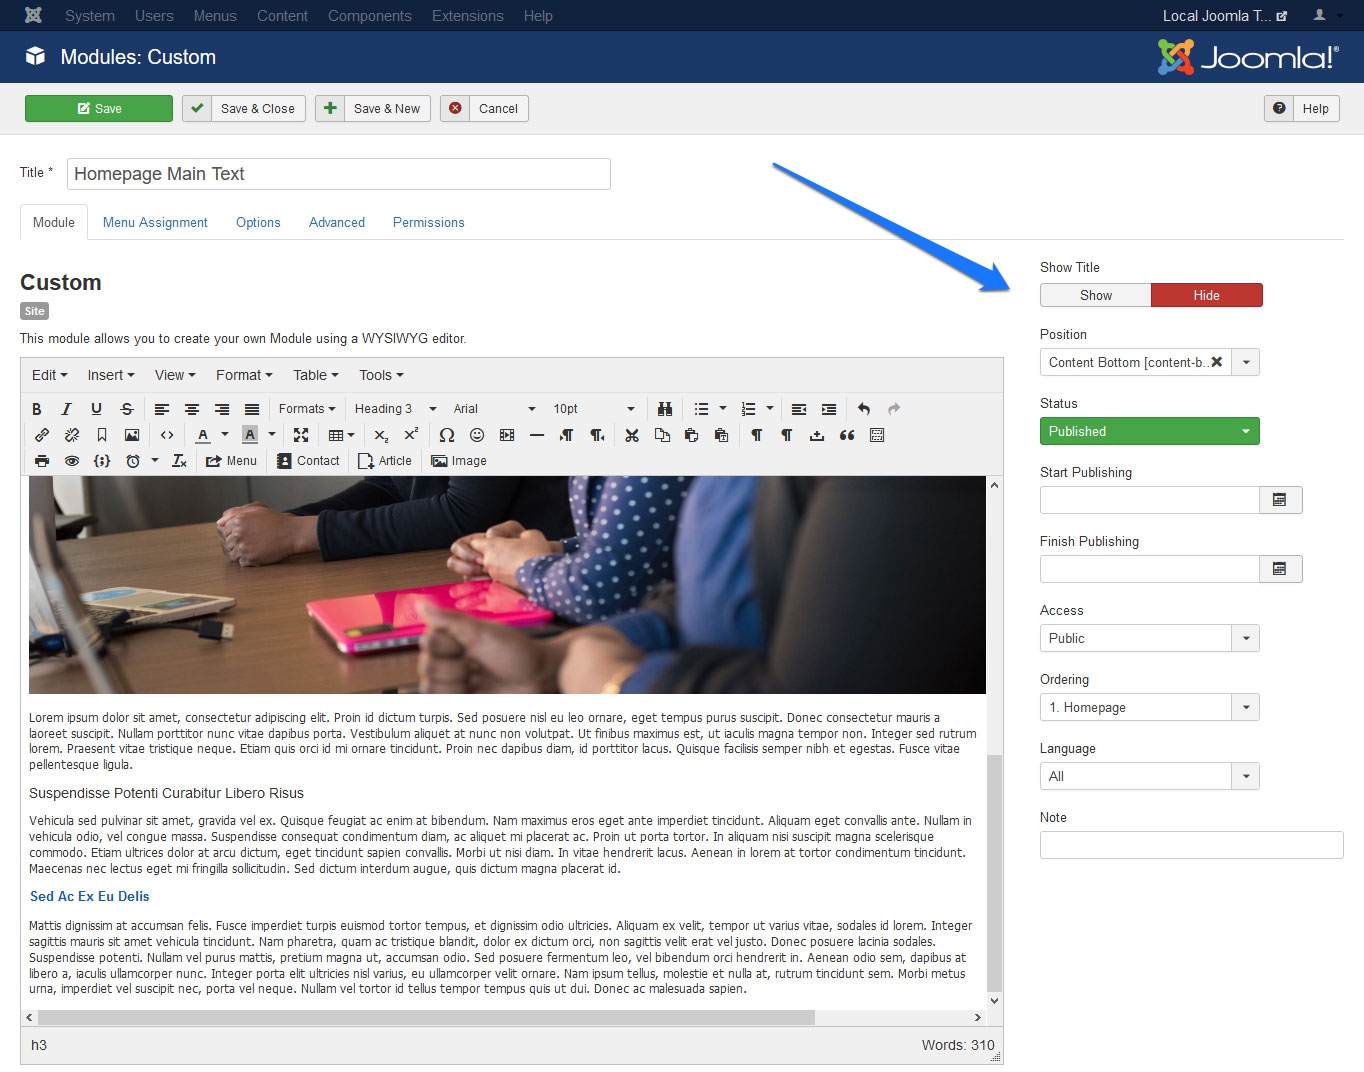
When you are done, make sure Status on the right is set to Published and pick the correct template position under Position (pay attention that you select your active template). You can also choose to hide the module title if you don’t want it displayed.
Then, go to the Menu Assignment tab and use the drop-down menu to choose the pages you want to show this module on. For a homepage-only module, select Only on the pages selected and then check Home.
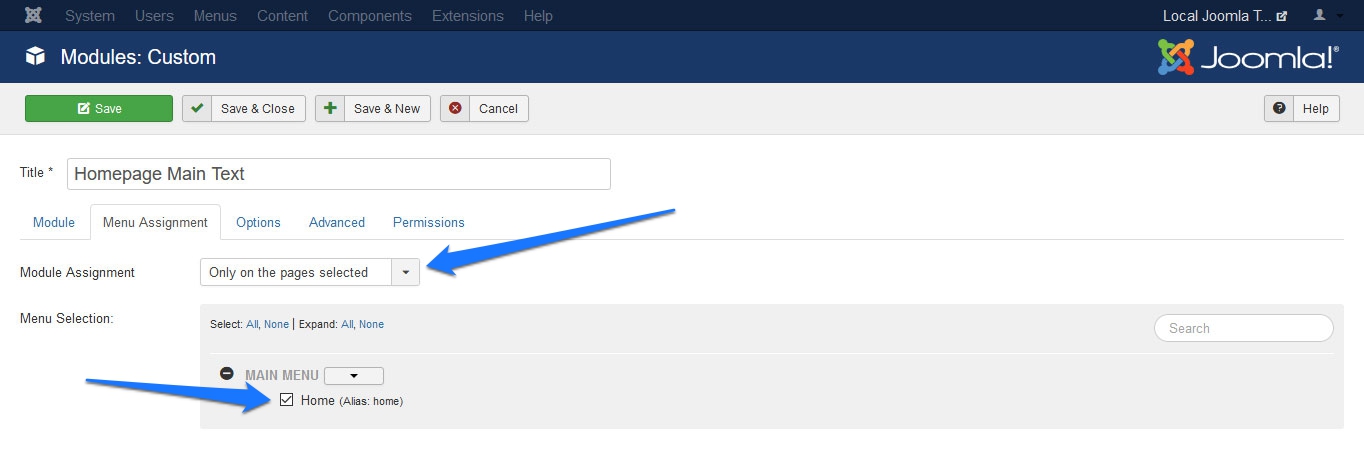
Save and you should see it on your homepage (and only there).
You can use this same method to insert other things into Joomla pages – blog post lists (we will talk about that later), banners, menus, images, and iframes. You can also add new module types via extensions (more on that below).
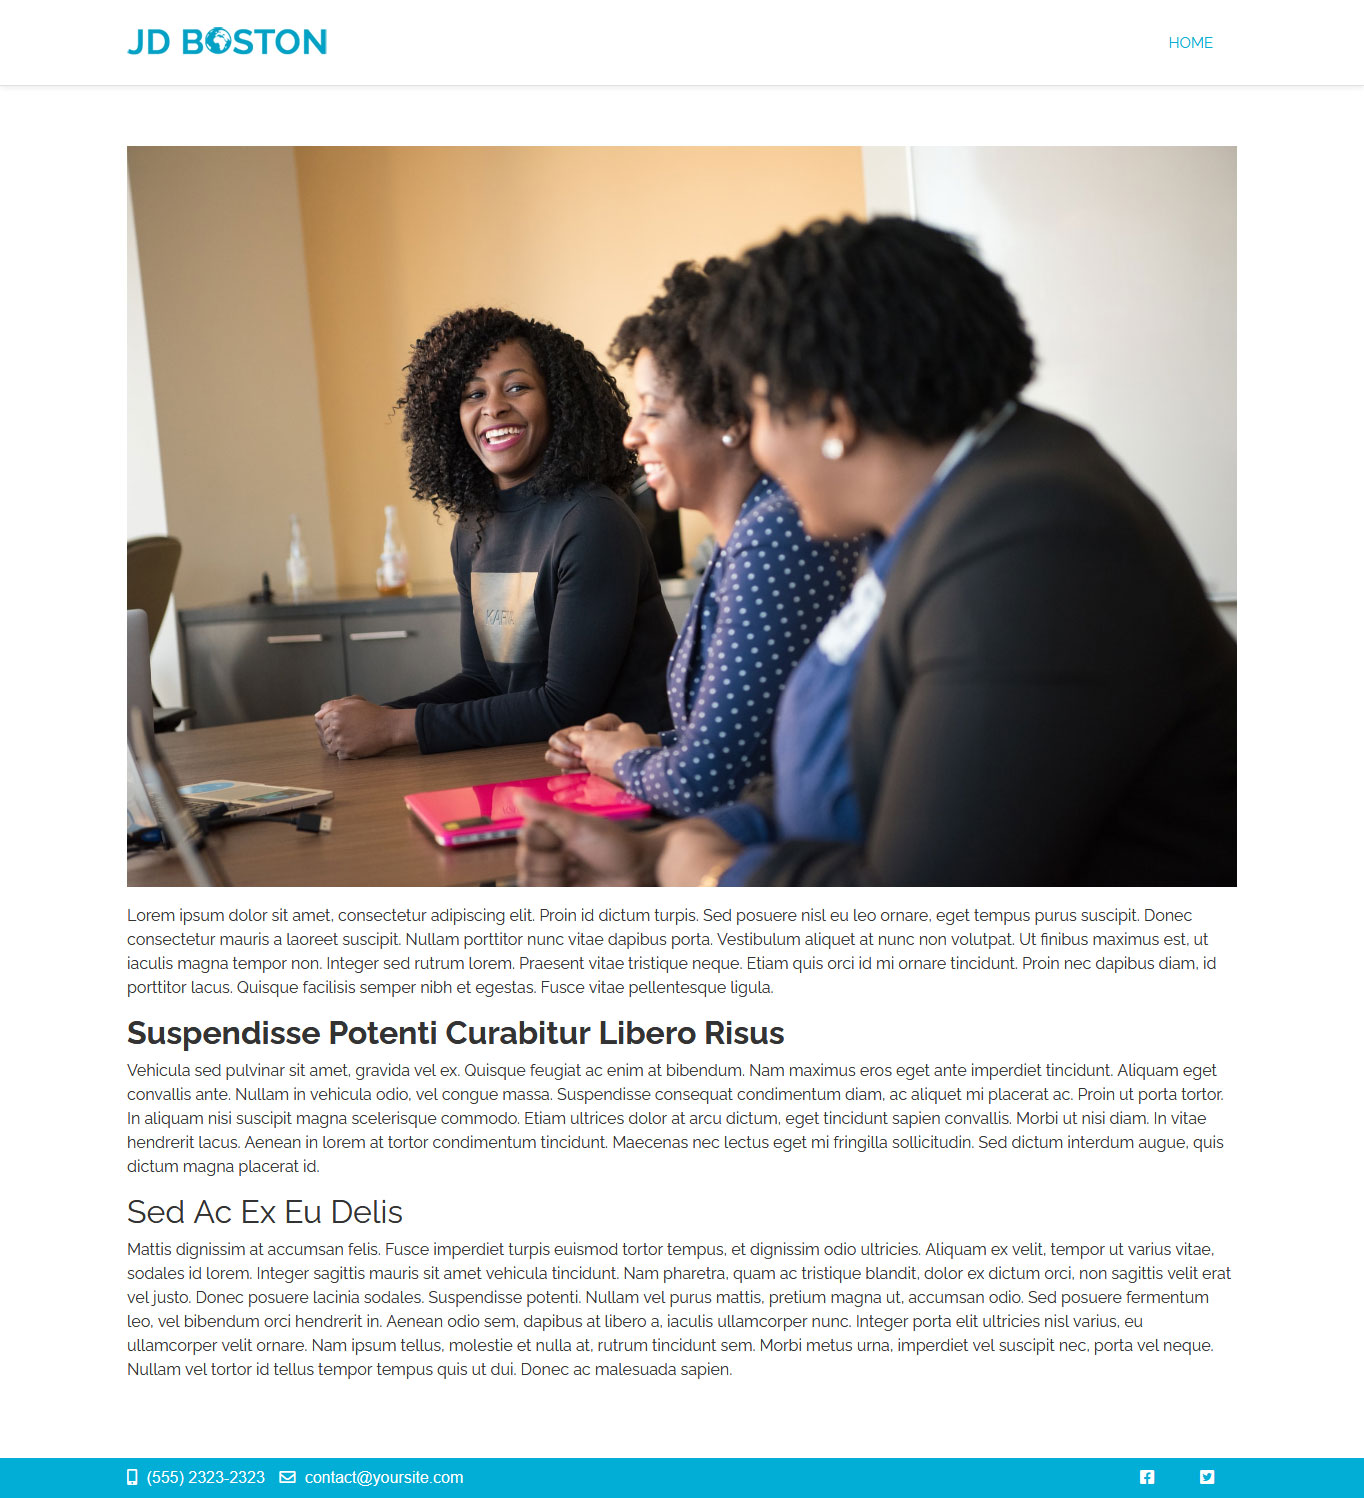
For example, this is what the homepage looks like when we add a main image as a slider with the help of an extension and move the text module to a different position:

Already better, isn’t it?
9. Create New Pages
Now for something easier: pages. The first thing to learn here is that you create them in one place and make them appear on your site in another. This is a general principle in Joomla – anything you create won’t automatically show up on the front end until you assign it to a menu.
In Joomla, pages are called articles. This can be a little confusing if you come from a blogging background, but don’t let that hold you up. You can create articles via Content > Articles > New Article. Alternatively, use the shortcut on the dashboard. Both will take you to the content editor.
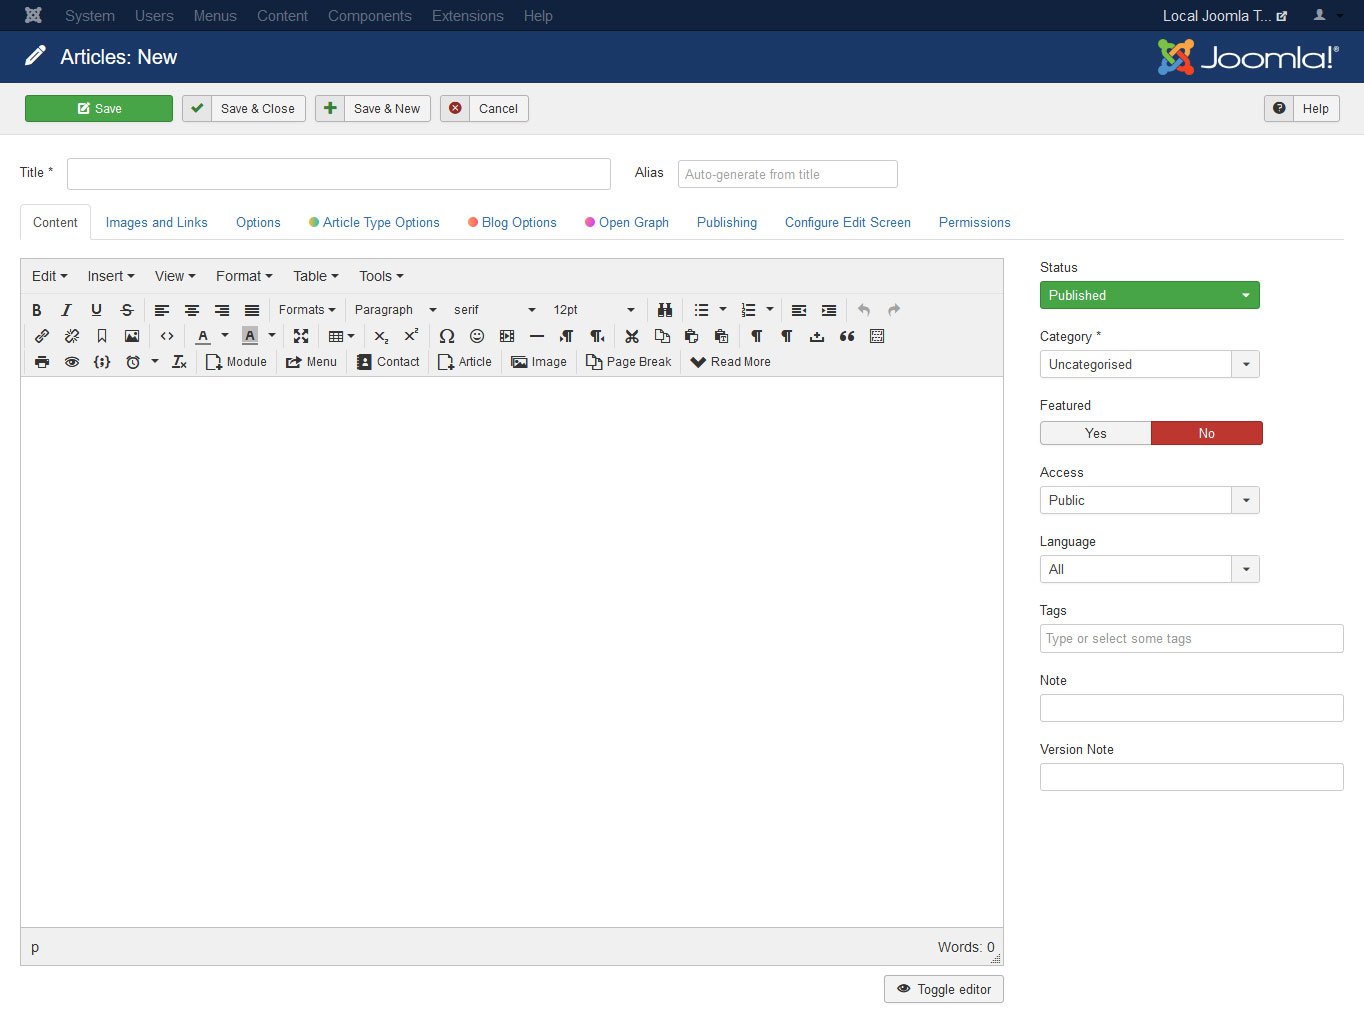
Create and format content the same way as you did earlier with modules. When you are done, under Alias you can set a custom permalink (page URL). It often makes sense to put a keyword here instead of using the auto-generated alias from the article title. Under Status, make sure it is set to Published before saving.
10. Assign Pages to the Joomla Navigation Menu
To allow visitors to access your new page, it’s time to assign it to a menu. Under Menus, find the one with the house icon – that is your currently active main menu.
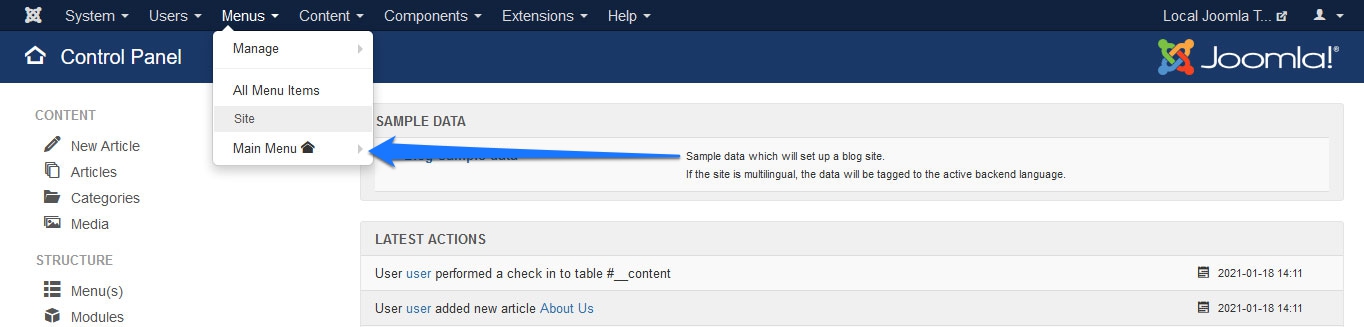
To add a new link, hover over the menu and pick Add New Menu Item. This takes you to the configuration screen.
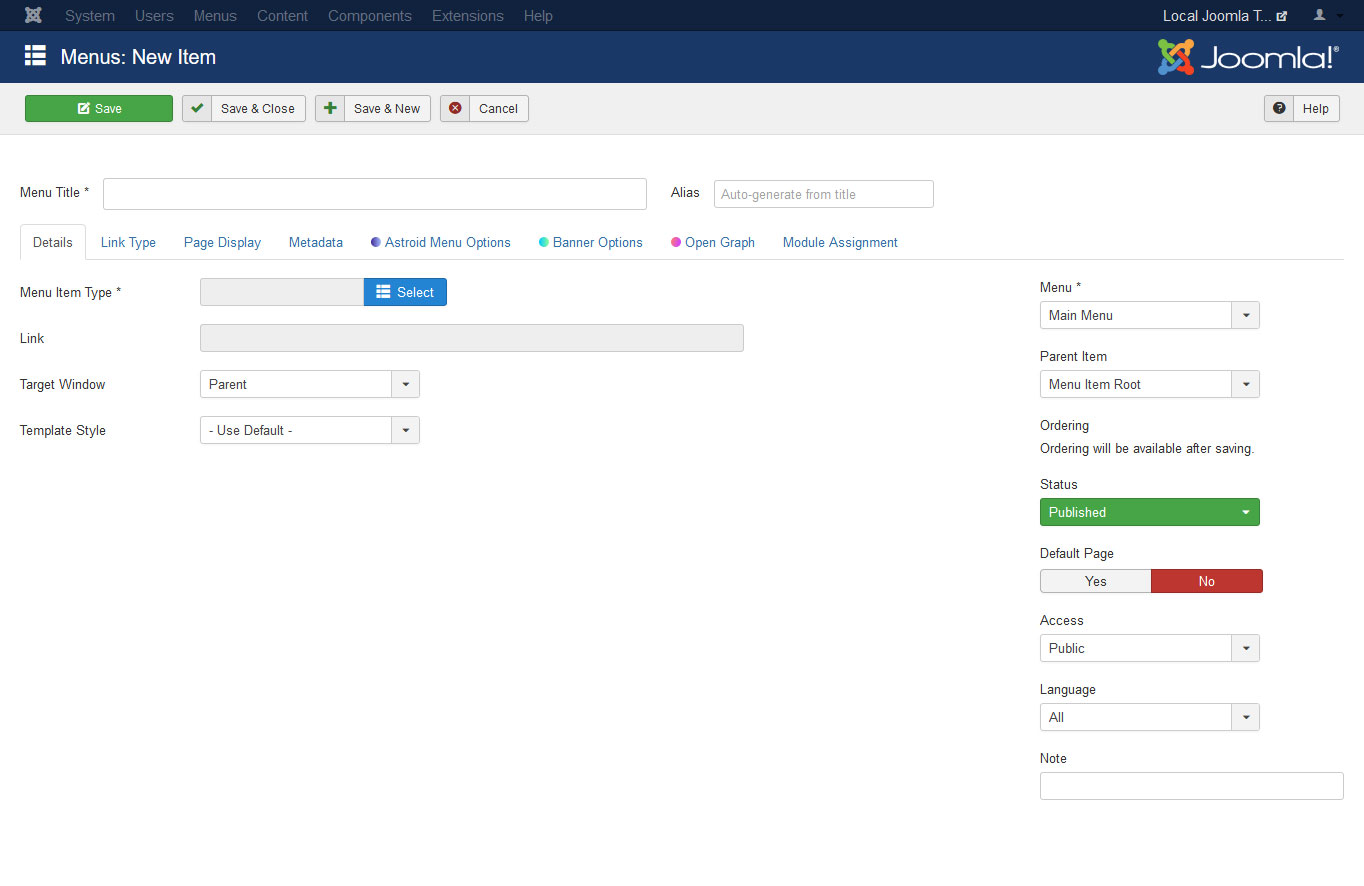
Under Menu Item Type, select Articles > Single Article. Then, under Select Article, click Select and choose the article you want to link to.
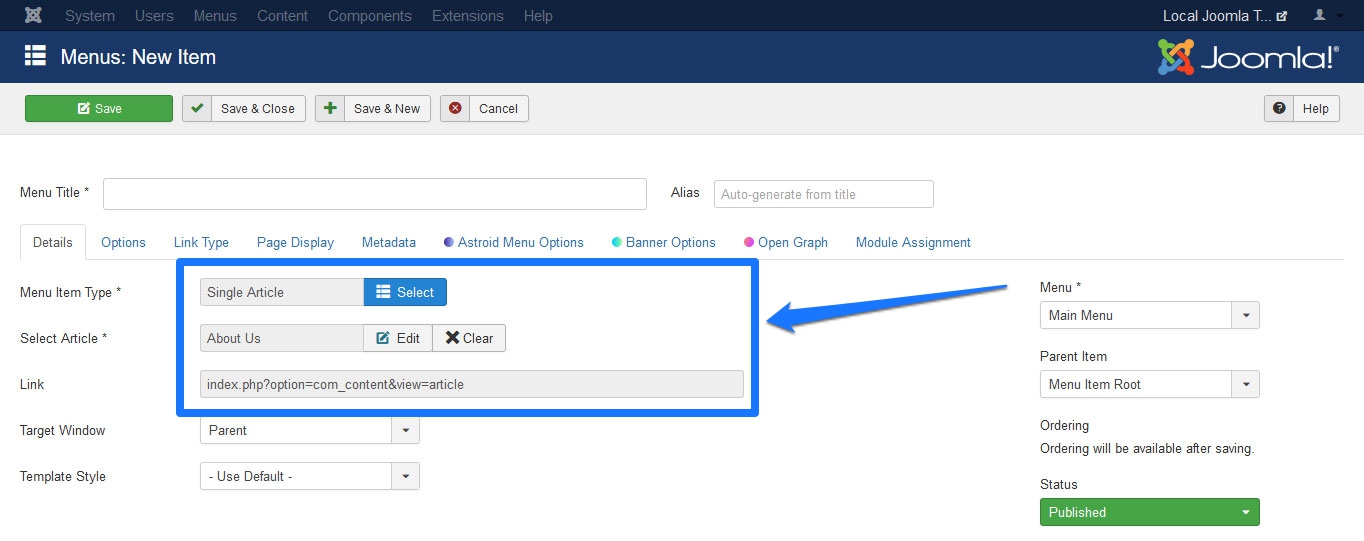
Input a Menu Title at the top (this is the text that will appear in the navigation) and make sure the correct menu is selected on the right. When you save and close, you can use the drag handles on the left to rearrange menu items and change their order.

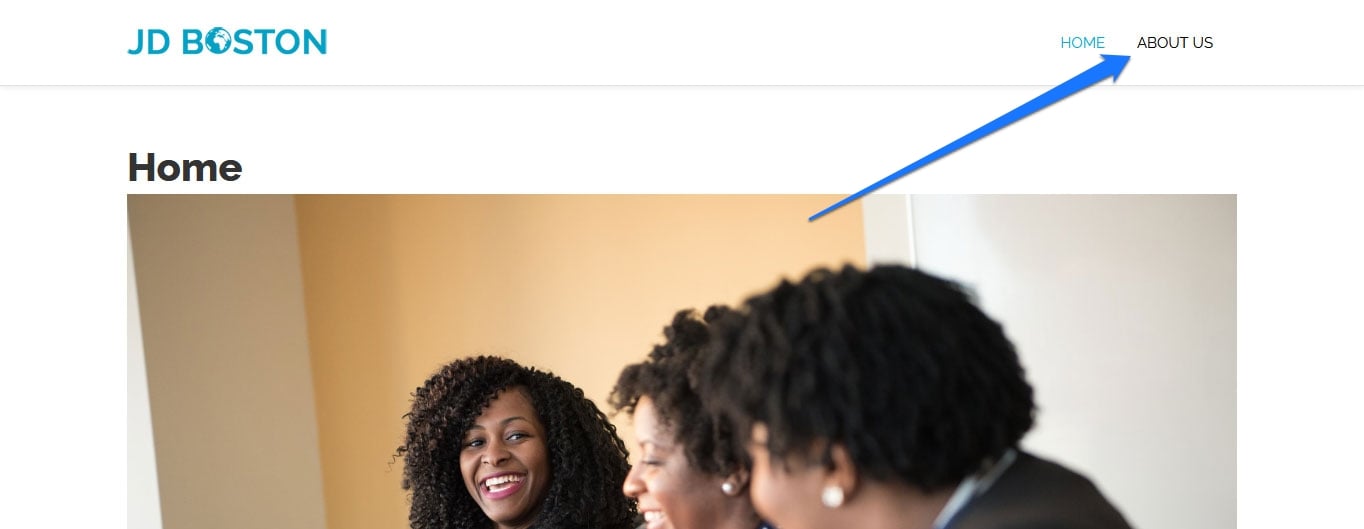
When you go back to your site, the new item should now appear in the navigation.
11. Add a Blog Section
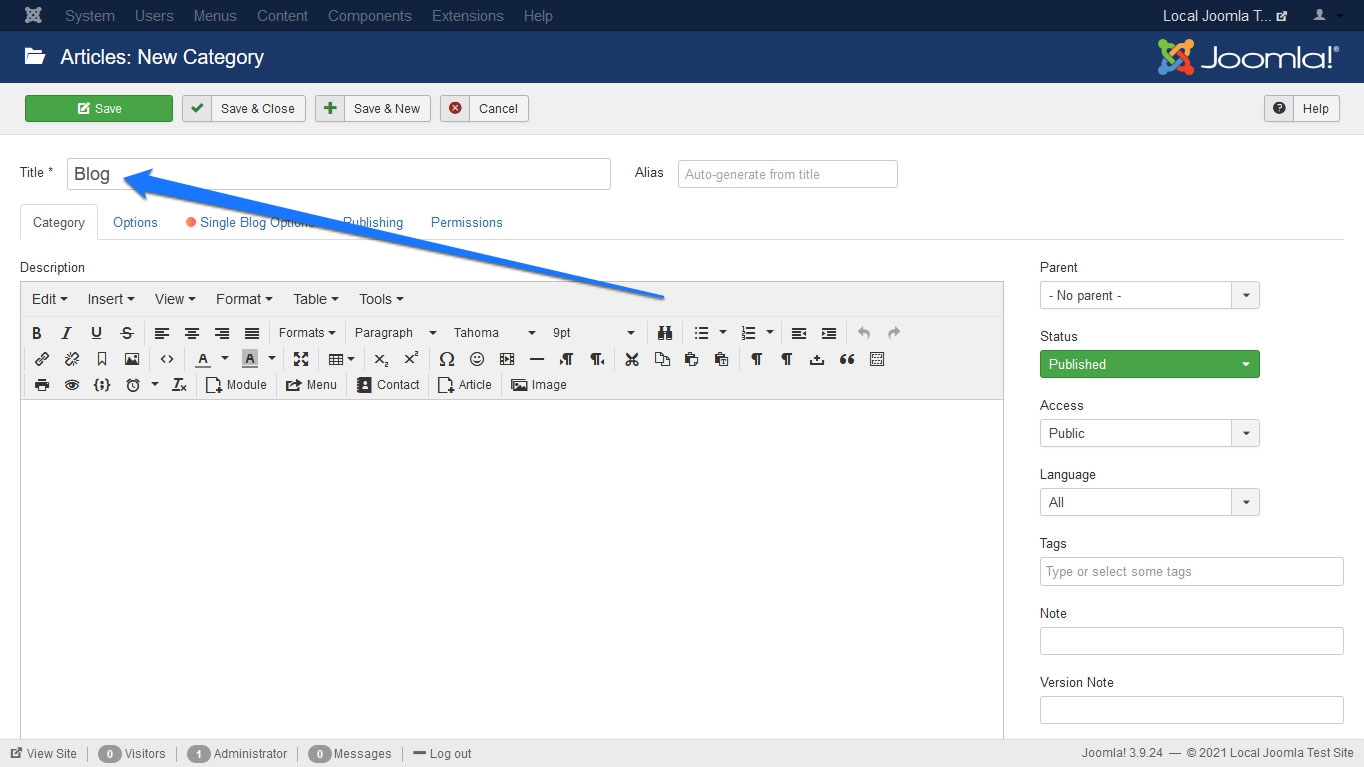
Publishing blog posts in Joomla works similarly to creating pages. The key difference: you assign your blog posts to a category. For that, we first need to create one.
Go to Content > Categories > New Category. Enter a name at the top (e.g. Blog), then save and close.
After that, assign the category to your menu the same way you did with pages. Only this time, under Menu Item Type, choose Articles > Category Blog.
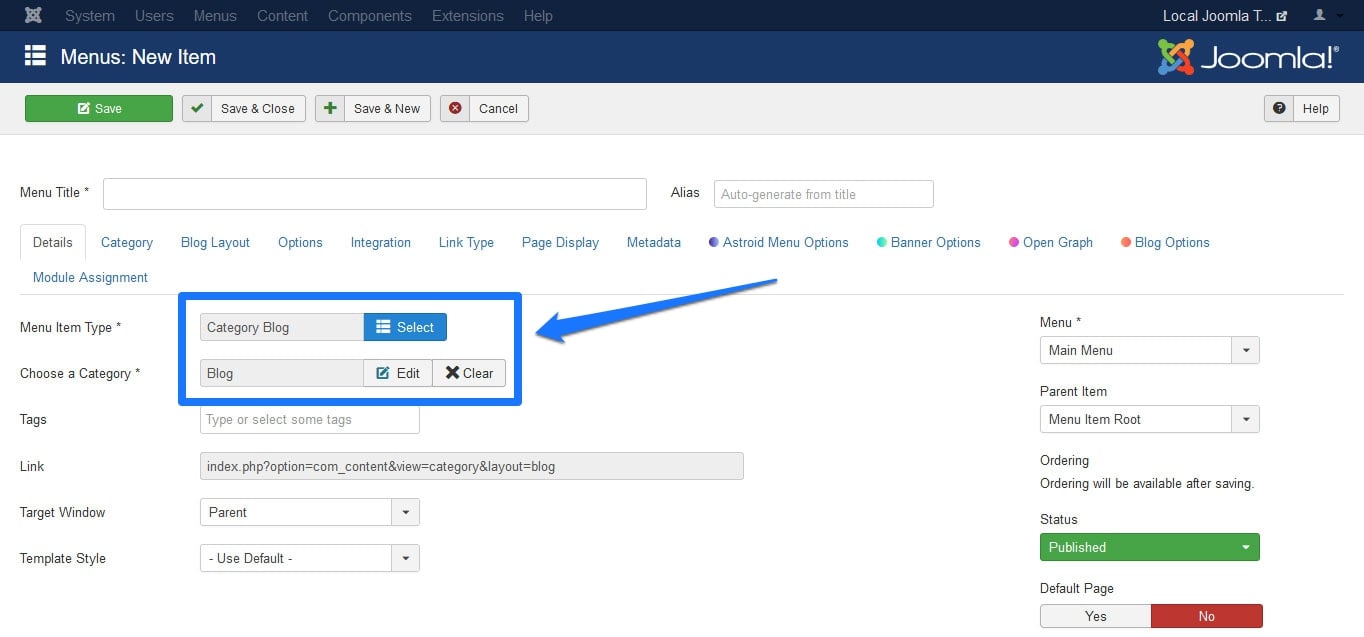
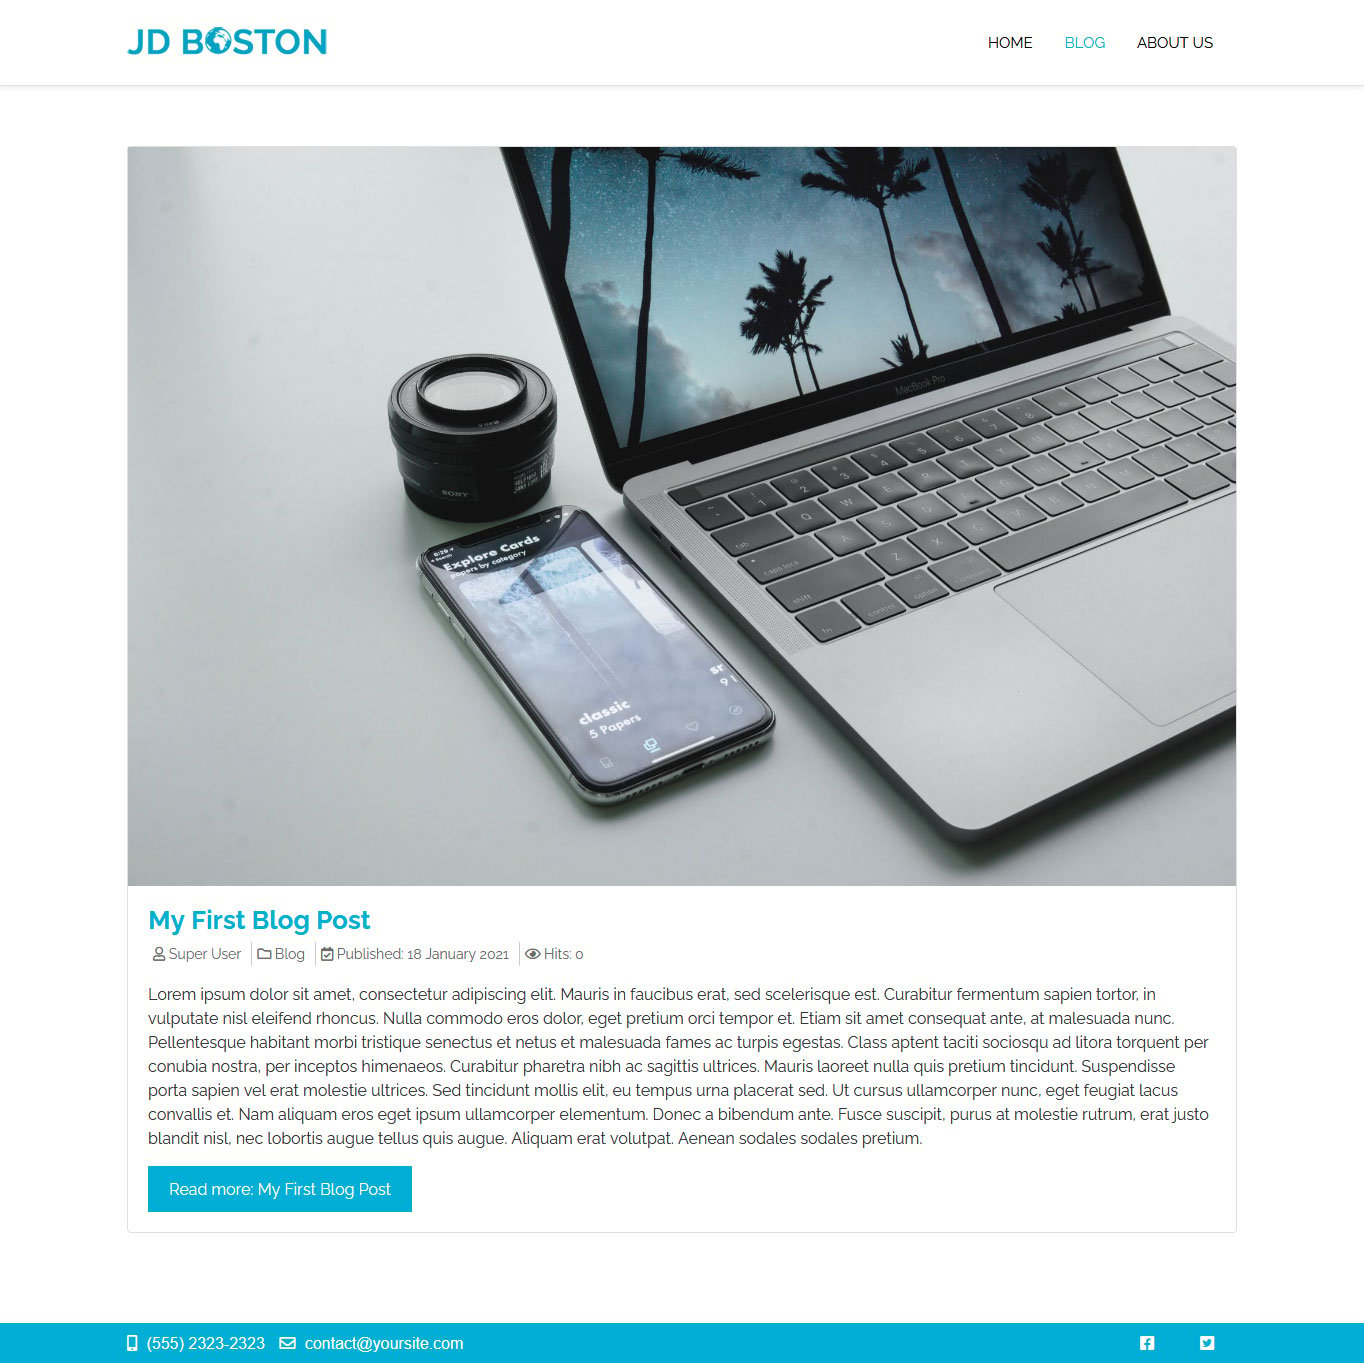
Make sure to select your Blog category under Choose a Category. Then, check that it’s assigned to the right menu and give it a menu title that makes sense. Save and close. From now on, any article that you assign to your Blog category will show up as a blog post under that menu item.
12. Install Extensions
The final core topic in this Joomla beginner tutorial is extensions. With their help, you can bring new features and functionality to your site. You find them in the official Joomla Extension Directory.
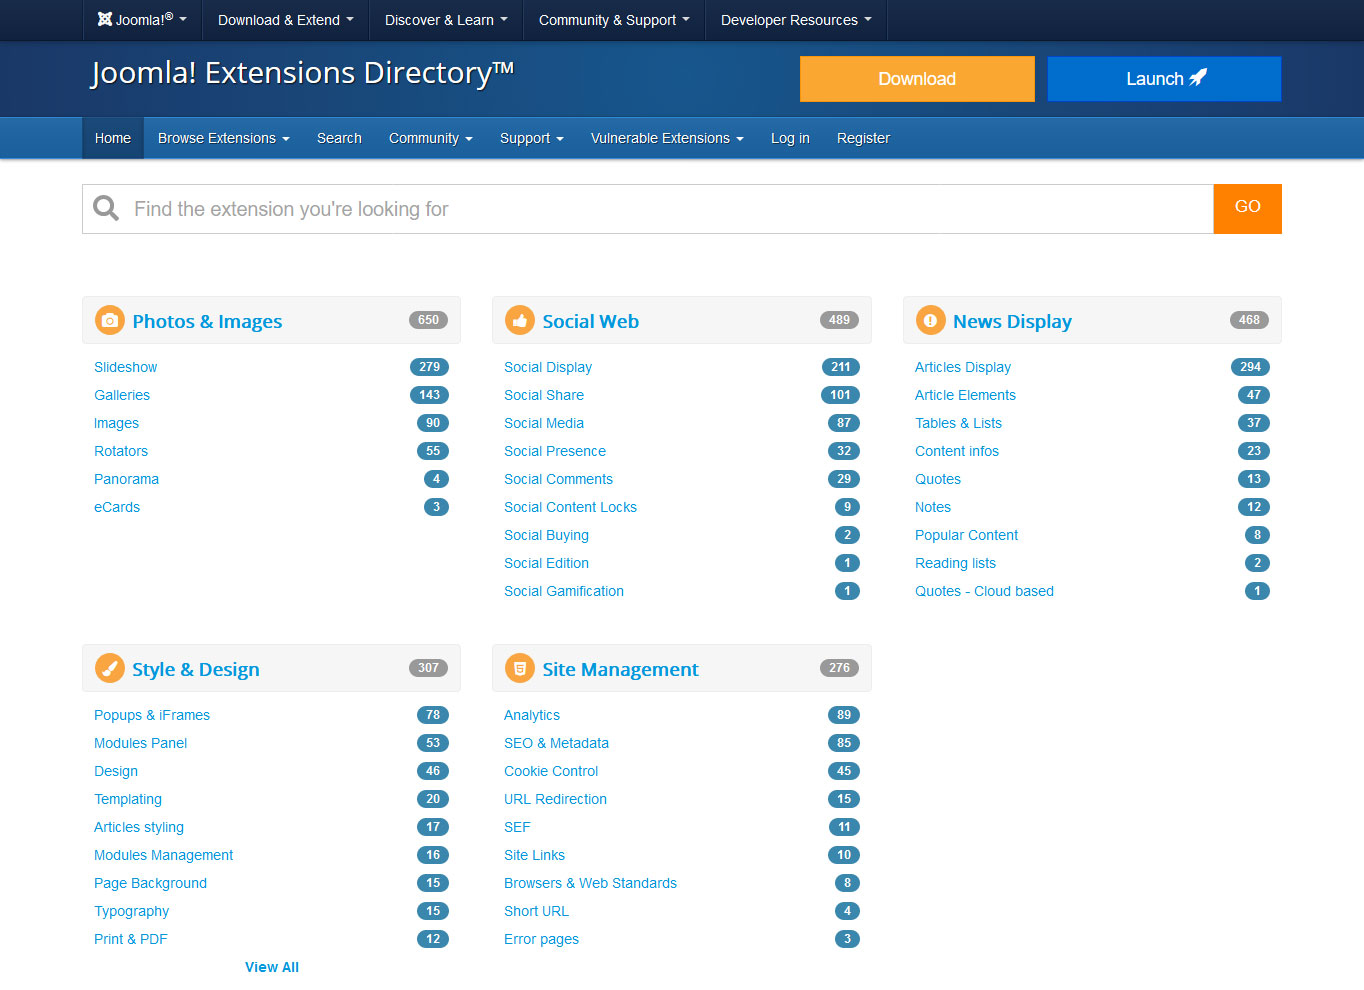
Input a search term, use the categories, or browse to find what you are looking for. With thousands of available extensions, it can be difficult to make a choice. A good starting point is the top-rated extensions page on the JED.
When choosing extensions, keep these tips in mind:
- Check Joomla version compatibility – Make sure the extension supports Joomla 6.0.3 before installing.
- Read reviews and ratings – The JED includes user ratings that can help you gauge quality and reliability.
- Keep it lean – Only install extensions you truly need. Each one adds complexity and can affect site speed.
To install an extension, go to System → Install Panel → Extensions. When you visit this page for the first time, you can enable the Install from Web tab, which gives you access to everything in the Joomla Extension Directory right from your back end.
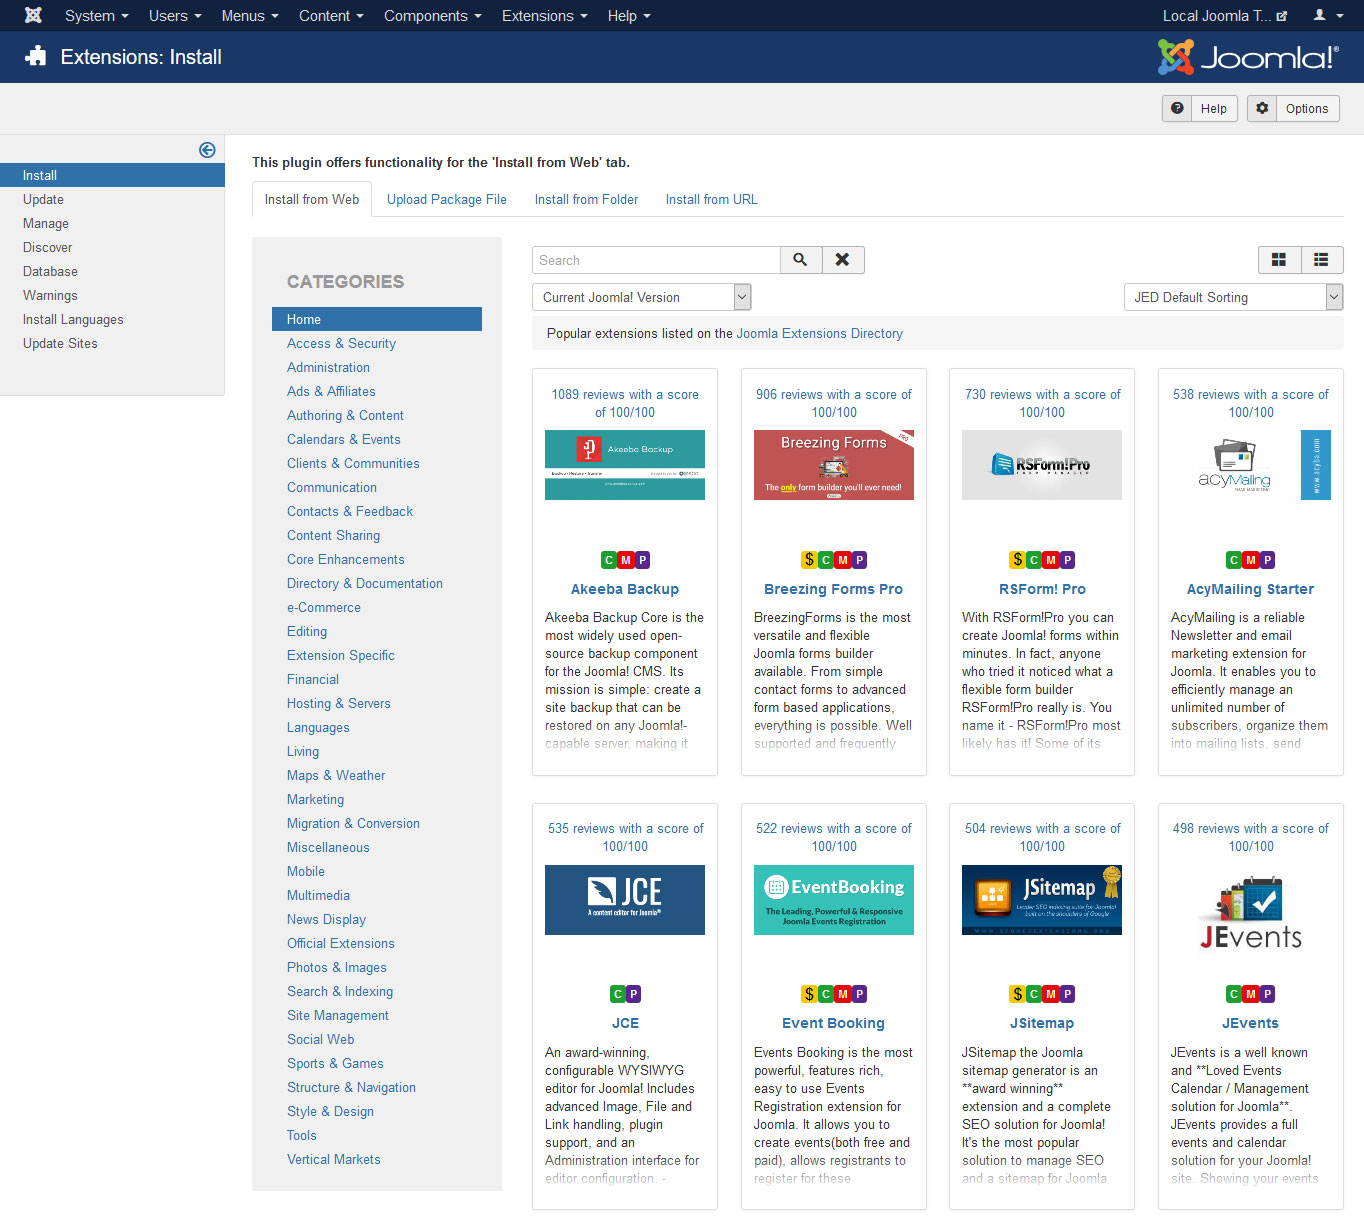
Click on any extension and then hit the Install button to automatically load it onto your site. If this doesn’t work, you can download the extension as a zip file and use the Upload Package File tab, or copy the download URL and use the Install from URL tab.
Note that you may still need to activate certain parts of the extension under System → Manage Panel → Extensions.
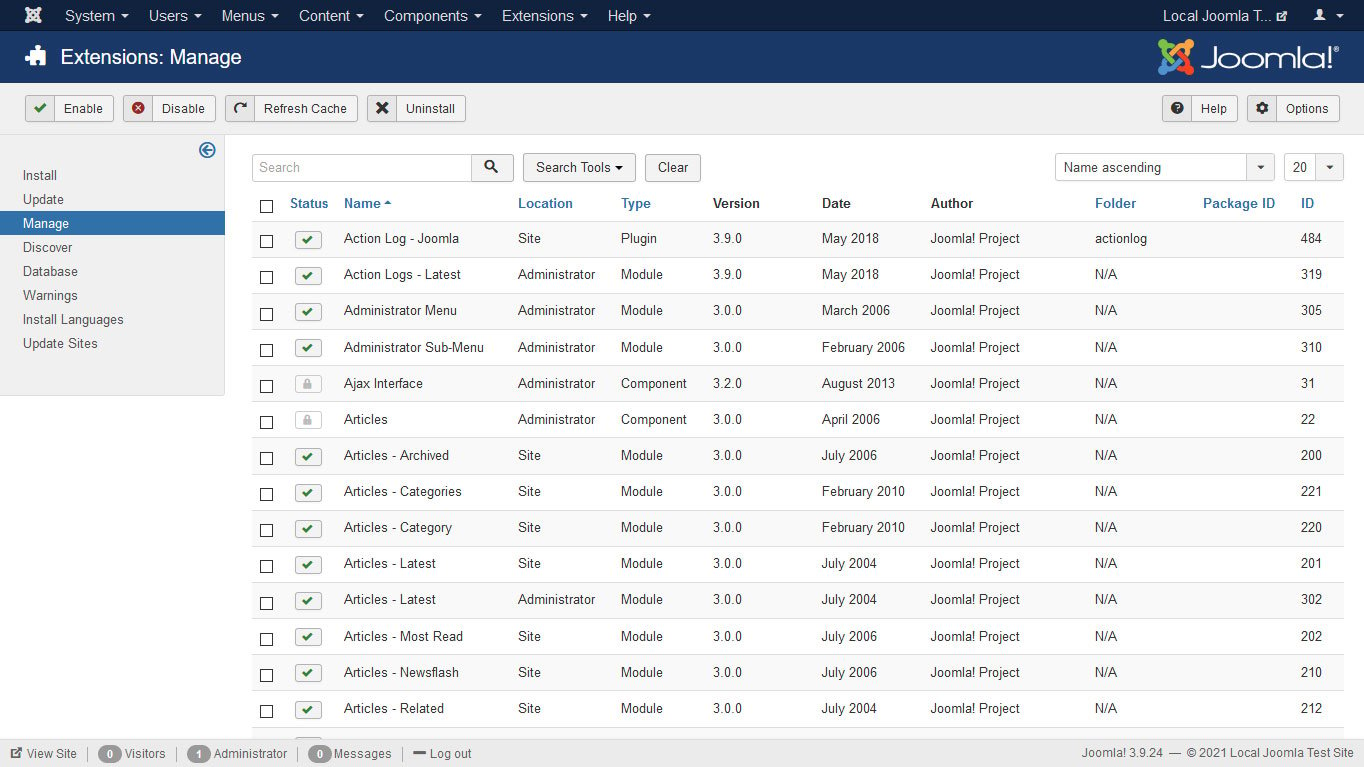
From here, you can also deactivate and uninstall extensions you no longer need. Use the search bar to quickly find your extension by name.
Back Up Your Joomla Site
Before you go too far with installing extensions and creating content, it’s a good idea to set up a backup system. If something goes wrong — a bad extension, a failed update, or even a hack – a recent backup lets you restore your site quickly.
One of the most popular backup extensions for Joomla is Akeeba Backup. The free version handles full-site backups (files and database) and can also be used to migrate your site to a different server. After installation, run the built-in configuration wizard, and you can create your first backup with one click.
As a general rule, take a backup before installing new extensions, updating Joomla, or making major changes to your site. Many hosting providers also offer their own backup tools, which you can use as an additional safety net.
Manage Joomla Users
If you are building a site that will have multiple people managing content, Joomla has a built-in user management system. You can access it under Users in the admin sidebar.
Joomla comes with predefined user groups (such as Author, Editor, Publisher, Manager, Administrator, and Super User), each with different permission levels. You can:
- Create new user accounts and assign them to appropriate groups
- Customize group permissions under System > Global Configuration > Permissions
- Control who can create, edit, publish, or delete content
For a single-person site, the Super User account you created during installation is all you need. But as your site grows, having properly configured user roles keeps things organized and secure.
Joomla Tutorial: Final Thoughts
Joomla is an excellent tool to build a website with. The CMS is powerful, flexible, widely extendable, and free of charge.
In this Joomla tutorial, you have learned how to install the platform, find your way around its back end, change your site’s design, add content, create a blog, and install extensions. We’ve also covered essential housekeeping tasks like configuring SEO settings and setting up backups.
Of course, there is a lot more to learn. However, you now know enough about how to use Joomla to start exploring on your own. If you want to dive deeper into the platform, here are some recommended resources:
We look forward to seeing what you will create!
Joomla Tutorial FAQ
Is Joomla free to use?
Yes. Joomla is open-source software released under the GNU General Public License. You can download, install, and use it at no cost. However, you will need to pay for web hosting and a domain name to put your site online.
Is Joomla good for beginners?
Joomla has a steeper learning curve than some other CMS platforms like WordPress. However, with a tutorial like this one and some patience, beginners can absolutely build a functional website. Joomla’s built-in features – like user management, multilingual support, and flexible content organization – give you more out of the box without relying on third-party plugins.
What is the difference between Joomla and WordPress?
Both are open-source CMS platforms. WordPress is more popular and has a larger ecosystem of themes and plugins. Joomla offers more built-in functionality (like advanced user management and multilingual support) without needing extra extensions. WordPress is generally considered easier for complete beginners, while Joomla offers more flexibility for complex sites. For a deeper dive, check out our CMS comparison.
Can I build an online store with Joomla?
Yes. While Joomla is not an ecommerce platform by default, you can add shopping cart functionality through extensions. Popular options include HikaShop and VirtueMart. Note that as of early 2026, VirtueMart does not yet support Joomla 6 – a new version is in development.