As a website owner, you should definitely learn how to add a contact form to WordPress.
Your website is not an anonymous entity. Most people want to know and occasionally interact with whoever is behind the content they read.
For that reason, in this article, you will learn how to add a contact form to your WordPress website. The post will first go over the reasons why it’s a good idea and then you will get a step-by-step guide on how to include a contact form on your site via few plugins that we selected.
We will also talk about how to change the design of your form and implement spam protection. What’s more, we will examine contact forms and personal data protection.
Table of Contents
- Why Should You Use a Contact Form on Your WordPress Site?
- How to Add a Contact Form With Contact Form 7
- How to Add a Contact Form With WPForms
- Next Steps for Your Contact Form
- To Sum Up: How to Create Contact Form in WordPress
Let’s get started…
Why Should You Use a Contact Form on Your WordPress Site?
Before getting into how to let’s examine why it’s necessary. There are many good reasons to use a contact form on your site instead of posting your email address directly for example.
- Protection from email spam — Spam is a pest. You will notice it quickly when you have a WordPress website that uses blog comments. One thing spammers do is automatically scan websites for unprotected email addresses so that they can add them to their mailing lists. Contact forms keep that from happening by giving visitors a chance to get in touch without publishing your address online.
- Ask for the right information — People who get in touch with you don’t always send all the information you need. With a contact form, you can specifically ask for it upfront. It also gives you a way to filter inquiries, for example by type. This makes your life easier and reduces a lot of back and forth.
- Inform your clients — Conversely, contact forms can also act as the first point of information. You are able to include information for callers to let them know about the expected response time and steps they can take in advance to address their inquiry. This reduces the likelihood of multiple emails from the same impatient person.
Convinced that contact forms are useful? Then let’s get to the practical part of this tutorial.
How to Add a Contact Form With Contact Form 7
There are many WordPress plugins out there to add a contact form to your site, both free and premium. For the following tutorial, we will be using Contact Form 7 and WPForms.
The plugins are available for free in the WordPress directory and have been consistently among the most popular plugins of all time (in fact, at the time of this writing Contact Form 7 in the first place). In addition to that, they’re easy to use, have a nice feature list and sensible add-ons.
Let’s start with Contact Form 7.
Step 1. Install Contact Form 7 Plugin
Installing Contact Form 7 is as easy as any other WordPress plugin. Simply log into your site, go to Plugins > Add New and type its name into the search box.
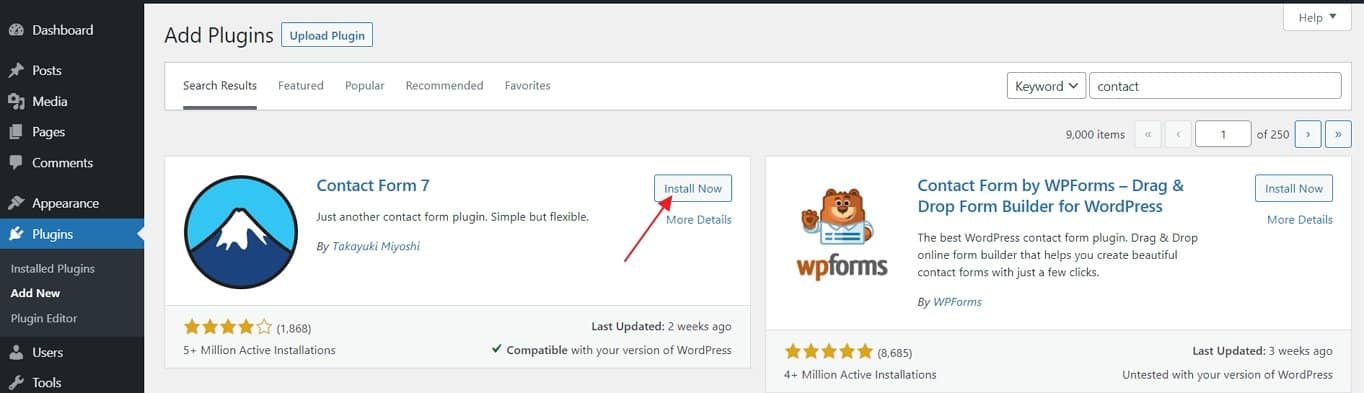
It should appear in the first place. Click on Install Now to download it on your site. When it’s done, click Activate to start using the plugin.
Step 2. Create Your New Contact Form
After the installation, you will find a new menu item named Contact in your WordPress sidebar. Clicking it gets you to this screen.
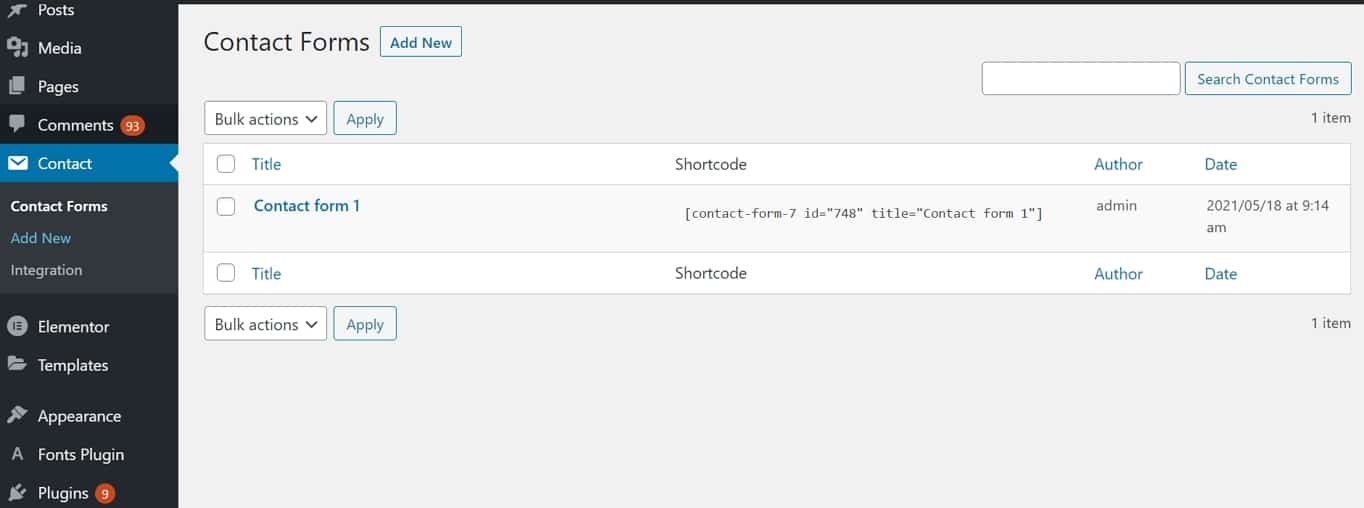
You will find a list of all contact forms on your site. It includes a sample form that you can, theoretically, use right away. Either click it to start editing or hit Add New at the top of the screen. Both will get you here:
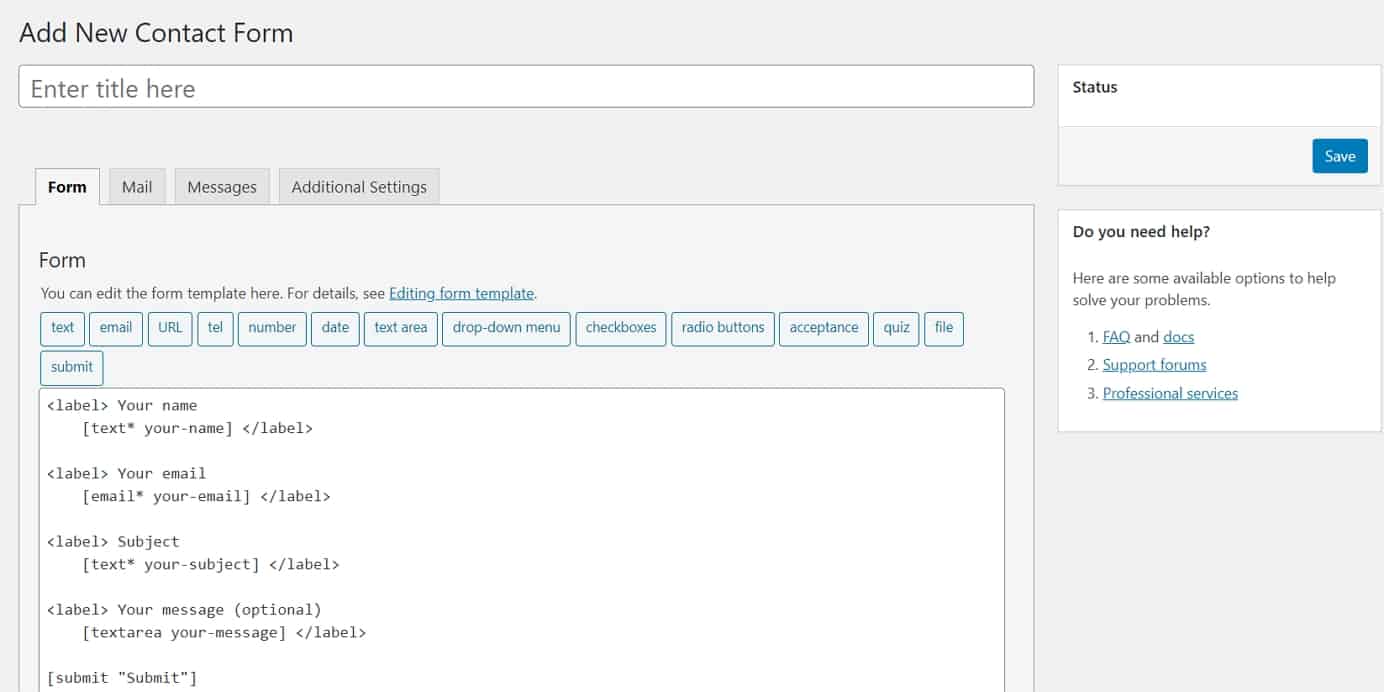
It looks a bit cryptic at the beginning, but don’t worry – the plugin comes with tools to generate code automatically, so you don’t have to do any of the coding yourself.
Step 3. Configure Your Form
At the moment, the default form we have in the backend will look like this on the page.
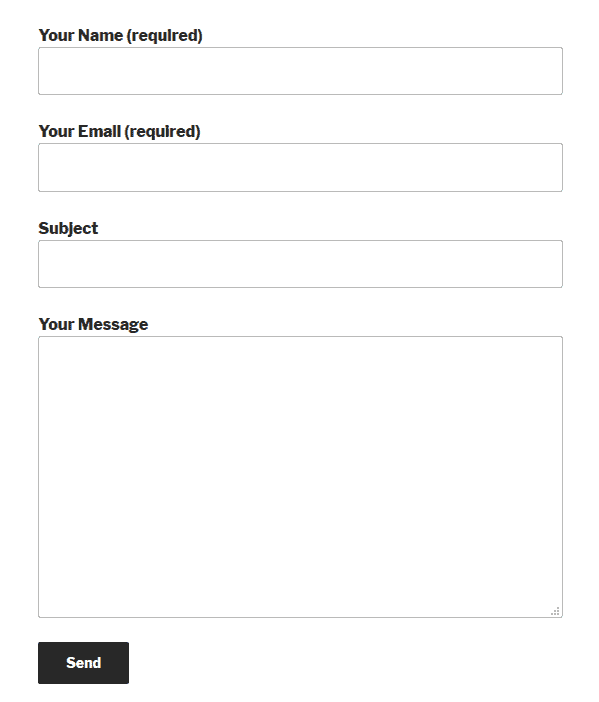
It’s all standard. Let’s say that you want to add a drop-down menu to choose the purpose of getting in contact with you. That way, you are able to immediately see the messages to which to give priority.
To do so, you first need to place the cursor where you want the menu to appear in the contact form. In this case, that’s between the email address and subject.
Click on the drop-down menu in the toolbar on top. It gets you to this menu:
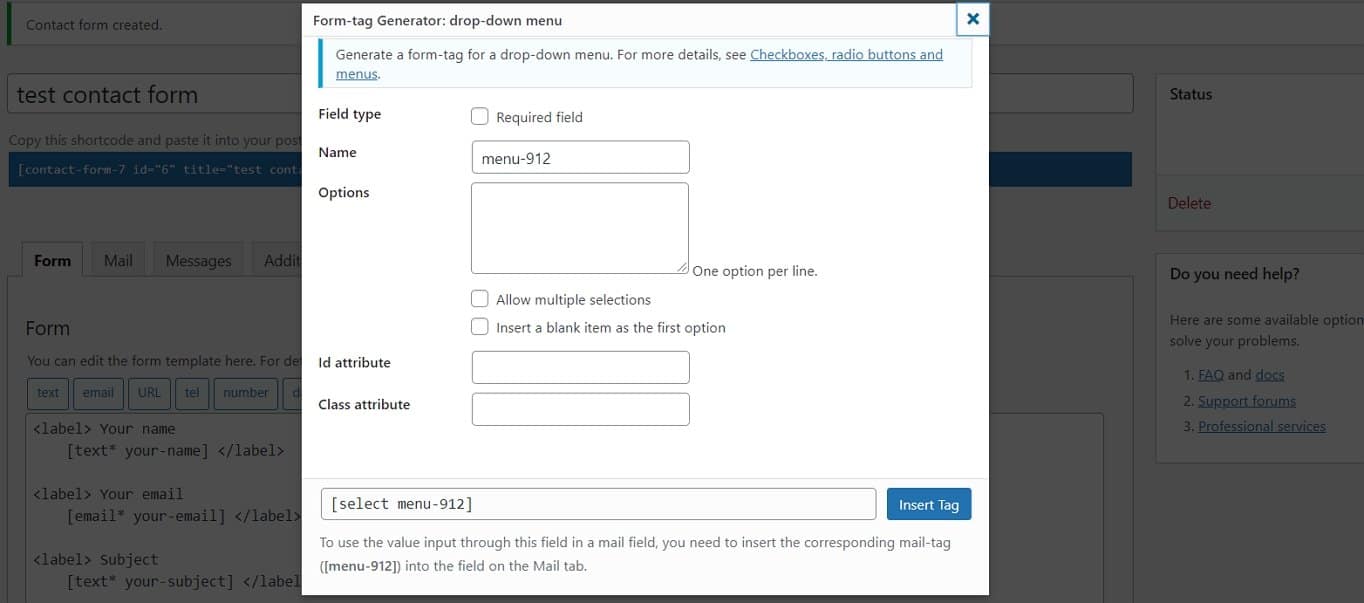
Here’s how to fill in different fields:
- Field type — Choose whether the field is required to submit the contact form or not.
- Name — This means the name used in the tag. It won’t appear for visitors but makes it easier for you to remember the purpose of the tag and also configure the email sent to your account later.
- Options — Input the options available for visitors using the drop-down menu. Put one per line. You also have the option to allow multiple selections and use a blank item as default.
- Id/Class attribute — In this place you can assign a CSS class or id to the field. This is very useful for custom styling. We will talk about it later.
Here’s how we filled it out:
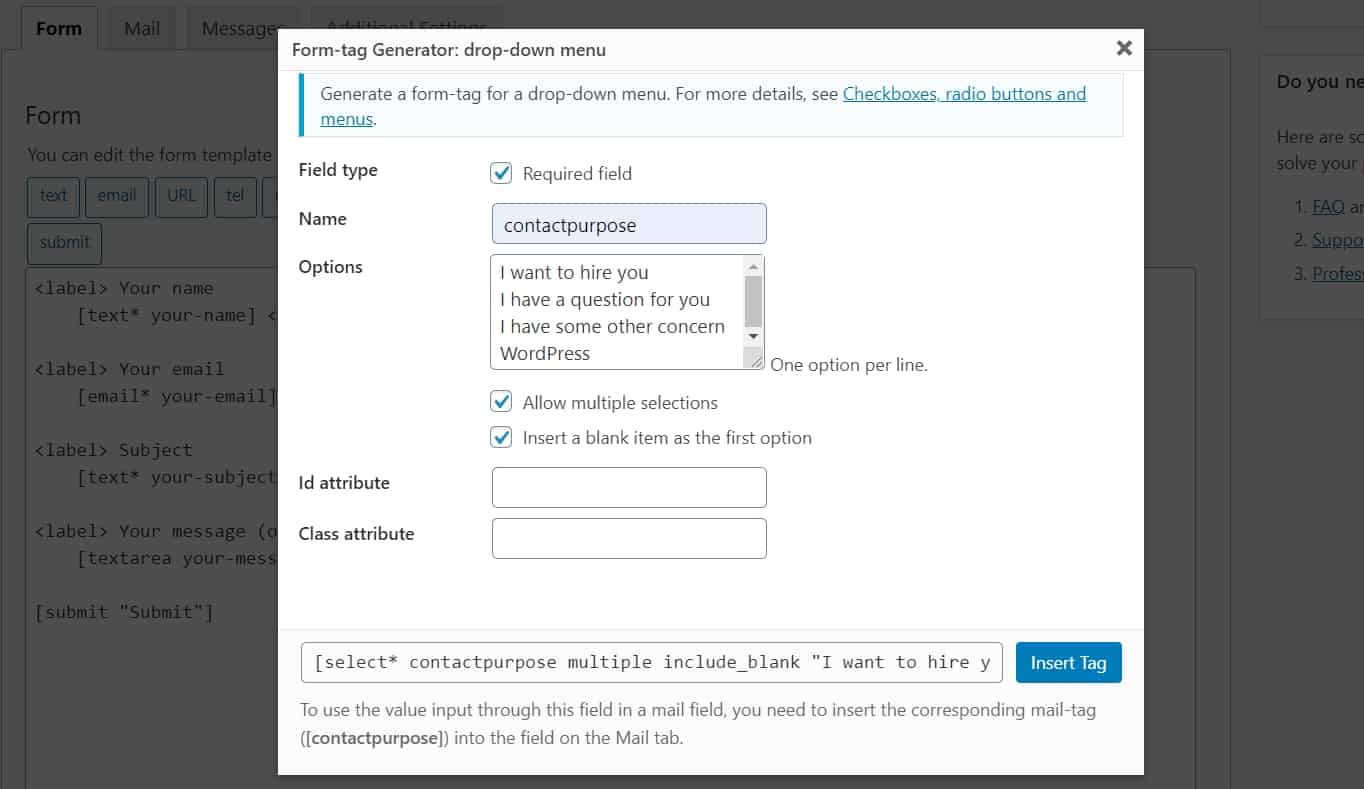
When you are satisfied, click on Insert Tag to put it into the form.

Now all that’s left is to add a label. That is the text which accompanies the contact form field to explain what it does. Simply copy and paste the existing code from other fields and then adjust it to your needs.

Step 4. Edit Email Settings
Next up, you have to configure the email sent to you from the contact form. You can do this under the Mail tab at the top.
You will find the fields pre-filled with similar tags as the contact form earlier. It also provides you with available field tags including any new ones you created earlier (if you have saved the form). You can use those to customize how you will receive messages from your contact form.
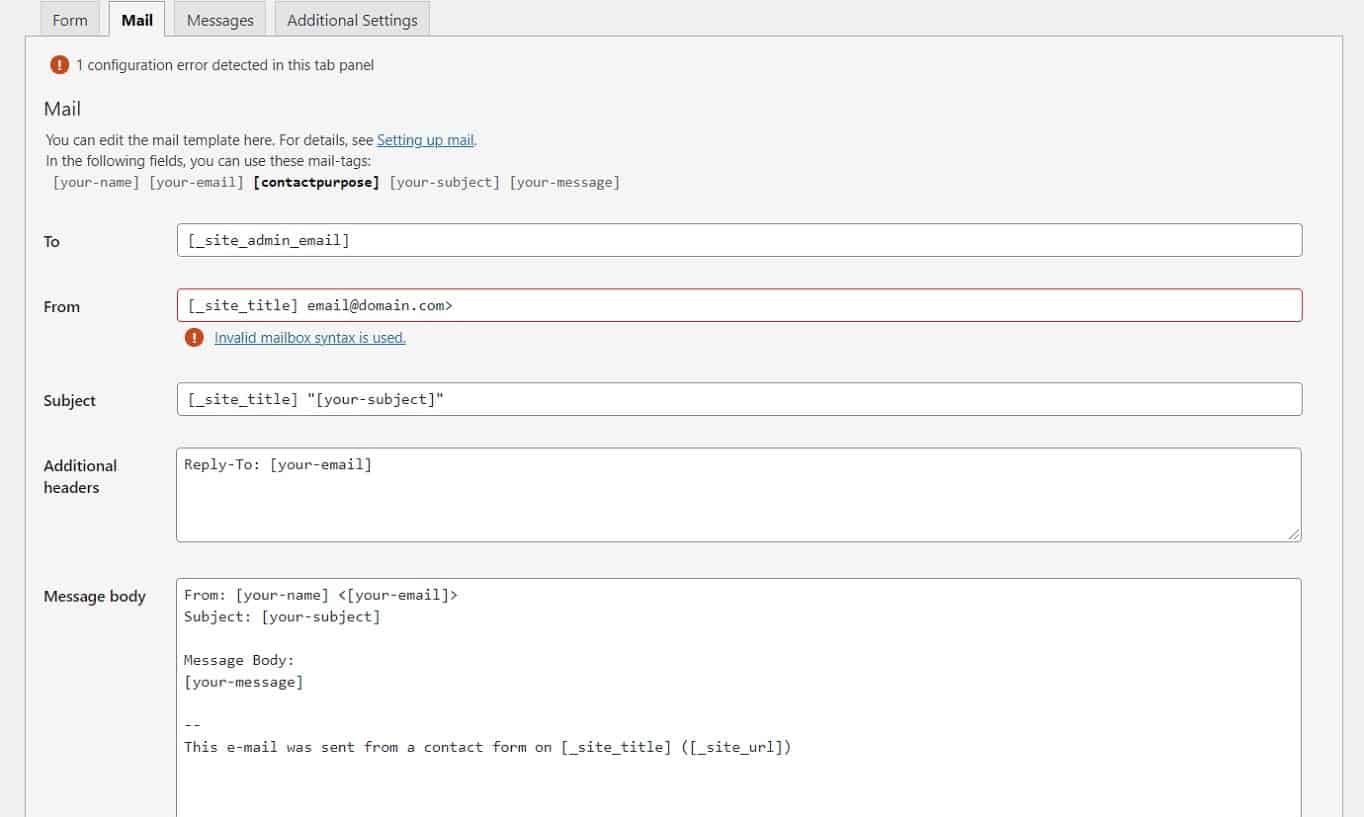
Here’s what each field means:
- To — The email address to which the messages will be sent. You can usually leave this as is.
- From — Sender of the email. By default, it is set to the name of the person using your contact form.
- Additional Headers — Space for additional message header fields. The standard settings send your response to the email of the person contacting you, not the email it came from (i.e. your site) when you hit Reply. It’s also possible to put addressees to CC or BCC in there.
- Message Body — The body of the email you will receive.
- Exclude lines with blank mail-tags from output — When you check this, if any of the used tags are empty, the plugin will exclude them from the message.
- Use HTML content type — By default, the message is sent in plain text. Check this box to use HTML instead.
- File Attachments — If your form allows file uploads, the tags for these files belong here. You can also use it to attach files hosted on your server.
- Mail (2) — An additional mail template often used as an autoresponder. Check to activate.
The standard options are pretty good. The only thing we need to change for our example is the subject line.

Using the format above, you can now set up a filter in your mail program to sort messages by subject line, giving priority to business inquiries.
Step 5. Add a Form Messages
Next up is the Messages tab. You have the ability to configure the messages your visitors might encounter while using the form.
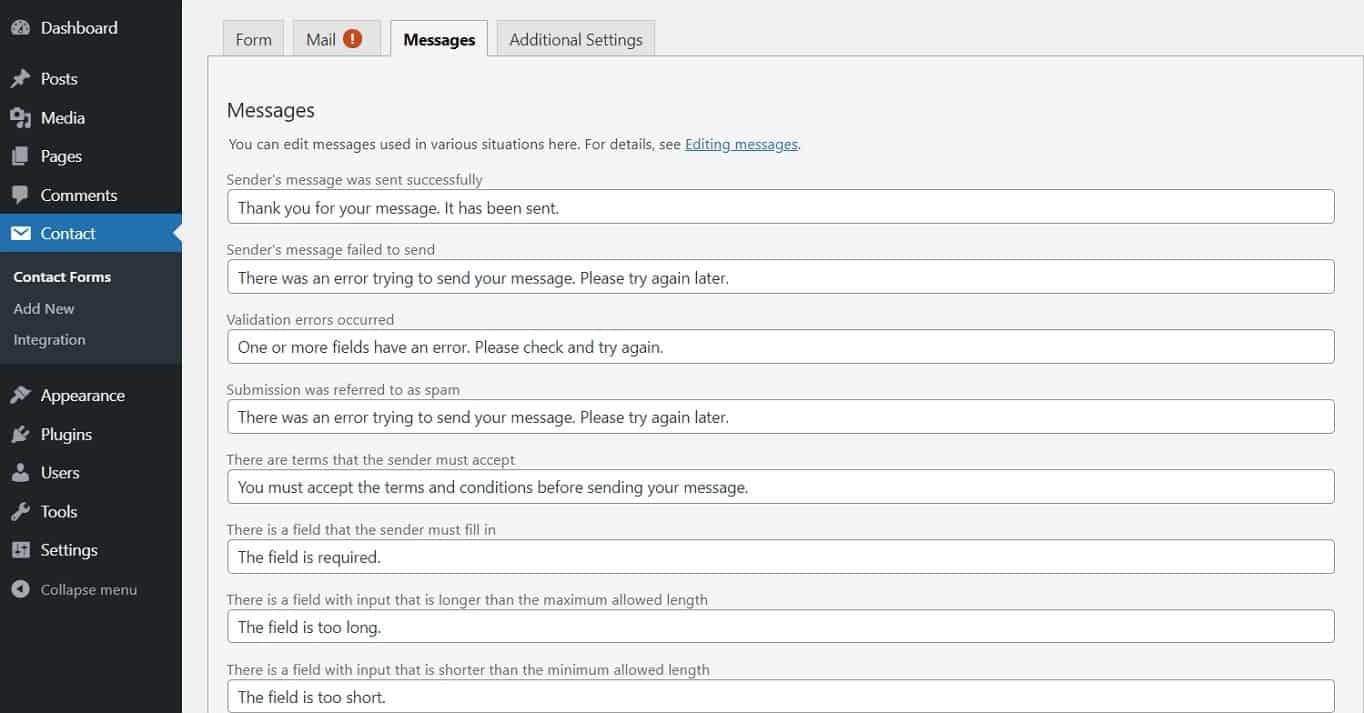
These are error messages, success messages, or just hints on how to use the form correctly. We find that these are already pretty good so we usually leave everything as is. If you have a reason to change any of them (for example, to fit the tone of your website), feel free to do so.
Step 6. Customize Additional Settings
Finally, you get to the additional settings.
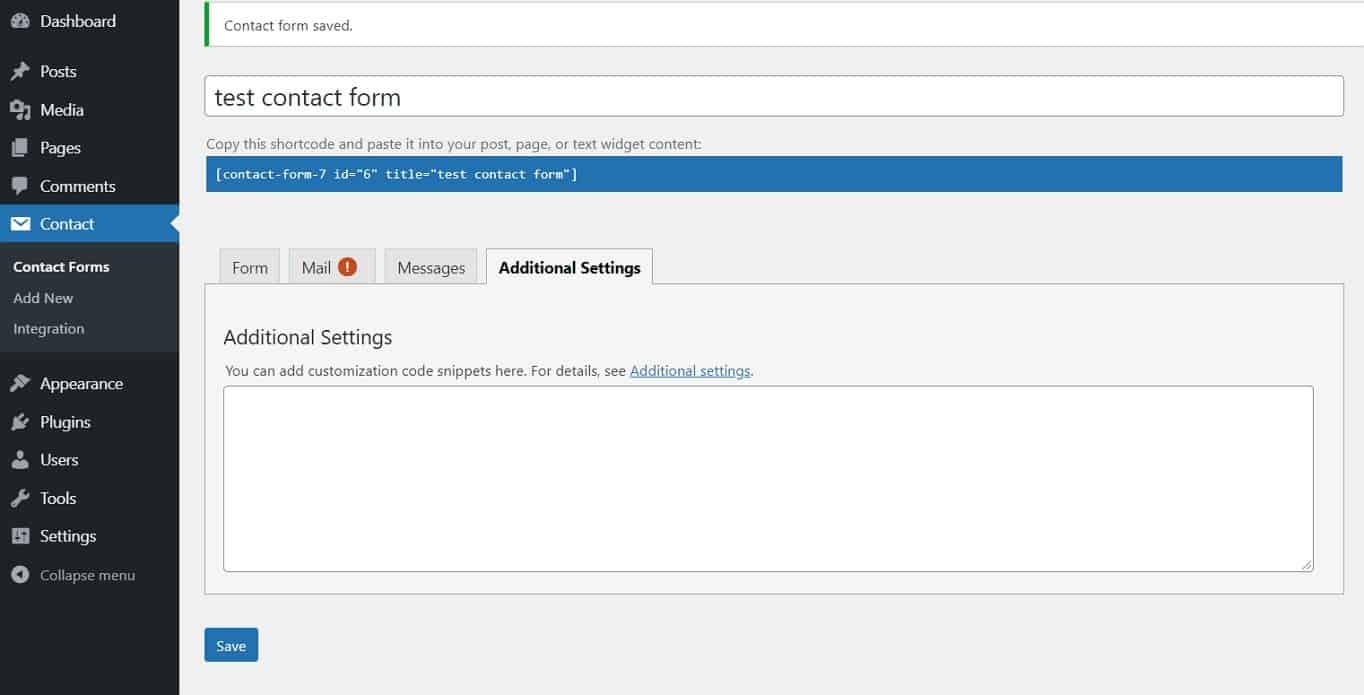
By default, these are empty.
You can do different things – from limiting the ability for only logged-in people to submit the contact form to set the form to demo mode for testing purposes. It’s not important for our purposes but you can find all the different options in the documentation.
Step 7. Add The Form To Your Website
Now that you are done configuring the form, it’s time to get it on your site. The first thing you need to do is save the form.
Before you do that, you might want to add a name to the top. This will make the form more distinguishable in case you create several ones.
Once you saved your form, a shortcode will appear on the screen:

You will use it to place the form wherever you want.
The first thing you want to do is to mark and copy it. Once it’s done, go to the page where you want to place the form. For example, you might simply create a new page and name it Contact. Paste the shortcode into the WordPress editor.
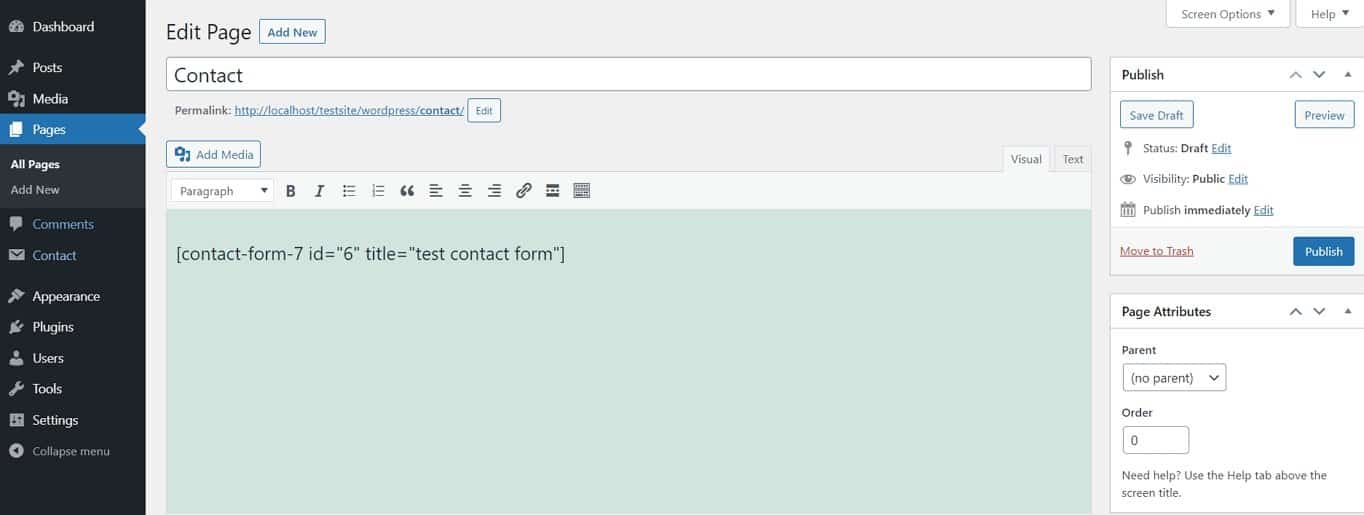
When you now publish the page and go to the front-end:
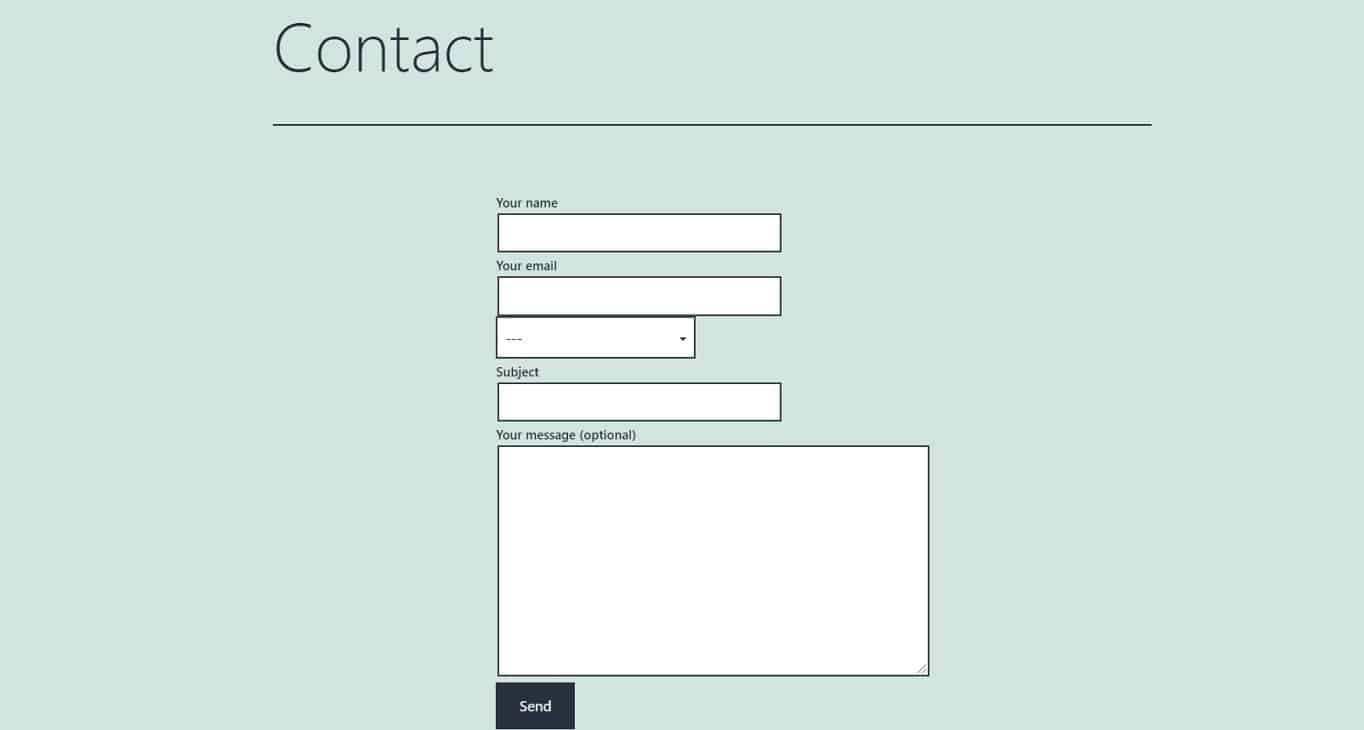
There it is. Notice the drop-down menu we created earlier. It is now part of the contact form as needed.
Simple, right? Plus, you can use the same method to place the form anywhere else.
How to Add a Contact Form With WPForms
Now that we’ve covered how to create a form with Contact 7, it’s time to move on to WPForms.
Step 1. Install WPForms Plugin
This step should already be familiar to you from above. Go to Plugins -> Add new. Type in WPForms and it should appear in your search results.
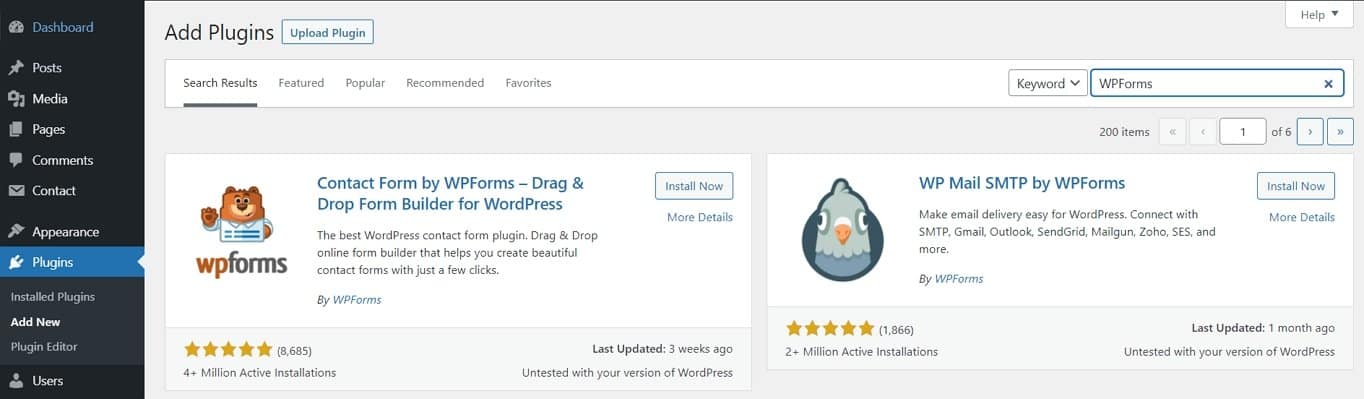
Click on “Install Now” to download it and activate your plugin.
Step 2. Create New Contact Form
After the installation is done and you have activated the plugin you should have a new menu item “WPForms” on your sidebar and also see the below screen:
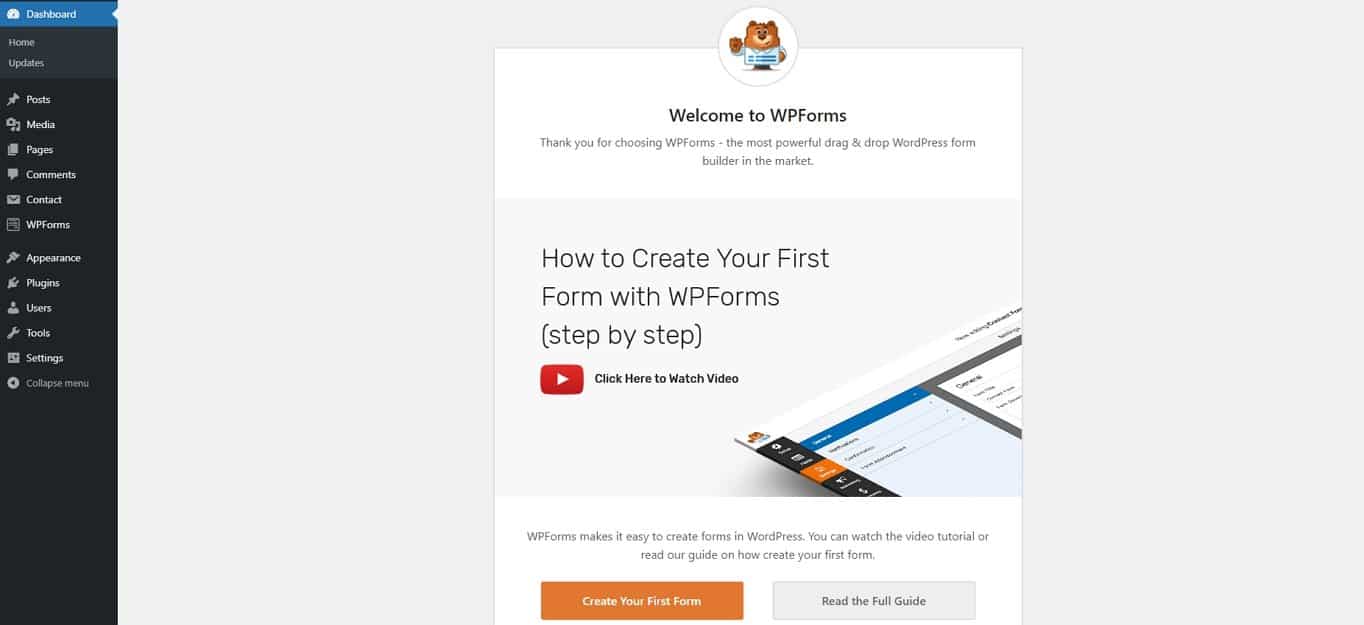
The easiest way to start creating a new contact form is to click on the orange button “Create Your First Form”. Then you will be directed to the setup page where you have to fill in your form name and select a template.
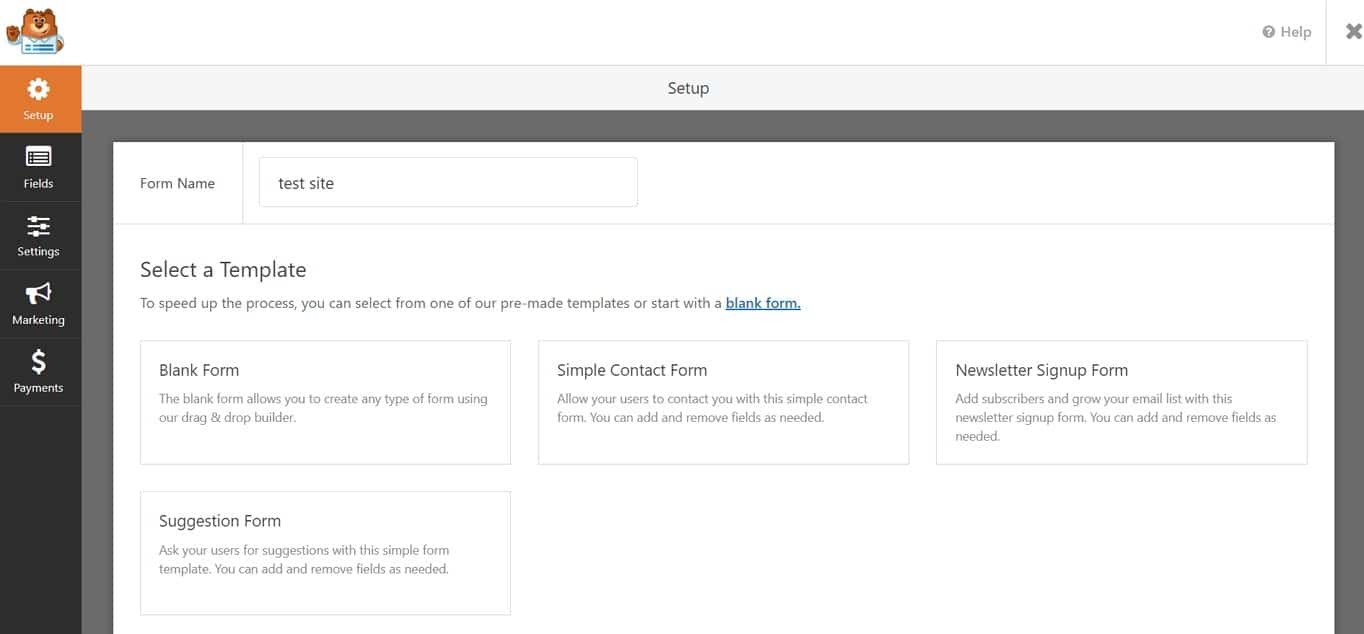
There are many templates to choose from. For example, choosing “Blank Form” lets you create a contact form from scratch and you can decide how you want your form to look like.
In this example, however, we’re going to use the “Simple Contact Form” template.
Step 3. Edit Your Form
To start editing your site, hover on the chosen template and click on “Start Creating”. You will then be redirected to the editing screen.
In our example, the editing screen looks like this:
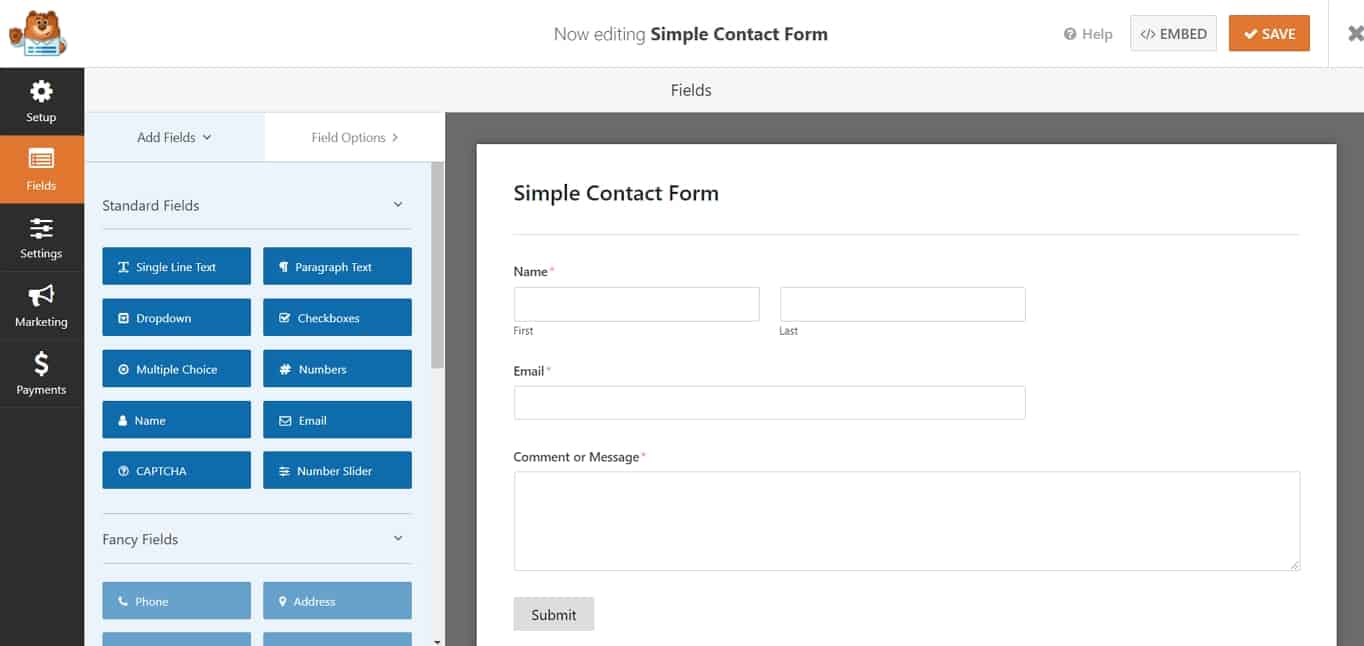
As you can see, the contact form is already created for you. All you need to do is to customize it according to your needs.
The free version of WPForms only allows you to use the Standard Fields option. To get access to Fancy Fields, you’d have to upgrade your plugin.
Customizing with WPForms has been made really simple by using a drag-and-drop editor. For example, to add a dropdown menu to your contact form, just drag it to the location on your form where you want it to appear (we dragged it between Email and Comment or Message) and on the left side of the screen you can start customizing your dropdown menu:
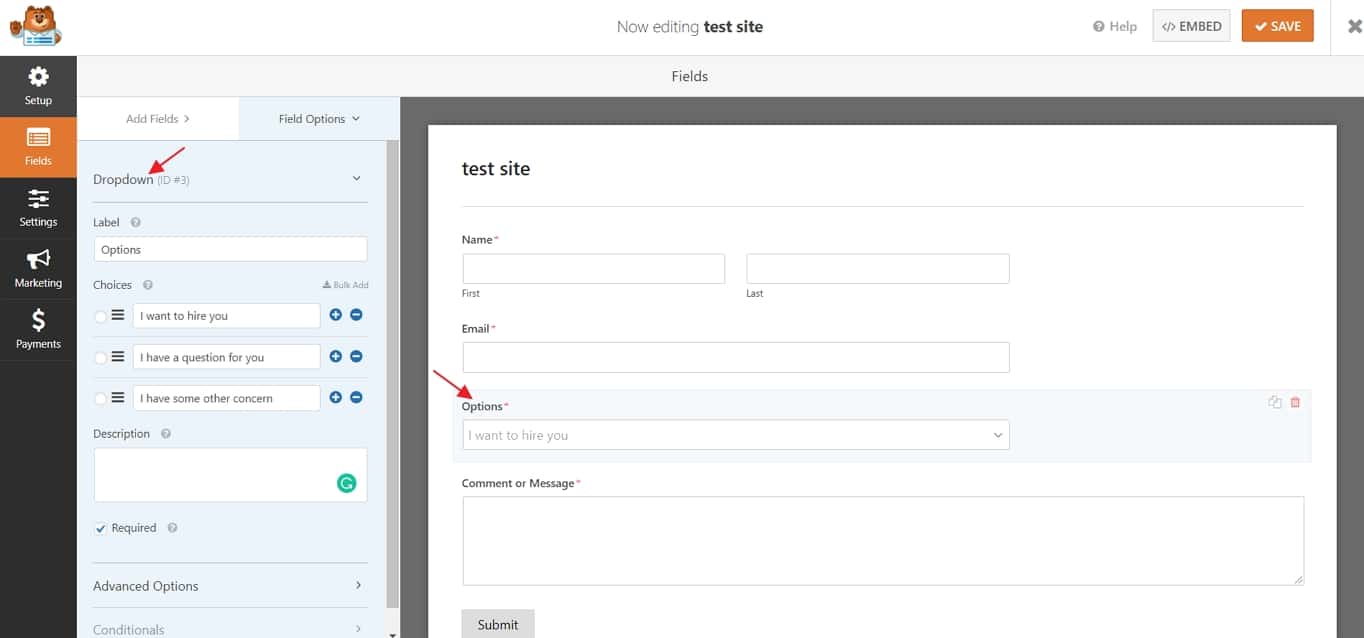
Change the “Label” name and do the same with “Choices”. Click “Save” once you’re done.
The same logic applies to other selections too.
Step 4. Check Your Settings
Once you’re happy with your contact form edits, it’s time to check your settings.
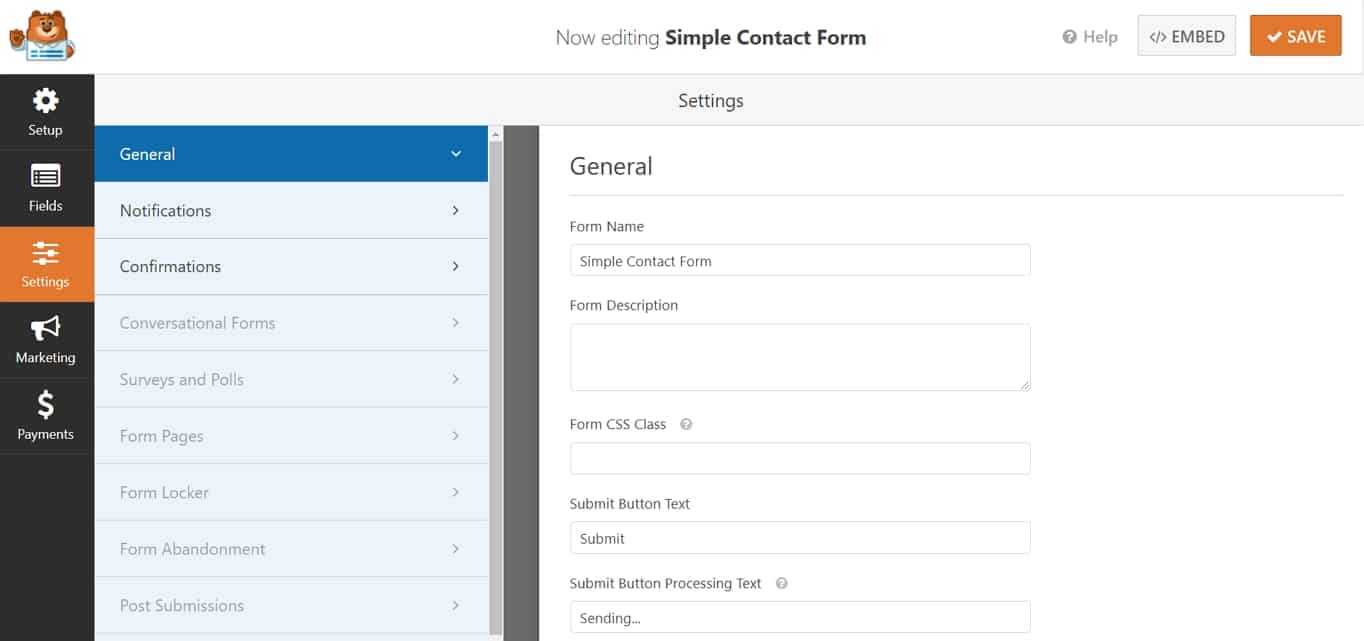
General Settings
Under general settings, you can edit your form name, add form CSS class, edit button text, and so on. Basically, as the name suggests, all the general settings are handled there.
Notifications
Would you like to automatically send out emails once your form is submitted?
If so, then the “Notifications” tab is the next stop for you.
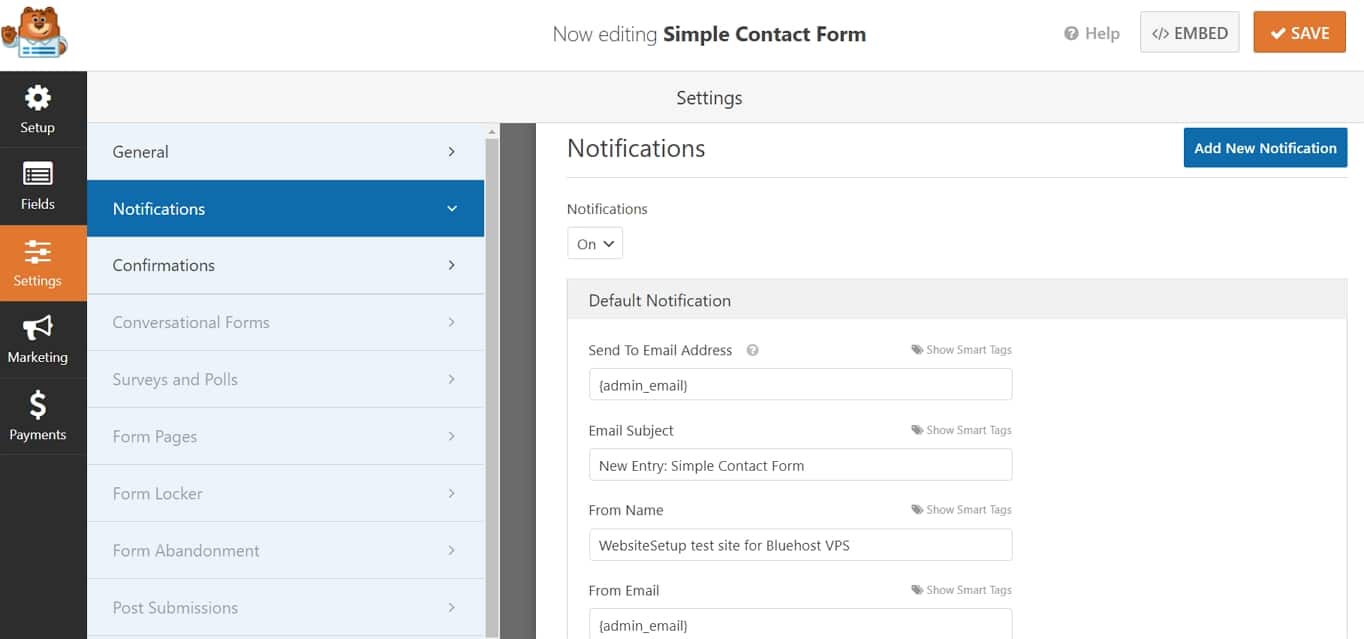
Here you can find more information on how to add notifications emails in WPForms.
Confirmations
WPForms confirmation features let you decide what happens after the user has submitted a form. For example, you can choose to simply display a thank you message on the same page, send a confirmation email or redirect to another page.

Step 5. Add the Form on Your Website
After you have finished tweaking all the settings and appearance of the contact form, it’s time to add it to your website.
For starters, save all your work and close the WPForms setup page. Once it’s done you should see your contact form under WPForms -> All Forms:

Notice the shortcode and copy it.
Move on to Pages -> Add New. Create a new page and name it for example “Contact”:

Then copy the shortcode to the WordPress editor and save the page.
If everything went right, you should see the contact form on your WordPress’s front-end looking something like that:
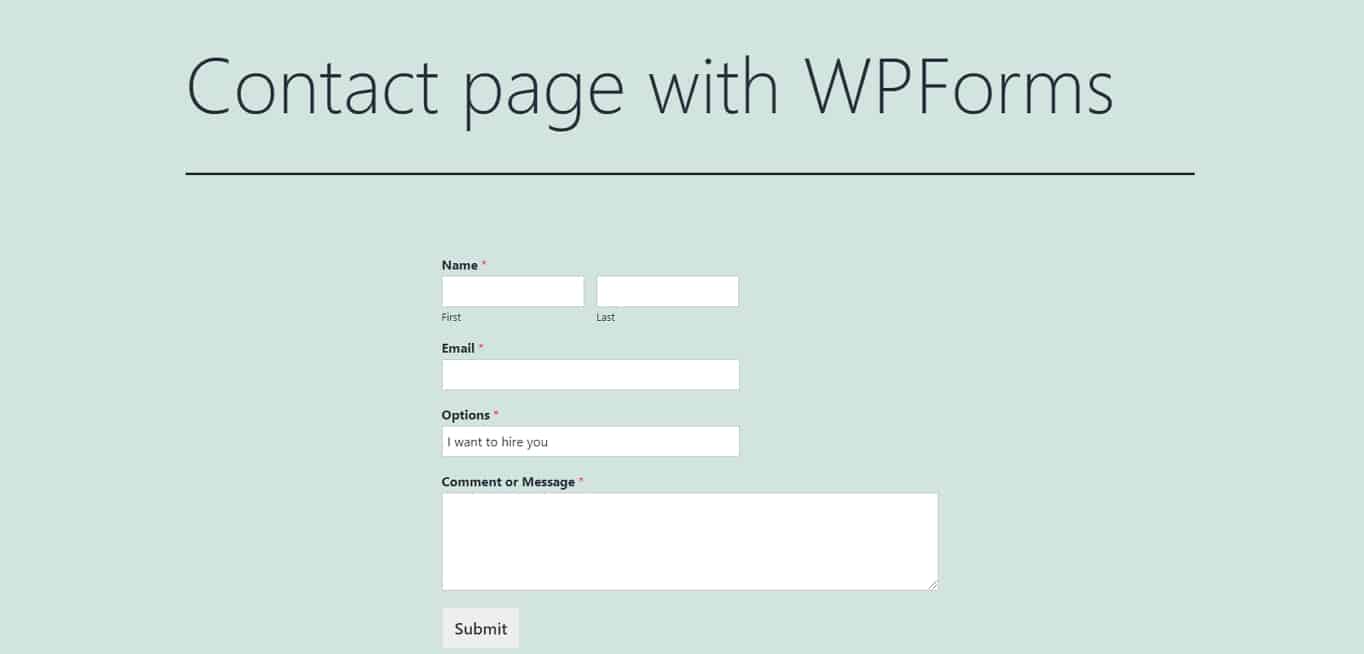
And that’s all! You have just mastered the basics of adding a contact form in WordPress.
However, we are not at the end yet. There’s still a bunch of things to do to further improve your forms.
Next Steps for Your Contact Form
Once you have the form on your site, the work doesn’t end. There are still some important things to take care of, e.g styling your form, protecting it from email spammers, and implementing protective measures for personal data. Let’s do this in order:
Changing the Form Design
Ideally, there is no need to change the styling of your contact form.
In good WordPress themes, these are defined in the style sheet. Consequently, the contact form most likely automatically fits your site design. In case you still need to make adjustments, you have several options.
Contact Form 7
Contact Form 7 forms have standard HTML markup. You may simply change the associated CSS and thus the way the forms look. Just keep in mind that this also has consequences for other input fields on your site which share the same markup.
So, in order to style your contact form, you have to learn a bit of CSS. However, it’s nothing too complicated, plus Contact Form 7 has a tutorial on how to do it.
WPForms
Similar to the abovementioned, WPForms contact forms can also be styled by using CSS. In fact, WPForms has created a tutorial on how to implement custom CSS style to your forms.
Once again, it’s nothing too difficult. Just needs a little bit of practice.
Implementing Spam Protection
Spam is a big topic when it comes to the web and websites in general. If you leave your email address unprotected on your site, there are a lot of automatic programs out there that will pick them up and start sending you unsolicited offers, fishing emails, and worse.
Unfortunately, the same is true for contact forms. Unless you set measures in place to prevent it, there are also programs that can send you spam via contact forms.
Contact Form 7
Fortunately, Contact Form 7 offers easy ways to prevent this.
Quiz
One of them is simple: include a quiz into your form that bots can not answer, like a simple equation.

reCAPTCHA
Aside from that, there is reCAPTCHA. This is a Google service for fighting spam. You need an API key and integrate it with Contact Form 7. This might have consequences for protecting personal information.
You can use the reCAPTCHA tag to add it to your form. The maker of Contact Form 7 also has a Captcha plugin called Really Simple CAPTCHA that you can use for the same purpose.
Plugins
You also have the ability to use third-party plugins for spam protection. The most well-known is, of course, Akismet and Contact Form 7 offers detailed instructions on how to use the two together.
There are others, e.g Contact Form 7 Honeypot or WPBruiser. For the latter, you need a paid extension for it to work with Contact Form 7. There are also more options that you can find easily.
WPForms
WPForms comes with its own anti-spam option that you can enable right away. For that go to Settings -> General. Then scroll down and tick the box where it says “Enable anti-spam protection”.

And done!
For extra protection, you can also add reCAPTCHA and hCaptcha to your forms.
Make it GDPR Compliant
You might be aware that there have been some changes to Internet privacy laws in Europe. On 25 May 2018, the General Data Protection Regulation (GDPR) came into effect.
It brought a number of changes to laws that concern the use of personal information online. It also threatens hefty fines for anyone in violation of the regulations.
Why is that important? Contact forms collect personal data. For that reason, if you fall under the jurisdiction of the regulations (and most people do now), you need to pay attention to some things.
- Don’t collect data you don’t need — Contact forms give you a choice of which fields to include. If there’s any data you don’t actually need, stop collecting it. That way, if there’s a breach, you can’t lose it.
- Disable any tracking — If you are using a contact form that tracks cookies, user agents, and/or user IPs, you need to disable this to be GDPR compliant.
- Get absolute consent — Add a way to your form for people to consent to you collecting their data. For example, Contact Form 7 offers an acceptance box. (Important: don’t set the checkbox to be enabled by default. Users have to do that themselves. Also, include a message that says what you collect and for what purpose plus a link to your privacy policy).
- Have a privacy policy in place — Under GDPR every professional website needs to display a privacy policy that explains what data they collect and how they use it. You also need to give visitors the ability to ask for their personal data and have it removed.
- Implement HTTPS — Using SSL/HTTPS encrypts the data exchange between browser and server. This is important for contact forms to keep personal data safe. It is also considered common practice now.
You can find more information about applying GDPR compliant forms into contact forms here:
- Contact Form 7 – How to make privacy-friendly contact forms
- WPForms – How to create GDPR compliant forms
To Sum Up: How to Create Contact Form in WordPress
And that’s a wrap!
If you followed our tutorial, you should now know why is it a good idea to have a contact form on your website and how to create one using Contact Form 7 and WPForms.
Once you start creating your contact form, don’t forget to add spam protection and make it GDPR compliant.
In case you have any additional questions or comments, don’t hesitate to reach out to us in our comments section below!