Whether you’re rebranding your website, trying to debug an error, or making an update to an existing page, you don’t want your visitors’ experience on the frontend to be disturbed.
However, when you’re making changes to your website, that’s a very real possibility. That’s why you need to learn how to put WordPress into maintenance mode. Not only will this ensure that you can work in peace behind the scenes, but it gives your visitors some insights into what’s going on.
But how do you go about updating an existing website or a work in progress without visitors encountering it in a state of disrepair?
Today, you’re going to learn three ways how to put WordPress into maintenance mode so you can work in peace behind the scenes.
But, first, let’s look at when it’s best to close down your website with a maintenance mode or under construction page.
When Should You Use Maintenance Mode?
Maintenance mode is a setting WordPress automatically applies to a website when it’s applying a software update.
So, instead of displaying your website to visitors while an update is going on and potentially introducing them to an error message, WordPress temporarily disables the website and displays a maintenance mode message:

It’s not just WordPress that has the power to temporarily take your website offline with maintenance mode though. You can do it, too.
Many times when updating a website (or even building it the first time around), you won’t need WordPress maintenance mode. Adding a new blog post, updating your contact information, editing an old link — these are the kinds of minor changes visitors won’t be affected by.
However, when you’re doing more extensive work on your website, you’ll definitely want to take it offline. You could try and schedule your updates at a time when you think visitors will be asleep, but even that’s not a foolproof approach.
Here are some reasons why you’d want to use maintenance mode:
- Rebranding an entire website.
- Adding new or different details to a popular page.
- Installing a plugin that will add a new feature or functionality to the site.
- Troubleshooting a bug or error.
- Cleaning up a defaced website after a security breach.
- Announcing the launch of a company with “coming soon” to generate buzz while it’s in progress.
In other words, if any major overhaul needs to take place, or you know that the appearance of the website will turn visitors off, activate maintenance mode in WordPress.
How to Put WordPress Into Maintenance Mode
The safest way to update a website is to make changes on a staging server and then migrate them over (which you can usually do through your host).
But if there’s something wrong with the site or it appears “broken” to visitors, the live site should be taken down and replaced by a maintenance mode page regardless of where you’re working.
There are three ways to do this:
- A) Put WordPress Into Maintenance Mode Using Code
- B) Put WordPress Site Into Maintenance Mode Using Plugin
- C) Put WordPress Site Into Maintenance Mode Using Theme/Page Builder
Option A: Activate the Default Maintenance Mode with Code
For short-term downtime (less than an hour or so), you might not want to go through the trouble of setting up a custom maintenance mode page.
In that case, you can use WordPress’s default maintenance mode page to let visitors know you’ll be right back.
Step 1: Go to the WordPress Theme Editor
To activate maintenance mode, go to the theme editor in WordPress. You’ll find it under Appearance > Theme Editor:

If you don’t see it, then request admin access to the WordPress website from the owner.
Step 2: Open the functions.php File
Look for the file called Theme Functions or functions.php:

Click on it to open it in the code editor to the left.
Step 3: Add Maintenance Mode Code to functions.php
With functions.php open in the editor, copy all of the code inside the file and save a copy of it to your desktop.

Then, scroll to the bottom of the file and add the following snippet:
function wp_maintenance_mode() {
if (!current_user_can('edit_themes') || !is_user_logged_in()) {
wp_die('<h1>Under Maintenance</h1><br />Website under planned maintenance. Please check back later.');
}
}
add_action('get_header', 'wp_maintenance_mode');
This is the default WordPress maintenance mode setting and message.
If you want to edit what it says, replace this bit with your own wording:
<h1>Under Maintenance</h1><br/>Website under planned maintenance. Please check back later.When you’re happy with what it says, click “Update File”.
Step 4: Confirm Maintenance Mode Is Active
As a logged-in user, you won’t be able to see maintenance mode when you visit the website. That’s so you can keep working and previewing your changes.
You want to make sure it’s been activated though.
To do this, you can either log out of WordPress and visit the website or you can open it in a completely new browser.
Remove Maintenance Mode
The easiest way to turn off maintenance mode is to remove the code you added to the functions.php file. Just make sure that’s the only thing you delete.
Once you’ve removed the snippet, save the file once more. Again, either log out or open a new browser to confirm that maintenance mode is gone.
Option B: Activate Maintenance Mode with a WordPress Plugin
For longer downtime (like when rebranding a site or repairing a bug), you probably don’t want to leave the default WordPress message up. That boring grey page and a short message aren’t going to make a very good impression on visitors.
Instead, use a WordPress maintenance plugin to put something more engaging up there.
Not only will this allow you to put a designed page up there, but you can do more than say “we’ll be back”. You can leave contact information, provide details on what’s to come or even ask interested prospects to leave their information through a small contact form.
Step 1: Find a WordPress Maintenance Plugin
Go to the Plugins menu and click “Add New.”
Next, in the search bar in the top-right, type “maintenance:

You’re going to see over a thousand matches in the search results. To help you narrow down the options, we’d recommend one of the following plugins:
- Coming Soon by SeedProd (this is the most downloaded and top-rated plugin in this category)
- Maintenance by WP Maintenance (this is the simplest and easiest to configure)
- Under Construction by WebFactory Ltd (this is the best option if you want to do more with your page without having to pay for it)
Each of these plugins makes it easy to turn maintenance mode on or off as well as to customize the appearance of the page.
Note: There’s always going to be a tradeoff when you use a free WordPress plugin to build a maintenance page.
In the case of the Under Construction plugin, you won’t be able to add your logo or customize the colors, typography, etc. But you will have a maintenance page up in a matter of minutes.
If you were to use the SeedProd plugin, on the other hand, you’d have no premade templates to use. Everything about the page would have to be created from scratch. But you would get to add things like your logo, brand colors, etc.
So, figure out what matters most at this time.
If you need to put something up while you’re cleaning a hacked site, the quick implementation option might be best.
If you’re working on a longer-term rebrand, then taking the time to build a custom page would make more sense. And, in that case, it may be beneficial to pay for a premium maintenance plugin so you can quickly and completely customize the page and its functionality.
Step 2: Install the Maintenance Plugin
Once you’ve selected the plugin you want to use, you need to install it on the site. For the purposes of this example, we’re going to use Under Construction.
Click the “Install Now” button:

When it’s done installing, the button will turn blue and say “Activate”. Click it once more.
You should automatically be taken to the plugin’s Settings page. If not, go to your Plugins list and click “Settings” beneath the maintenance plugin:

Before you turn it on, spend some time setting up your maintenance mode page.
Step 3: Design the Maintenance Mode Page
Some plugins come with maintenance mode page templates (similar to a WordPress theme or page builder plugin does).
Other plugins require you to upgrade to pro to get access.

In the case of Under Construction, though, there are some free basic templates you can choose from.
When you find the one you like, activate it.
And if your plugin doesn’t come with template options, that’s okay. You should still have the option to customize the colors, fonts, and images. It’ll just take a little more work.
Step 4: Add Content to the Page
Starting out, your maintenance mode page is going to be very simple in terms of content. For example:

However, your plugin should give you full control over all of the content that appears on the page:

These are the content elements you should customize:
Title: This is the title that Google will show to visitors when your site appears in search. For example:
My Website Name | Under Construction
Or:
My Website Name | Coming Soon
Description: This is the description that Google places beneath the title in search results.
So, if you introduced your website as “under construction” or “coming soon”, give users a taste of what’s to come. For example:
Home goods, furniture, and educational toys. Website coming soon. Visit us in downtown Toronto in the meantime!
Headline: This is the headline or title that appears at the top of your maintenance mode page.
You can leave it as a generic “Sorry, we’re doing some work” message or you can customize it. For example:
New Website and Products Coming in September 2022
Content: This is the body of the page.
Typically, it’s a generic “Thanks for waiting” type of message. Again, feel free to customize it so you can let visitors know exactly what you’re working on and why they should get excited.
Optin Boxes and Popups: When this setting is turned on and the MailOptin plugin activated, you can add an optin form to your maintenance page.
This is important as it doesn’t just leave visitors to think about other websites to try while yours is down. Instead, you provide them a lifeline. The second the site is available again, you’re there in their email inbox letting them know to return.
We’ll work on setting up your optin form in a couple of steps. For now, let’s finish filling in the content of the page.
Content Font: If you’re using custom fonts on your website (either font you’ve chosen or that came with the theme), update the fonts here as well.
Login Button: If you have other users that need access to the WordPress admin area, you can embed an inconspicuous “Login” button on the page.
Social & Contact Icons: The optin form isn’t the only way to stay in touch with visitors. If you already have social media pages set up for the site or brand, add them to the page.
By default, you’ll have the option to fill in links for Facebook, Twitter, LinkedIn, and YouTube. You can expand these options and add others like:
- Vimeo
- Behance
- Dribbble
Don’t overdo it though. Only add the accounts that you plan on monitoring and using.
Don’t forget to add your contact information to the additional fields provided. For example:
- Email address
- Phone number
- WhatsApp number
Again, only fill in the pertinent details. You’re going to be busy building or fixing your website at this time. The last thing you want is to be distracted by people trying to contact you across too many channels.
Save your changes.
Step 5: Preview Your Changes
Once you’ve finalized the design and content pieces, preview the page you’ve created.
You’ll find a “Preview” button at the bottom of the Main, Design, Content, and Access pages:

Click on it and view your new page:

Make any remaining tweaks to the design and text as needed, save your changes, and then move on to the next step.
Step 6: Create the Optin (Optional)
If you want to create an optin for the page, you can do this step. If it’s not needed (say, if the site is only going to be down for a couple of hours or days), then skip to the final step.
To add a contact form to your maintenance page, check your plugin first.
For instance, Under Construction plugin works with MailOptin. Other maintenance plugins may come with their own contact form integration, so look for instructions on where to get your form from before installing anything new.
For now, let’s walk through the hypothetical situation of using MailOptin:
Email Contact Details
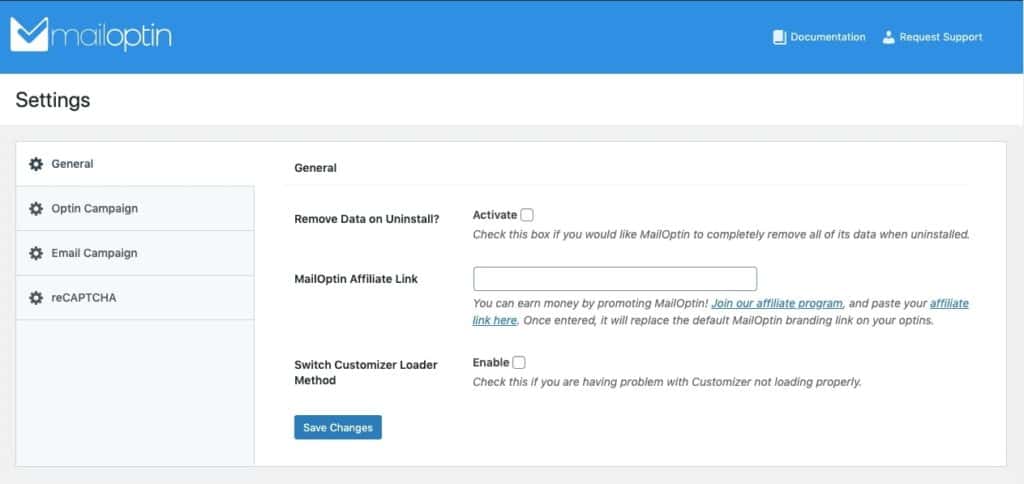
As far as plugin settings go, the only page you need to concern yourself with is the Email Campaign page where you will fill in your company’s details:

These details ensure that your subscribers know who your messages are coming from instead of immediately directing your emails to the spam folder. Fill in the details and save your changes.
Email Marketing Integration
Then, go to the Integrations tab in the MailOptin menu. This is where you’ll connect your email marketing software to the form:

MailOptin integrates with all major email marketing services, including AWeber, Constant Contact, GetResponse, MailChimp, and Brevo (formerly SendinBlue).
Find your provider on the list and follow the instructions for integrating the two tools. In the case of MailChimp, it would be as simple as adding an API key.

With this setup, leads that come in through the form will automatically go to your newsletter service provider. This keeps that data out of WordPress (which is good for security) and makes it easier to send high-quality marketing messages from a platform built for that purpose.
Optin Selection
Next, turn your attention to Optin Campaigns.

Click “Add New” to create your maintenance page optin.
The first thing to do is name the optin. Since this is going on your maintenance page, the title should be relevant to that.

Next, select the type of optin box you want to display.
Your options are:
- Lightbox: a standard pop-up box
- In-post: a box that appears in-line with your content
- Sidebar/widget: a small box that appears in the sidebar or widget section (not relevant here)
- Notification bar: a sticky bar at the top of the page (only available in premium)
- Slide-in: an animated pop-up box that usually sticks to the corner of the page (only available in premium)
For the purposes of a maintenance page, use the in-post option. If you go premium, the notification bar would be a good alternative.
Click on the type of optin you want to use. The free theme options will sort to the top. Pick the one that works well with the maintenance page you’ve built and that you like the style of:

Optin Customization
When you click “Select Theme”, you’ll be taken to the WordPress Customizer:

Take your time going through each of the optin settings to create a custom design and content. Don’t forget to connect your email marketing software to the form (under the Integration tab).
When you’re done, save your changes and switch the toggle in the top left to the “On” position.
Exit out of the Customizer using the “X” in the top-left corner. Then, return once more to your Under Construction plugin.
Connect the Optin
Under the Content tab, scroll down to “Optin Boxes & Popups”. Change the setting from “Disable optins” to your new optin:

Save the changes.
You can now preview the maintenance page with the live optin. Here’s an example of how that might look if you created an in-post opt-in to appear at the bottom of the content:

This is the above-the-fold image and headline for the page. Scroll down once and visitors will see this:

There’s a short message about the state of the site and then the opt-in appears between it and the social/contact links.
If you want to make any adjustments after seeing how the page has turned out, return to either your maintenance plugin or optin plugin to adjust.
Step 7: Turn on Maintenance Mode
When you’re happy with what you have, it’s time to activate maintenance mode.
Go to the Main tab in the maintenance mode plugin. Switch the “Under Construction Mode” toggle to the “On” state.
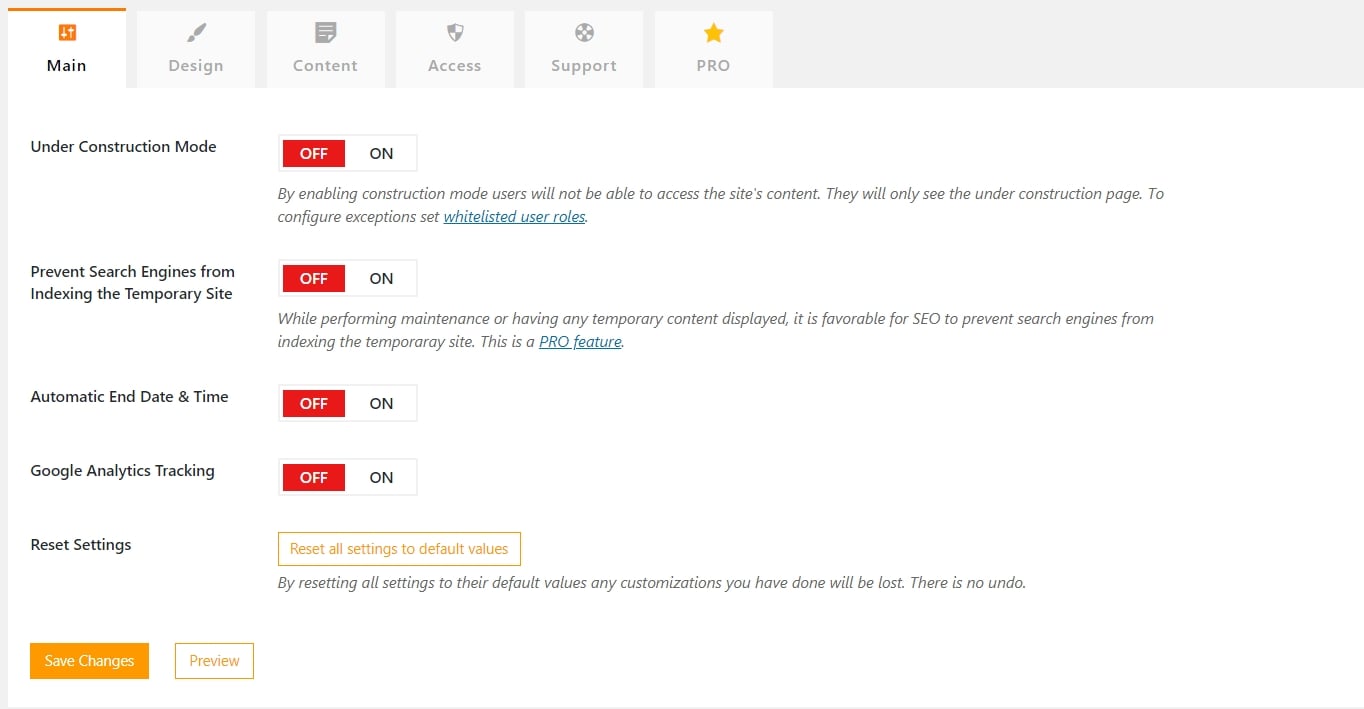
You can configure the other settings on this page, too. The only one you can’t control is indexing as that’s a Pro feature.
However, if you want to automatically turn maintenance mode off on a certain date and time, you can set that here. You can also add your Google Analytics tracking code if you want to keep tabs on traffic to the page.
Finish configuring your settings and then click “Save Changes”. Maintenance mode will now be live on your website.
Deactivate Maintenance Mode
To turn maintenance mode off with a plugin, simply toggle the activation switch to the “Off” position.
Option C: Activate Maintenance Mode with Your Theme or Page Builder
There’s one other way to activate maintenance mode in WordPress. And that’s to use a theme or page builder plugin that includes the setting.
In this example, we’ll show you how to build this out with Elementor.
Step 1: Review Maintenance Mode Settings
The Elementor page builder plugin has a Maintenance Mode setting under Tools:

What’s nice about this feature is that it automatically configures your website to send the right status code to search engines.
This is Coming Soon mode:

When activated, Google and other search engines will see an HTTP 200 code and continue with indexing the site. Use this if a website is being built for the first time and you want to get a headstart on indexing it.
This is Maintenance mode:

Maintenance Mode, on the other hand, sends an HTTP 503 code. This tells search engines not to index the site right now. Use this if you’re repairing a hacked site, bug, or implementing an otherwise quick update.
Step 2: Create the Maintenance Page Template
Before you can activate either of these modes, you have to create your own maintenance page template. Click this button and Elementor will take you to where you need to create the template:

Give it a name and click the “Publish” button:

Click the blue “Edit with Elementor” button and step inside the template editor:

Step 3: Design and Add Content to the Page
Setting up this page is like setting up any other page with Elementor. However, the main difference is that you’ll want to remove any trace of the header and menu.
When your site is in progress, access to it should be blocked — which is why it’s best to remove the temptation of exploring it all together.
To do this, click the Settings gear icon in the bottom-left of the toolbar:

Then, adjust these two settings:

You can hide the title bar by toggling the setting to “Yes”. Then, change the Page Layout to Elementor Canvas. This will remove the header and footer.

To quickly add an Elementor template to the maintenance page, locate the Library folder icon in the preview.
Click on the icon and open up Elementor’s page templates. Do a search for “maintenance”:

There are two free maintenance page templates and four premium. Select the one you want to use and click the green “Insert” button to add it to the page.

You can now customize the design and content of the page. Or, if you’d rather just build your own, open the Elementor Elements bar here:

Drag and drop your elements from the left onto the empty page on the right.
This is the best way to create something 100% custom that includes all of the elements you want to appear like your logo, social icons, lead generation form, animations, etc.
Step 4: Preview the Maintenance Page Template
When you’re done creating your maintenance page template, give it a look. In Elementor, you can open a preview from the eyeball at the bottom of the toolbar:

Give the page a look-through:

If you’re happy with it, go ahead and save your changes. If not, update it, preview once more, and save.
Step 5: Activate Maintenance Mode with Elementor
You can now return to the Elementor > Tools menu to activate maintenance mode.
You’ll find your new maintenance page template here:

Select it from the dropdown. Choose the mode you want to put your site in. Then, click “Save Changes”.
You’ll not only be able to see your new maintenance page on the frontend of your site, but Elementor will remind you of this status with the red notification in your admin bar:

Deactivate Maintenance Mode
To turn maintenance mode off with Elementor (or your theme), simply return to the Tools page and disable it. You can also do so from the bright red tab in the admin bar.
Wrap-Up
There you have it: three ways you can use WordPress maintenance mode to inform visitors that your website is currently unavailable. Which option you choose will depend on what kind of update you’re making, how long it will take, and what action you want them to follow in the meantime.