Shopify is the most popular way to build an online store in 2026, and setting one up is faster than ever. Much of the heavy lifting, from writing product descriptions to picking a starting design, is now handled by built-in AI, so you spend less time fiddling and more time selling.
This guide is for anyone who wants to sell online, whether that’s handmade goods, a print-on-demand line, or a full catalog. You don’t need to write a single line of code, and you can have a store live in an afternoon. Follow the steps in order and you’ll go from empty account to open for business. If you have not settled on Shopify yet, our guides to how to create a website and the best website builders compare all your options.
Prefer to watch? Here is a video walkthrough of the process:

What you need before you start
Three things get you to launch: a product idea, a few clear photos of what you’re selling, and a payment method for accepting money. That’s it. You can add more products and polish later.
On cost, the Basic plan is $29 per month on yearly billing, and it’s plenty to start. Before that kicks in, you get a 3-day free trial, and then your first 3 months run at $1 per month. So your real spending in the early going is tiny while you build.
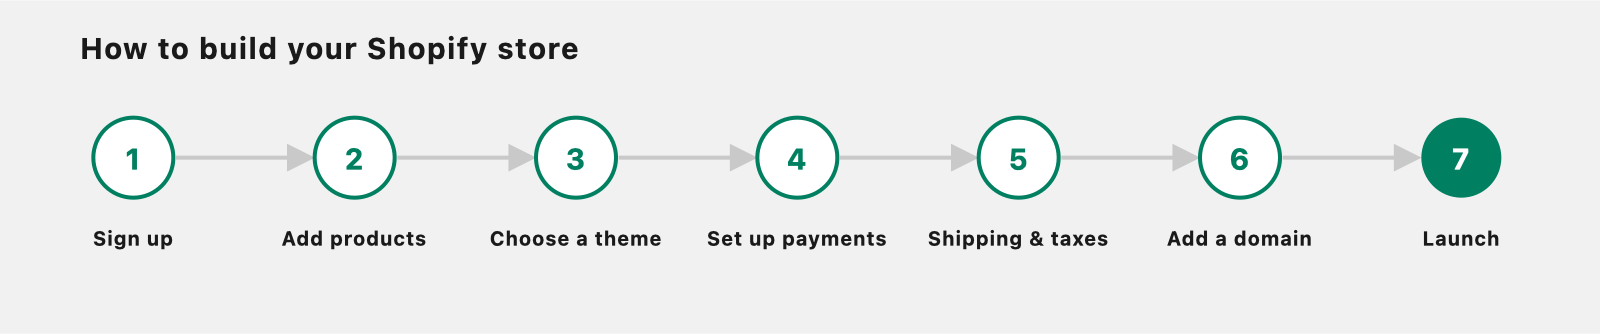
Step 1: Sign up and start your free trial
Head to Shopify and start your free trial. You get 3 days free, and then $1 per month for your first 3 months, so there’s almost no risk in trying it. No credit card is required to begin the trial.
During signup, the AI-guided onboarding asks a few quick questions about your business, what you sell, where you are in the process, and where you plan to sell. Your answers help Shopify set sensible defaults. Sidekick, the AI assistant built into your admin, is there from the start if you get stuck or want something done for you.

Step 2: Get to know your dashboard and set the basics
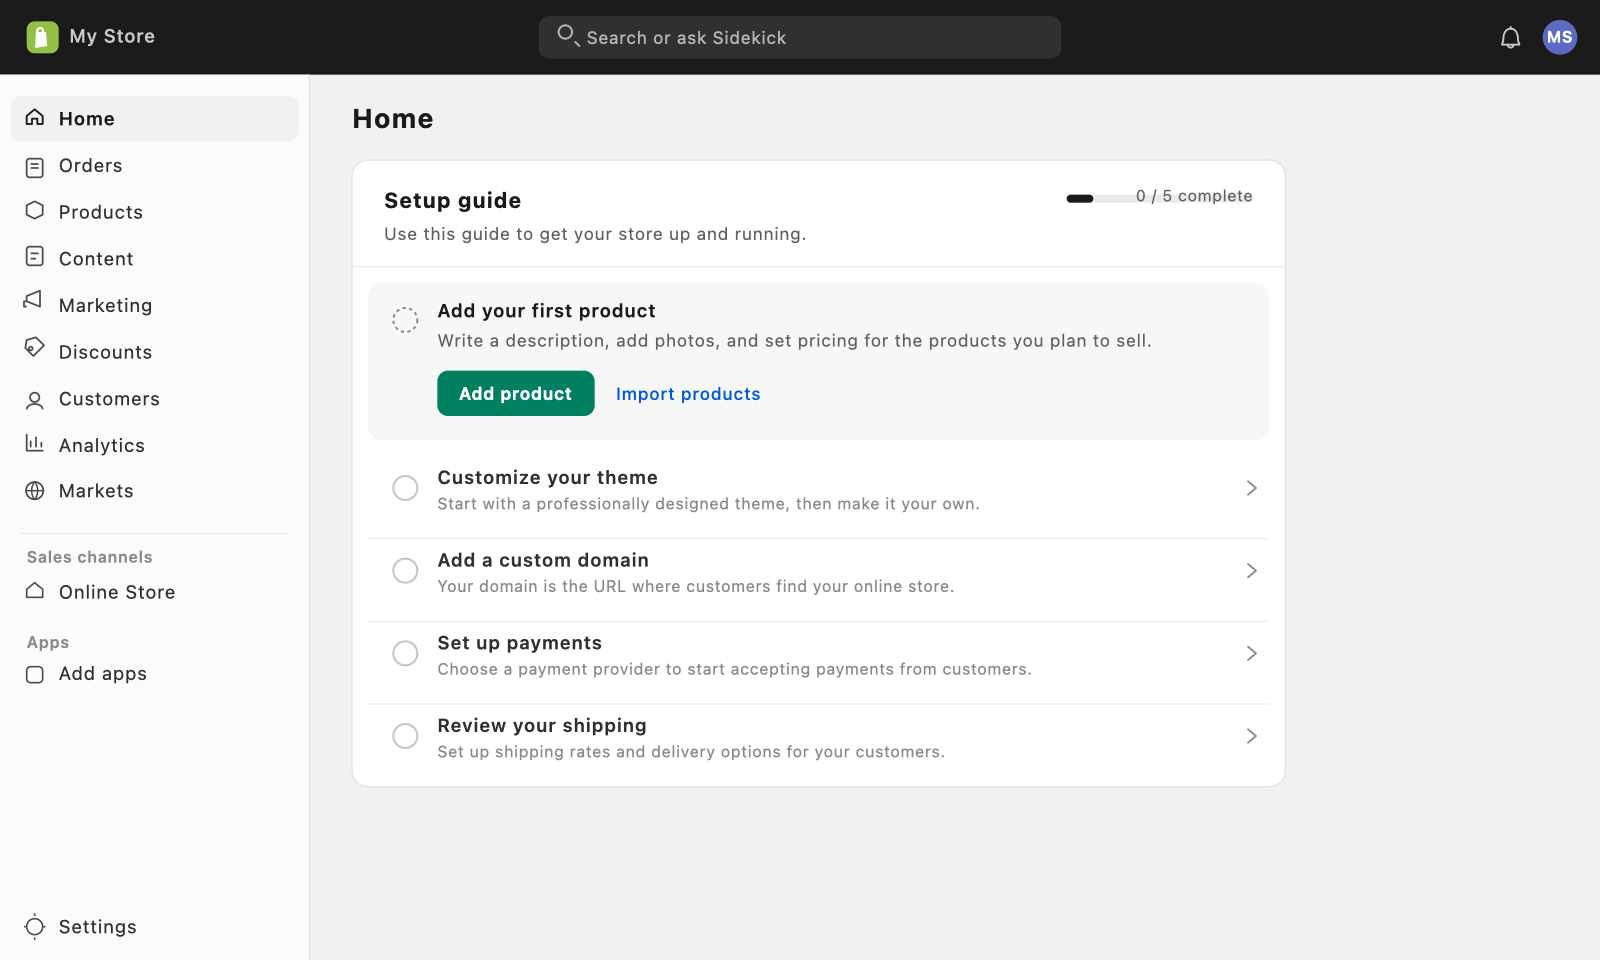
Once you’re in, take a minute to look around the admin. The left sidebar is your main menu: Home, Orders, Products, Content, Marketing, Discounts, Customers, Analytics, and Markets. On the Home page, a setup guide walks you through the first tasks with checkboxes, so you always know what’s next.
Set the foundations now. In the redesigned Settings area, enter your store name, choose your currency, and fill in your business details. These feed your invoices, checkout, and tax setup, so getting them right early saves cleanup later.
Anytime a task feels fiddly, ask Sidekick to do it for you. You can type a request in plain language, like “change my currency to euros” or “add a discount for first-time buyers,” and it handles the steps.
Step 3: Choose and customize a theme
Your theme is your store’s design: layout, colors, fonts, and the overall look customers see. New stores start on Horizon, the free, block-based theme Shopify introduced in 2025, so you already have a solid modern design out of the box.
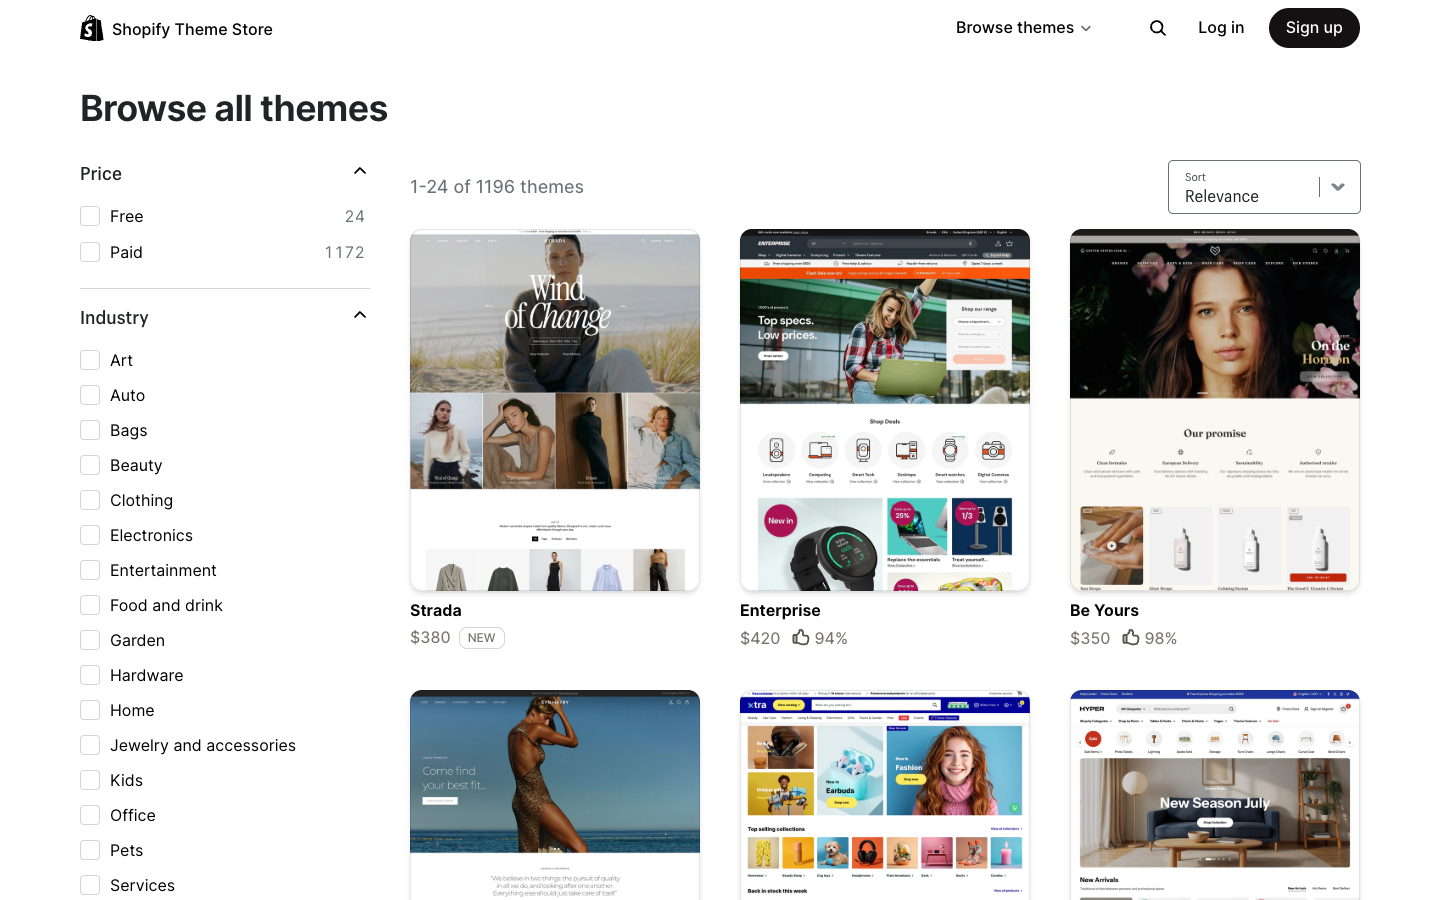
Want something different? Browse the Shopify Theme Store, which has 24 free themes and more than 1,000 paid ones. Paid themes run roughly $100 to $500 as a one-time purchase. A free theme is a fine place to begin, and you can always switch later.
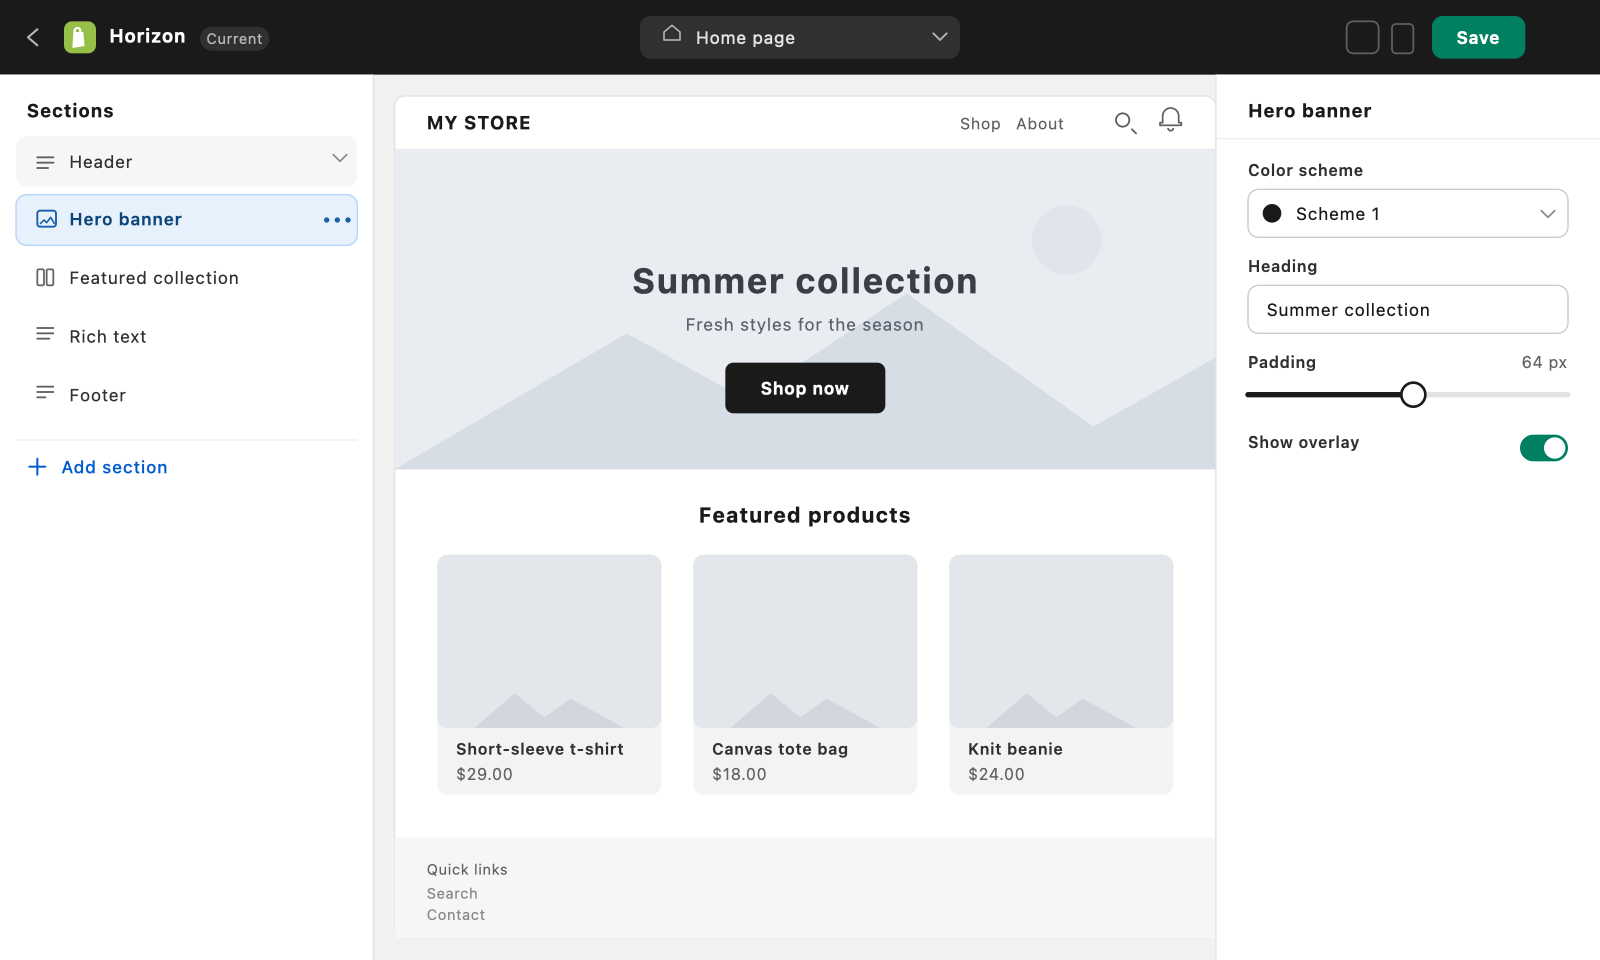
To make it yours, open the theme editor and work with sections. Add and rearrange blocks like the header, a hero banner, featured products, and the footer. Set your colors and fonts to match your brand, then upload your logo. Everything updates in a live preview, so you see changes as you make them. Nothing here is permanent, and you can redesign whenever you like.
Step 4: Add your products
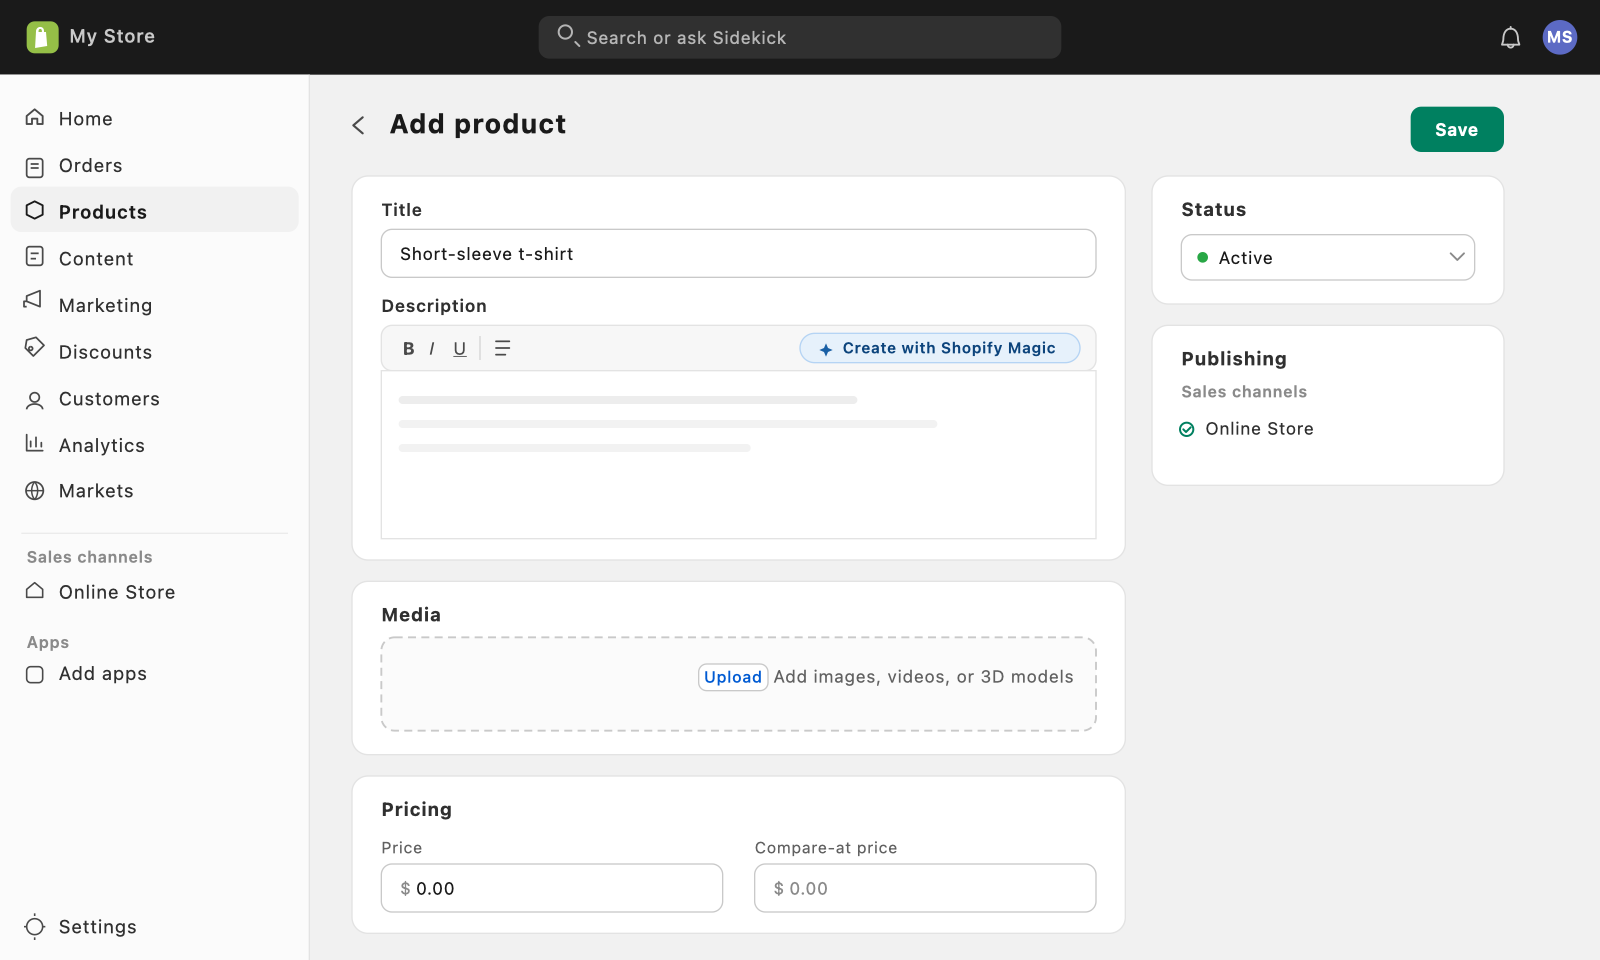
Go to Products, then Add product. For each item, add a title, a description, photos, a price, and your inventory count. Good photos do a lot of the selling, so use the clearest ones you have.
If writing descriptions isn’t your thing, Shopify Magic can draft one for you from a few details about the product. Treat it as a starting point: read it over, fix anything inaccurate, and adjust the wording so it sounds like you.
As your catalog grows, organize products into collections, for example “New arrivals,” “Sale,” or by category. Collections make it easier for shoppers to browse and give you tidy pages to link to in your menus.
Step 5: Set up payments and checkout
To take money, turn on Shopify Payments. On the Basic plan, card rates are 2.9% plus 30 cents for online sales, and Shopify Payments adds no extra transaction fee on top of that. Rates are lower on higher plans.
You can use a third-party payment gateway instead, but on Basic that adds up to 2% per transaction (1% on Grow, 0.5% on Advanced), so most new stores stick with Shopify Payments.
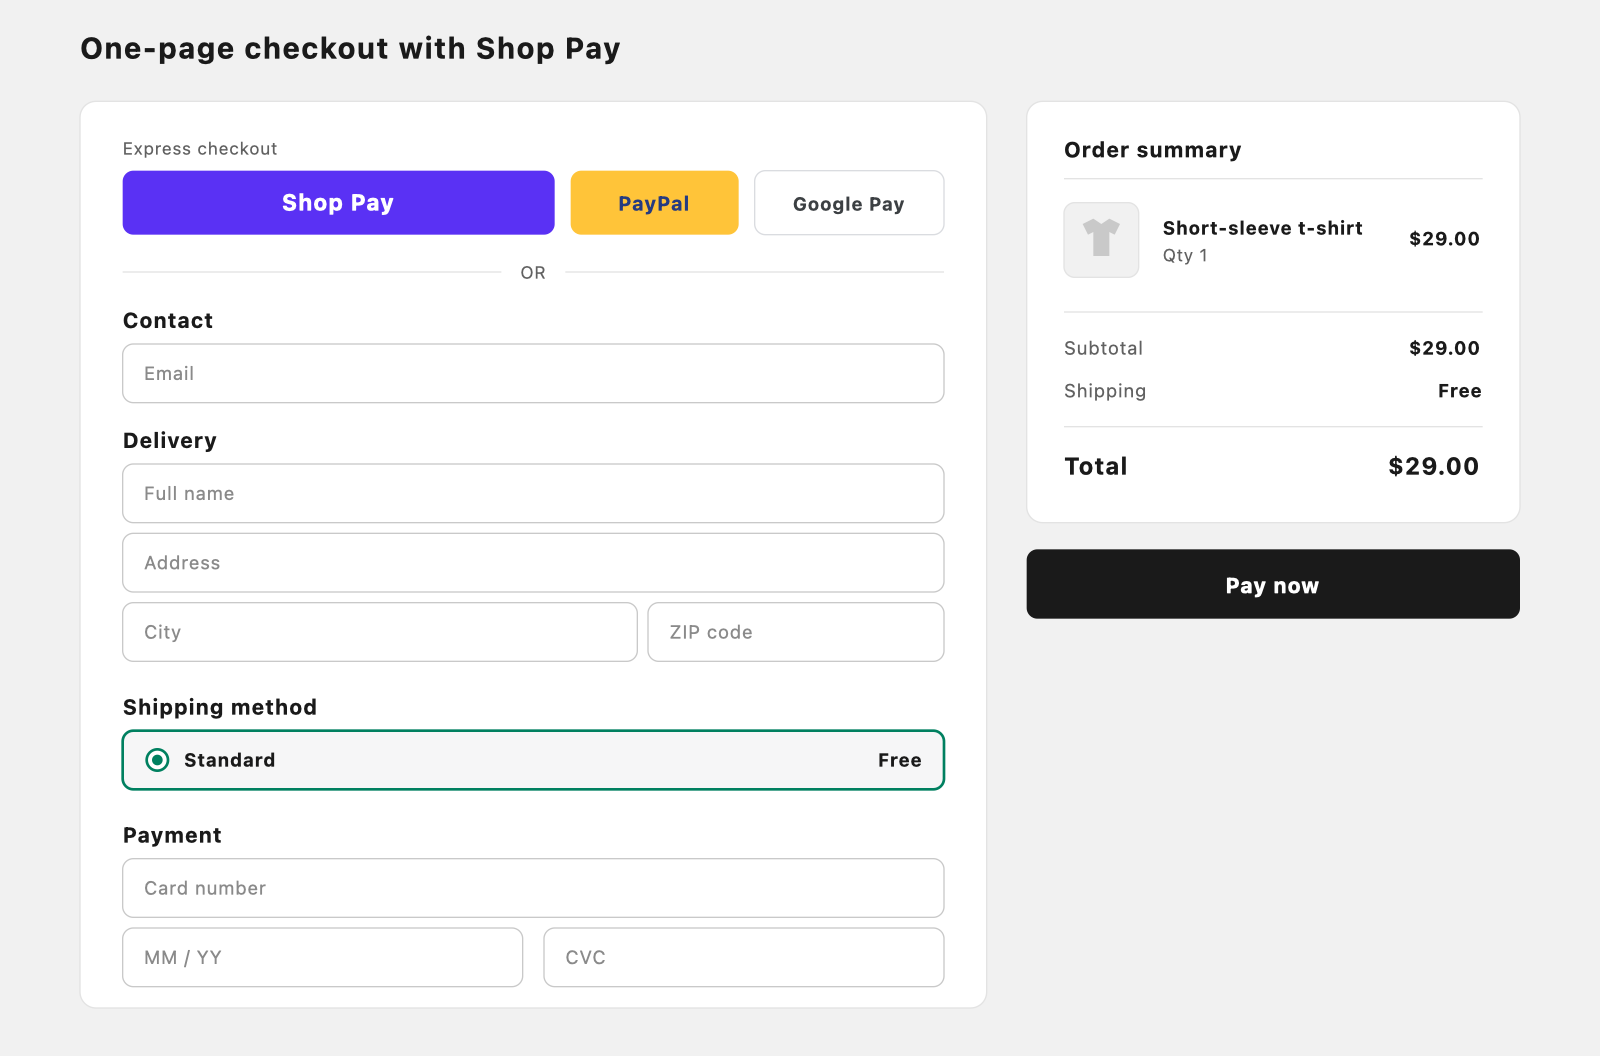
Checkout is already set up to convert well. Shopify’s one-page checkout and Shop Pay, its accelerated checkout, are on by default. Shop Pay lets returning customers buy in a couple of taps, which cuts drop-off and lifts conversions. You don’t have to configure any of this to benefit from it.
Step 6: Configure shipping and taxes
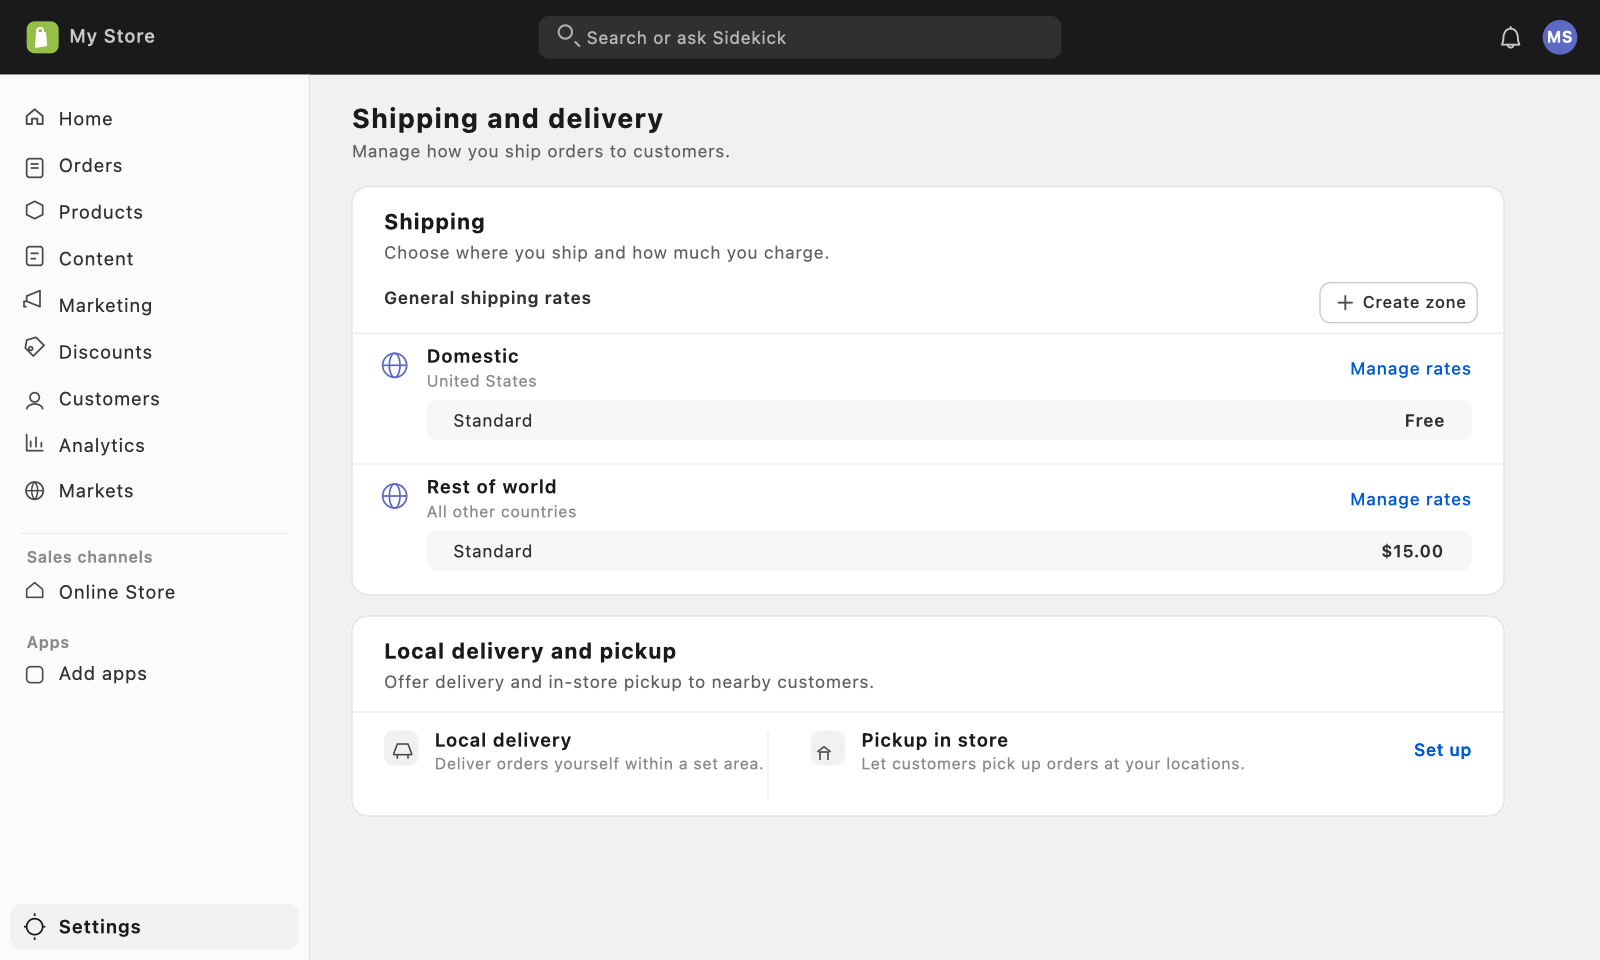
In Settings, set up your shipping. Create shipping zones for the regions you sell to, then pick rates for each: free shipping, a flat rate, or carrier-calculated rates that pull live prices from carriers. Free shipping over a threshold is a common way to nudge larger orders.
For sales tax, let Shopify Tax do the calculating. It works out the right rate at checkout based on where you and your customer are, so you’re not looking up rates by hand. If you sell nearby, you can also offer local delivery and in-store pickup as options at checkout.
Step 7: Add a custom domain
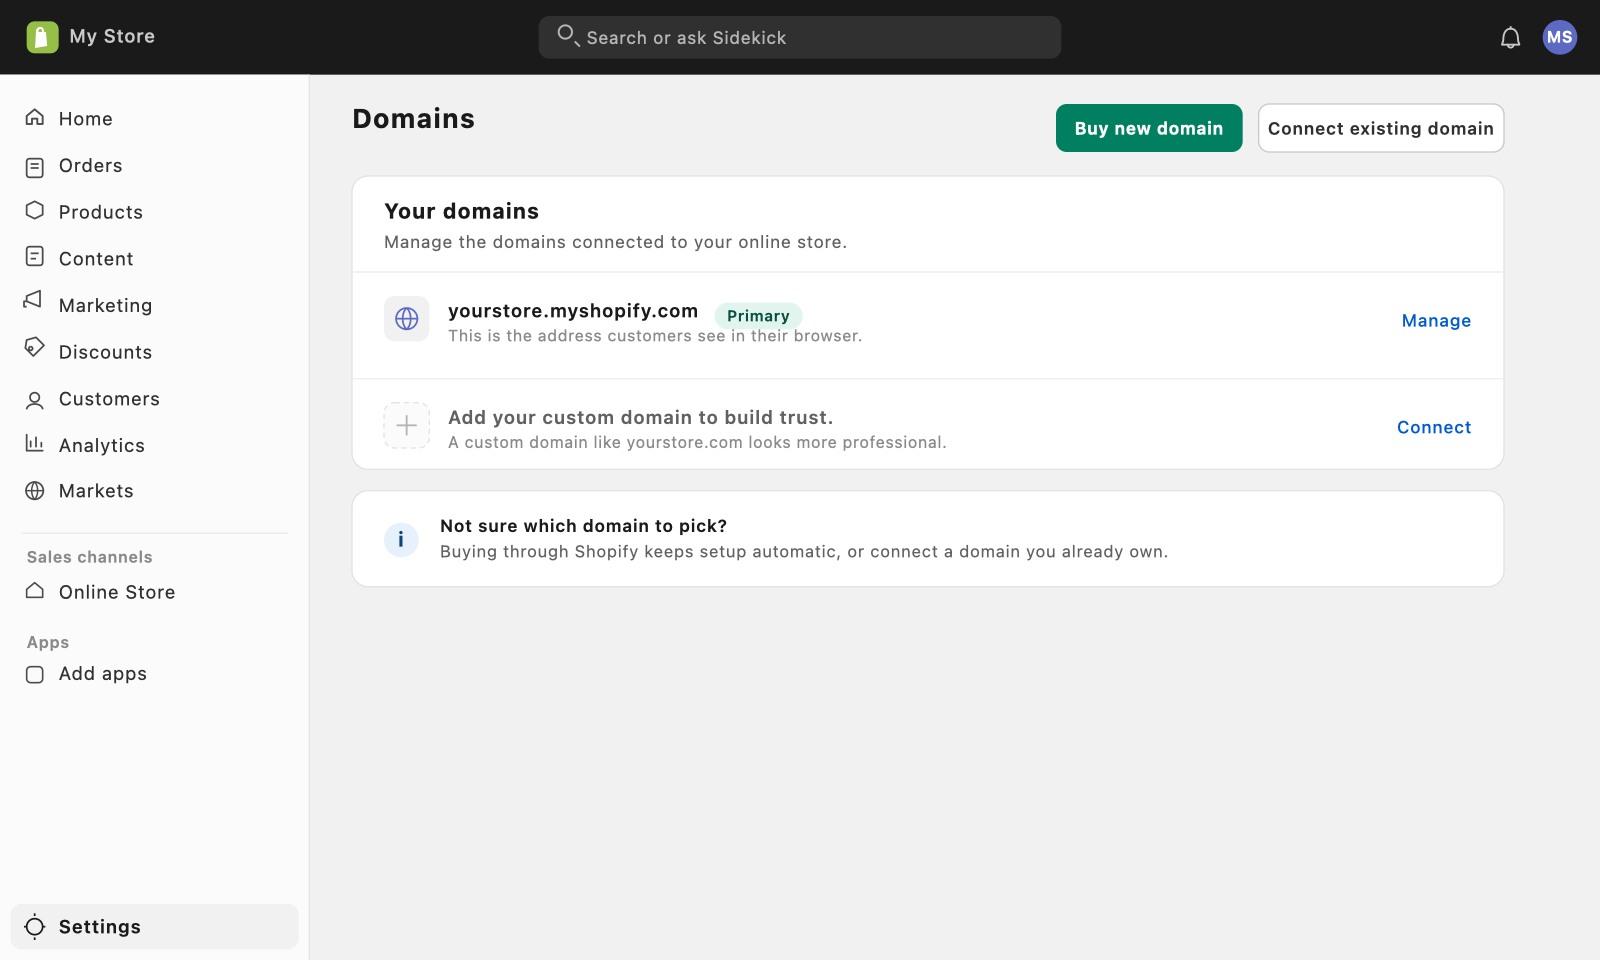
Every store comes with a free address like yourstore.myshopify.com, which works right away. For a more professional look, use your own domain instead.
You can buy a custom domain directly through Shopify for about $11 to $20 per year, and it connects automatically with no technical setup. If you already own a domain, you can connect that one too. A custom domain looks more trustworthy to shoppers and is easier to remember and share.
Step 8: Test everything and launch
Before you open the doors, run a quick pre-launch check:
- Place a test order to confirm the whole buying flow works end to end.
- View your store on your phone, since most shoppers will be on mobile.
- Double-check that payments, shipping rates, and taxes all calculate correctly.
- Read through your product pages and policies for typos or gaps.
When everything checks out, remove the password page in your settings to go live. Your customers will move through the one-page checkout with Shop Pay ready to go, so their first experience is fast and familiar.
Step 9: Grow your store after launch
Launching is the start, not the finish. A few things to focus on next:
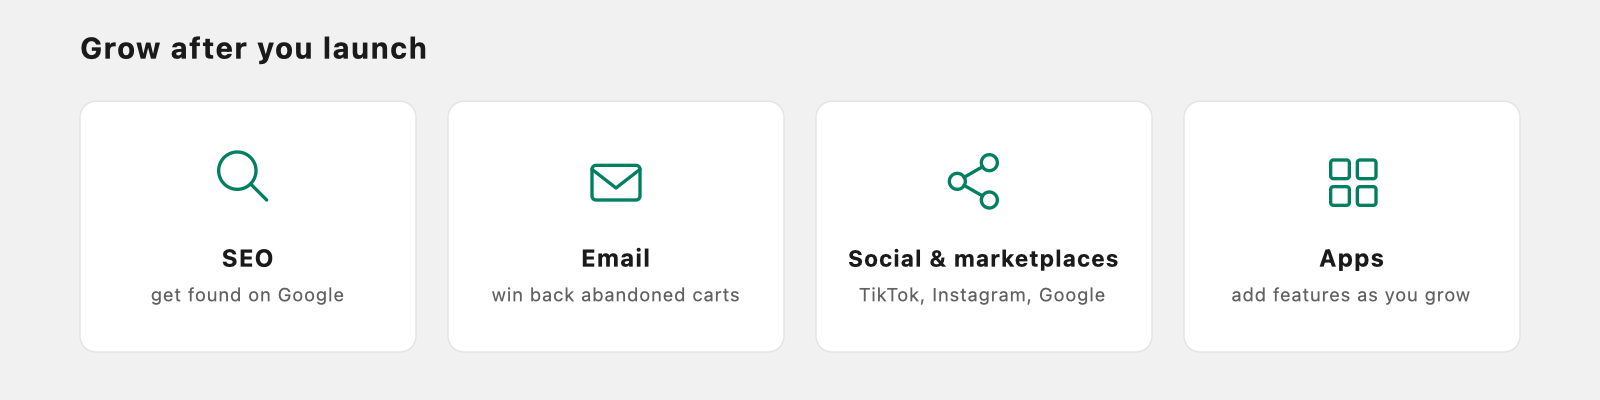
- SEO basics so people find you on Google: write clear product titles and descriptions, and fill in page details.
- Email marketing and abandoned-cart recovery to bring back shoppers who left before paying. Automated cart reminders alone recover real revenue.
- Selling on social and marketplaces: connect TikTok, Instagram, Facebook, and the Shop app so you can sell where your customers already spend time.
As you grow, the Shopify App Store adds features you don’t have out of the box, whether that’s SEO tools, product reviews, or email. Add apps when you have a specific need, not just to collect them.
Congratulations, your Shopify store is ready
That’s the whole build: signed up, designed, stocked, paid, and live. Take a moment to be proud of it, then keep tuning as real orders come in. If you’re still weighing platforms before you commit, our guide to building your first website compares the options, and our website cost guide breaks down what you can expect to spend. When you’re ready to build, start your free Shopify trial and get your store online today.
Frequently asked questions
How much does a Shopify store cost? The Basic plan is $29 per month on yearly billing (all prices as of 2026, so check current pricing before you sign up), plus card fees of 2.9% + 30 cents per online sale with Shopify Payments. You start with a 3-day free trial, then pay $1 per month for your first 3 months, so early costs are minimal.
Do I need coding skills? No. You build and customize everything through Shopify’s visual editors, and the AI tools handle the trickier parts like writing copy. No coding required.
How long does it take to set up? You can get a basic store live in an afternoon. A larger catalog or heavy design work takes longer, but the core setup is quick.
Can Shopify handle my taxes and shipping? Yes. Shopify Tax calculates sales tax automatically at checkout, and you set shipping zones and rates (free, flat, or carrier-calculated) to control delivery costs.
What is Shop Pay? Shop Pay is Shopify’s accelerated one-page checkout. It saves a returning customer’s details so they can buy in a couple of taps, which reduces drop-off and lifts conversions. It’s on by default.