Choosing an eCommerce platform that’s right for your business can be challenging. There are several options to consider – including Magento (now part of Adobe Commerce) – as well as multiple factors that may influence your decision.
As one of the leading eCommerce platforms on the market today, Magento offers a comprehensive solution for internet retailers. In fact, hundreds of thousands of online stores use it to display and sell their products. There are several options when it comes to pricing, including some that are dependent on your annual revenue.
In this step-by-step guide, we’ll explain the differences between Magento’s editions. We’ll also discuss everything you need to know to launch an online store with this platform, including choosing an appropriate web hosting plan and understanding the costs involved. Let’s get right to it!
What You Should Know About Magento Before Starting Your Ecommerce Website
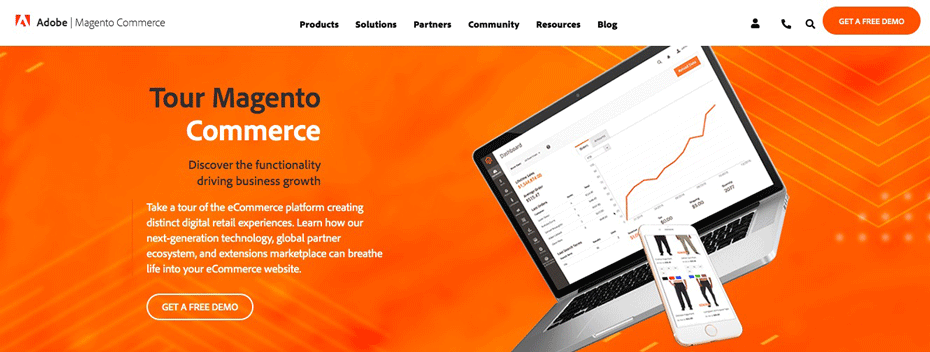
Magento (now Adobe Commerce) is part of the Adobe Experience Cloud. Being backed by one of the largest software developers in the world is a testament to its stability. It’s a popular choice for those looking to start an online store, powering well-known brands like Coca-Cola, Ford, HP, and ASUS:
Some of its popularity may be due in part to its diverse offerings. Magento operates a little differently than platforms like WordPress. Instead of a single solution for all users, it has specific packages for small businesses, enterprise-level sites, and those that fall in between.
Additionally, there are multiple editions of the platform available at different price points and varying levels of management. We’ll discuss these in more detail shortly.
The initial setup process for Magento should only take you about an afternoon to complete if you’re using a one-click installer. However, estimating how much time you’ll need to add all your product pages and configure your theme is a bit trickier. A basic store can take 2-4 weeks, while a fully customized build may take 3-6 months depending on complexity.
That said, there are some valuable features to check out once your eCommerce site is up and running. For example, you’ll have access to integrated marketing solutions that cover multiple channels. This goes hand-in-hand with Magento’s approach to seamlessly integrating physical and digital shopping experiences.
Understanding Magento’s Family of Products
If you’re looking for a dedicated eCommerce solution, Magento has a lot to offer. However, it’s important to note that this platform comes in three distinct editions:
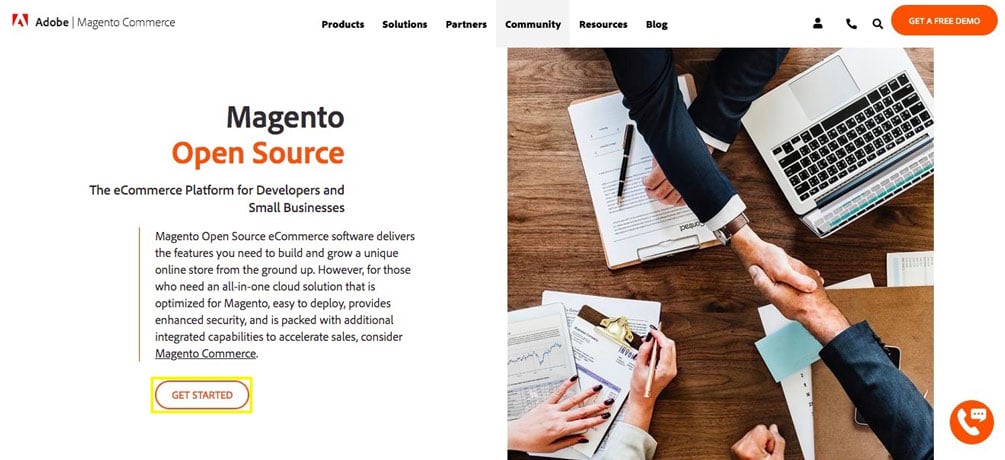
- Magento Open Source. This edition is free to use, but you’ll have to host your eCommerce site yourself. This usually means paying for a hosting plan. Although this version has fewer features than the paid editions, it’s highly customizable and powers a large number of successful online stores.
- Adobe Commerce (On-Premise). Formerly called Magento Commerce (and before that, Magento Enterprise), this paid edition offers more features, such as the Progressive Web Application (PWA) studio, a drag-and-drop Page Builder, advanced B2B functionality, and customer segmentation tools. You’ll still need to choose a hosting provider, but you’ll have access to professional Adobe support.
- Adobe Commerce Cloud. This edition is very similar to the on-premise version above. However, it’s hosted on a managed cloud infrastructure (built on Amazon Web Services) that includes built-in CDN, auto-scaling, and continuous security patches – so you don’t have to manage hosting separately.
If you’re just starting your brand or are otherwise on a tight budget, you’ll likely want to opt for the open-source version of the platform. For those who have more flexibility when it comes to price, the primary decision will be whether you’re happy with Adobe’s managed cloud hosting, or if you want to choose your own provider.
In terms of costs, how much you’ll spend to use Adobe Commerce or Adobe Commerce Cloud is determined by your annual sales revenue. Small stores that are working on building up a customer base can benefit from this system. That said, it can become quite pricey at scale.
How Much Does It Cost to Build a Magento Website?
One of the first questions that comes up when considering Magento is price. While Magento Open Source itself is free, building a complete online store involves several costs. Here’s an approximation of what you can expect:
- Magento Open Source is free. Adobe Commerce pricing is quote-based and scales with your store’s revenue – license fees typically start around $22,000/year. Adobe Commerce on Cloud starts at approximately $40,000/year.
- Domain Name: Typically $10 to $20 per year for a standard .com domain, though premium domains can cost significantly more.
- Web Hosting: Starting from around $10-30/month for a VPS plan suitable for Magento. Shared hosting is not recommended due to Magento’s resource requirements.
- Theme: Free themes are available, but premium themes generally range from $100 to $500. A fully custom theme will cost considerably more.
- Extensions: Individual extensions can range from free to $500+, depending on functionality.
- Development: If you hire a developer, rates range from $25 to $200+/hour depending on location and expertise.
For a small store using Magento Open Source with a premium theme and a handful of extensions, you might spend $500-$3,000 to get started (plus ongoing hosting). Enterprise-level builds with Adobe Commerce and custom development can run into tens of thousands of dollars or more.
The key takeaway: plan your budget before you begin. Magento is flexible enough that you can start small and scale up as your business grows.
Planning Before You Build
Before diving into the technical steps, it’s worth spending some time on business planning. This upfront work will save you from costly rework later:
- Identify your target audience. Understanding your customers’ demographics, interests, and buying behaviors will shape your store’s design, product catalog, and marketing approach.
- Define your business model. Will you sell B2C, B2B, or both? Will you sell physical products, digital goods, or services? This affects which Magento edition and extensions you’ll need.
- Set clear goals. Are you focused on increasing sales, building brand awareness, or expanding into new markets? Clear objectives guide your development priorities.
- Plan your catalog structure. Sketch out your categories, subcategories, and product types before you start building. A well-organized catalog is easier to manage and better for SEO.
- Consider compliance requirements. If you accept credit card payments, look into PCI DSS compliance. If you sell to customers in the EU, prepare for GDPR requirements including cookie notices and privacy policies.
With this groundwork in place, you’ll be much better positioned for the technical steps ahead.
How to Build an Ecommerce Website With Magento Open Source (In 12 Steps)
Magento can seem a little intimidating at first, but we’ve broken down the process for you. We’ll cover the steps you’ll need for creating and launching a website with the open-source edition of the platform.
Before you begin, it’s best if you create a free Magento account. This is a separate portal from the website you’ll be building, but you can easily move from one to the other. Your user page will provide you with information about the products you’ve purchased, billing, and more.
Step 1: Review Magento’s System Requirements
Like most website development platforms, Magento has certain requirements that have to be met by any server that is going to host the platform. You’ll want to make note of them before you start shopping for a hosting provider so you can ensure your website will run properly.
To use the current version of Magento Open Source, you’ll need to make sure you have the following:
- Operating System. Linux x86-64 distributions such as Ubuntu, RedHat, or CentOS. You can also develop locally on Mac or Windows using Docker or similar virtualization tools.
- Web Server. You can use either Apache 2.4 or nginx 1.x as your web server.
- Memory. Your Magento setup will require a minimum of 2GB of RAM, but 4GB or more is strongly recommended for production environments.
- Database. Magento 2.4.x requires MySQL 8.4 or MariaDB 11.4+.
- PHP. Magento currently recommends PHP 8.4 or 8.3. There are specific required PHP extensions outlined in the official documentation.
- Search Engine. Magento 2.4.8 requires OpenSearch as its search engine. Elasticsearch support has been fully removed in this release – if you are currently using Elasticsearch, you will need to migrate to OpenSearch before upgrading.
- Composer. Composer 2.x is required for installing and managing Magento and its dependencies.
- Security. An SSL/TLS certificate is required for secure data transfers, HTTPS encryption, and integration with payment gateways like PayPal.
Understanding these requirements before moving on to the next step can save you time and potential headaches. You don’t want to spend money signing up for a hosting plan only to realize it doesn’t meet Magento’s specifications.
Step 2: Choose a Web Host and Domain Name
Next, you’ll need to take your list of system requirements and look for a web host. Most providers will offer the equipment and tools you need to run Magento. Even so, it’s wise to choose a provider that includes support specifically for the platform.
Some popular hosts that support Magento include:
- Bluehost – A budget-friendly option with one-click Magento installation via cPanel, free SSL, and 24/7 support. VPS plans start from around $4.99/month on a 36-month term. Best suited for beginners and small stores.
- Hostinger – Consistently rated a top Magento host for value, with VPS and cloud plans offering strong performance, NVMe SSD storage, and scalable resources. Magento VPS hosting plans start at $6.99/month.
- DreamHost – A flexible, developer-friendly option with one-click Magento setup on managed VPS plans. VPS plans start at $10/month on a 3-year term, renewing at $24.99/month. Note that DreamHost does not offer dedicated Magento-specific hosting, so some manual server configuration may be required.
In addition to looking at the prices for each of these companies’ plans, it’s wise to consider factors such as performance, security, scalability, and whether there are any additional features you can add to your account.
A few important hosting considerations for Magento specifically:
- Avoid shared hosting. Magento is resource-intensive. Shared hosting may seem cheaper, but you’ll be sharing server resources with other sites, which can cause slow load times and problems during traffic spikes. A VPS, dedicated server, or cloud hosting plan is a much better fit.
- Look for SSD storage. Solid-state drives significantly improve page load times compared to traditional hard drives.
- Ensure SSL is included. If you intend to integrate your eCommerce site with payment gateways, SSL is essential. Most hosting plans include a free SSL certificate.
- Check for scalability. As your store grows, you’ll need the ability to upgrade to a plan with more resources without migrating to a new host.
While you’re at it, it’s a smart idea to register a domain name at this point, too. This will act as your website’s address and be a key part of your brand, so choose wisely. Keep it short, memorable, and related to your business. Many hosting providers offer domain name registration as part of your hosting package.
Step 3: Download and Install Magento Open Source
Once you’ve purchased a plan from a hosting provider and set up your account, you can install Magento Open Source. The recommended method is using Composer via the command line:
Before installing, you’ll need to meet several prerequisites. If you’re considering a manual installation, we recommend reviewing Magento’s official installation documentation.
The key steps for a manual installation are:
- Set up your server environment (web server, PHP, database, Elasticsearch/OpenSearch)
- Create a database for your Magento installation
- Get Composer 2
- Obtain your authentication keys from your Magento Marketplace account
- Download and install Magento via Composer or archive files
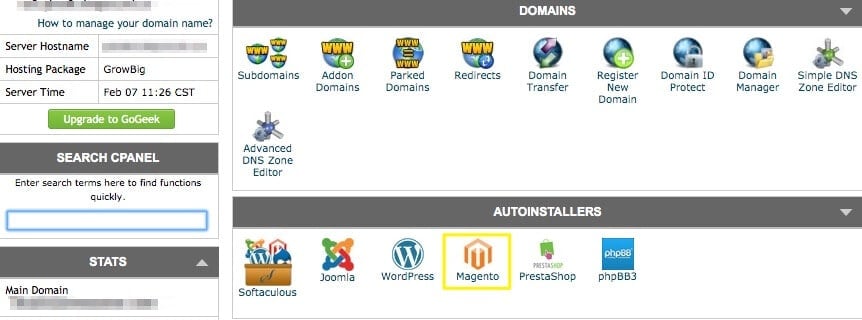
Beginners can still get Magento Open Source up and running with a one-click installation process if your host offers one. To do this in cPanel, navigate to cPanel > Autoinstallers and look for the Magento option:
Once you click on the Magento icon you will have the option to begin the installation process by configuring your administration settings.
Step 4: Configure Your Administration Settings
Before actually installing Magento, you’ll want to customize your admin username and password. You’ll be prompted to do so before executing the installation process.
Next, you’ll need to specify where your Magento installation will live on your server and what you want the URL path to your admin login page to be. For security purposes, avoid using a predictable admin URL like “/admin” – choose something unique that would be difficult to guess.
Once you’ve finished customizing these settings, click on Install. When the process is complete you’ll receive a confirmation message:
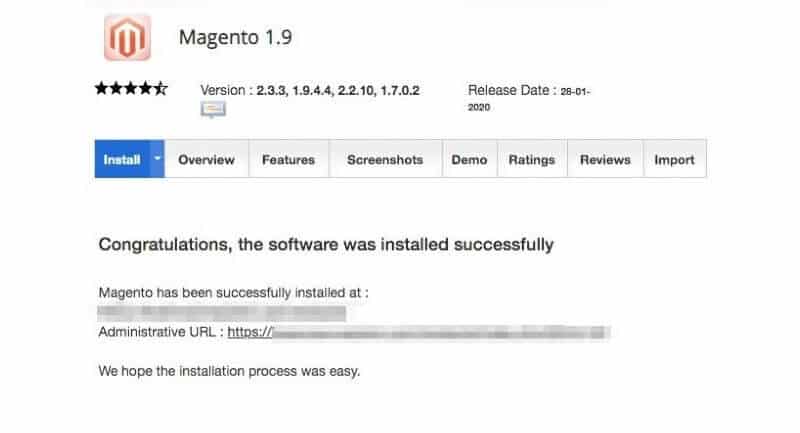
Now you can click on the Administrative URL and log in with the username and password you created during the installation process. This will take you to your new Magento dashboard where you can begin building your eCommerce website.
After logging in for the first time, you should also:
- Set up cron jobs for automated tasks (indexing, email sending, currency rate updates)
- Enable production mode for better performance
- Verify proper file and folder permissions
Step 5: Choose and Install a Theme for Your Store
One of the first things you might want to do is select a theme for your store. This will determine the look of your site. In many cases, you can modify the one you choose to match your branding.
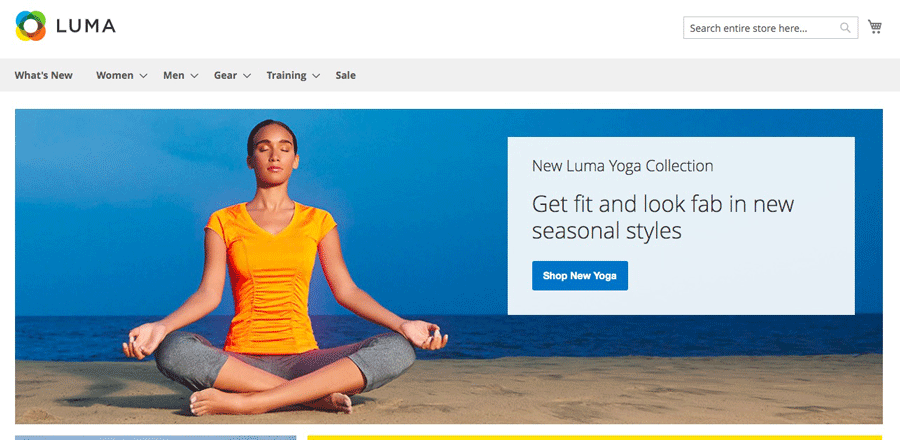
Magento comes with a default Luma theme that provides a solid starting point. It’s clean and functional, and you can customize banners, logos, and colors to fit your brand. However, if you want something more distinctive, you have several options:
- Magento Marketplace – Official themes tested for compatibility
- Third-party theme providers – Premium themes with advanced features and design options (such as those from ThemeForest or TemplateMonster)
- Custom theme development – Hire a developer to build a unique theme tailored to your brand (most expensive option)
When choosing a theme, prioritize ones that are lightweight, mobile-responsive, SEO-optimized, and compatible with the latest version of Magento.
In order to download and install themes from the Magento Marketplace, you first need to retrieve your access keys. You can find these in your user account by navigating to Marketplace > My Products > Access Keys:
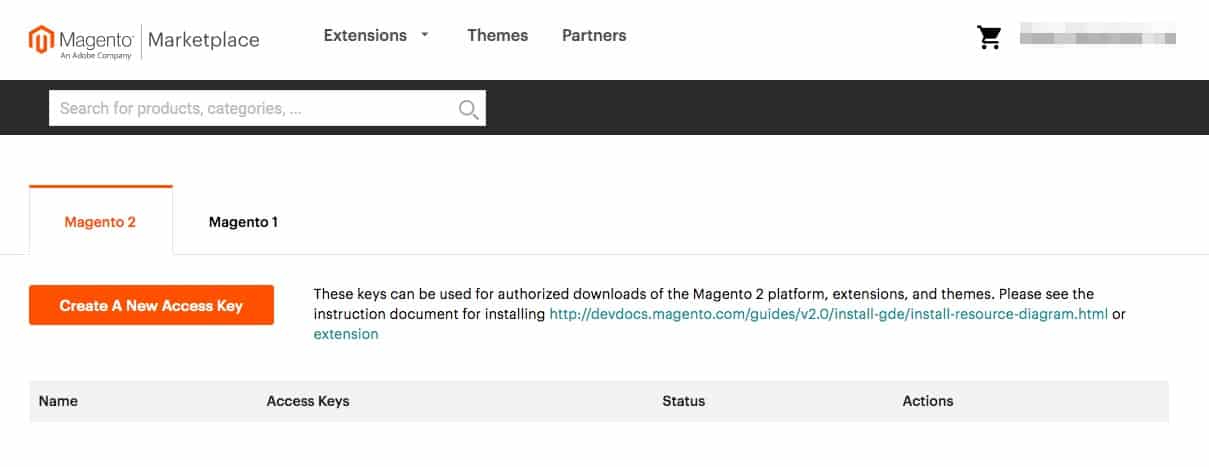
On the Access Keys page, you’ll be prompted to generate new keys and assign them each a name. After you complete this step, you’ll need to copy your public and private keys. Back in your Magento store dashboard, you can now navigate to System > Web Setup Wizard > Extension Manager:

When you click on Extension Manager, you’ll be prompted to enter the access keys you just created. Once you’ve successfully connected your Magento Marketplace keys with your website admin panel, any themes or extensions you purchase will appear in your Extension Manager list.
Navigate to the theme you want to use, select the box to the left of the file, then click on Install to begin the process. After that, you’ll be guided through a Readiness Check to ensure your website is compatible. If there are issues, you’ll need to resolve them before proceeding.
Step 6: Customize Your Theme
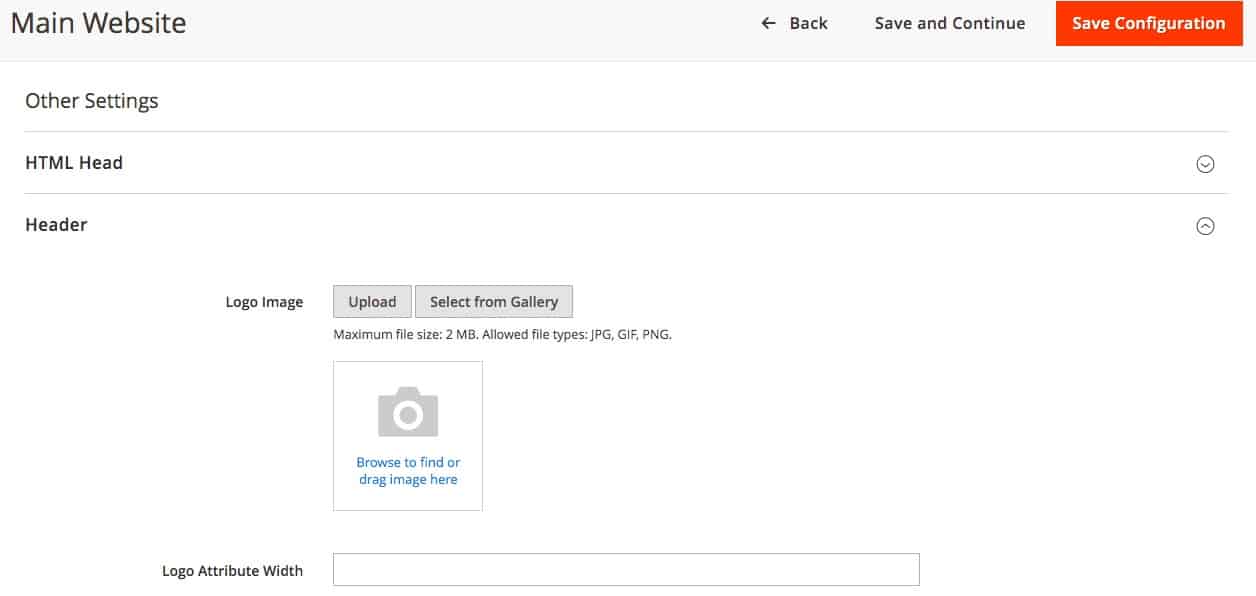
Once your new theme is installed, you can access it by going to Content > Design > Configuration. Then you can begin modifying its settings by selecting the website setup you want to customize. This is where you’ll find the interface for changing or uploading a logo, favicon, brand colors, and other visual elements for your online store:
Additionally, you can use the Content > Elements menu to edit your website’s pages and widgets, as well as the blocks that make up the structure of the site. Magento also includes a Page Builder with drag-and-drop functionality that makes it easier to design homepage layouts, landing pages, and product pages without writing code.
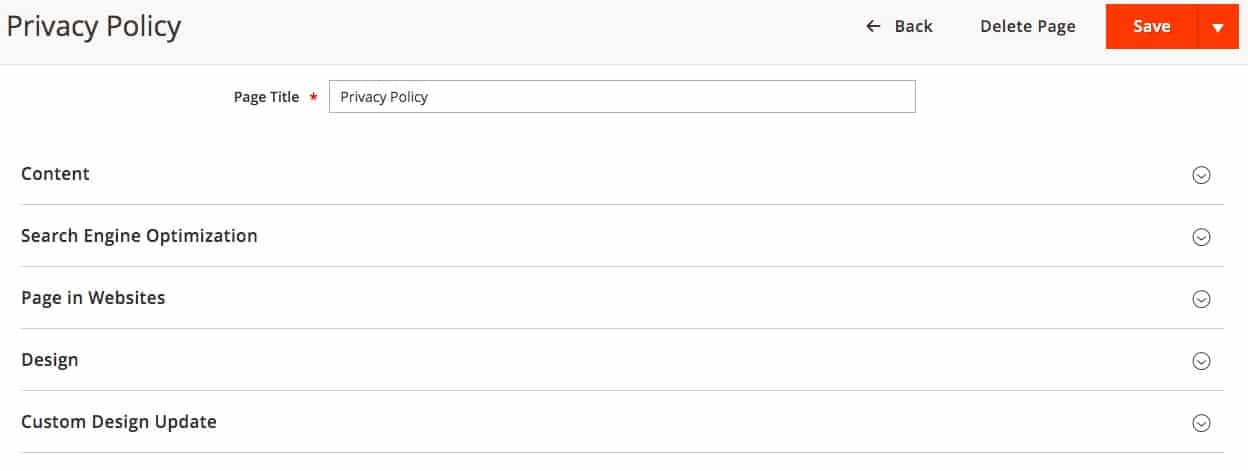
For example, if you select Pages you’ll see a list of your current content that’s available for editing, as well as the layout and theme each page uses:
There are several useful features included in the Magento content editing interface. In particular, it includes a Search Engine Optimization (SEO) panel for each individual page where you can set URL keys, meta titles, meta descriptions, and other SEO-related settings.
Understanding the Magento Content Hierarchy
It’s worth taking a moment to dive a little deeper into how Magento organizes content. There is a hierarchy when it comes to the different elements you’ll need to work with:
- Websites. When you install Magento, you’ll automatically start with one website. This is referred to as your Main Website. You can also create additional websites using the same installation.
- Stores. You can create multiple stores within a single website. Each can have its own main menu. Although all the stores within a website share a catalog, they can feature different products.
- Store Views. This is another way you can offer a flexible experience to your customers. Your Magento stores can have multiple views. For example, you can use this feature to accommodate different languages. In this scenario, your customers would be able to select a language from the front page to change the store view.
This three-tier structure is one of Magento’s most powerful features. It allows you to run multi-language, multi-brand, or multi-region stores all from a single Magento installation.
Wrapped around all of these elements is what Magento developers refer to as ‘scopes’. This element enables you to apply settings within a specific context, meaning at the global, website, store, or store view level.
You can easily spot the scope of a feature in your Magento dashboard – it will be designated with brackets. For example, the [website] scope would appear next to settings that apply to everything within the website hierarchy tier.
Step 7: Explore Extensions for Added Functionality
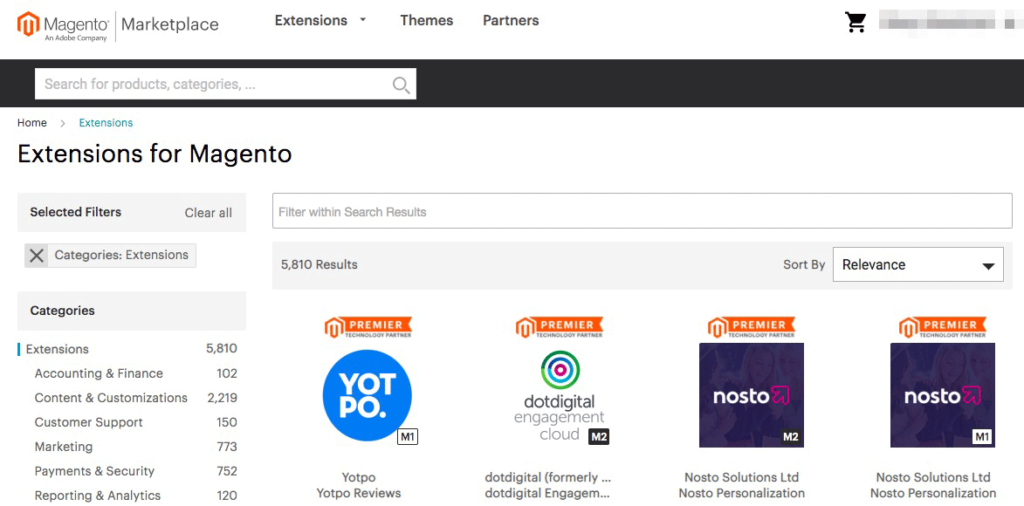
The Magento Marketplace is also where you’ll find extensions that can add functionality to your store. This includes everything from Instagram widgets to checkout enhancements:
In order to add an extension to your store, you can follow the same steps we outlined for adding a new theme. You can filter the extensions in the marketplace by category, price, rating, and compatibility. Once you choose one and check out, you will be able to download and install it.
A word of caution: avoid installing too many extensions, as each one adds code to your site and can potentially slow it down or cause conflicts. Only install what you genuinely need.
When it comes to which extensions you should use, the choice depends on your goals for your eCommerce site. Some general categories you might pursue include:
- SEO. Extensions that help you manage meta tags, generate sitemaps, add structured data markup, and fix duplicate content issues can significantly improve your search visibility.
- Security. There are a variety of security-related Magento extensions, including two-factor authentication, reCAPTCHA for checkout pages, and malware scanning tools. You can browse available security extensions on the Adobe Commerce Marketplace.
- Marketing. Depending on your strategy, you might want extensions for email marketing, upselling and cross-selling, loyalty programs, or a blog extension for content marketing.
- Analytics tracking. Monitoring customer behavior can help you make informed decisions to improve your site. Extensions for Google Analytics 4 integration and reporting dashboards are particularly useful.
- Payment gateways. In order for customers to make purchases on your site, you’ll need a payment gateway. Popular ones such as PayPal, Stripe, and Braintree help your store appear more trustworthy and put shoppers at ease.
- Shipping. If you’re selling physical products, extensions that help customers track shipping progress, calculate real-time shipping rates, or manage orders can improve the customer experience.
You may not need extensions from all of these categories, but they’re available at varying price points if you do.
Step 8: Modify Your Store Settings
The last thing you’ll want to tackle before you start adding products to your store is to personalize your eCommerce site’s settings. To do this, navigate to Stores > Settings > Configuration:
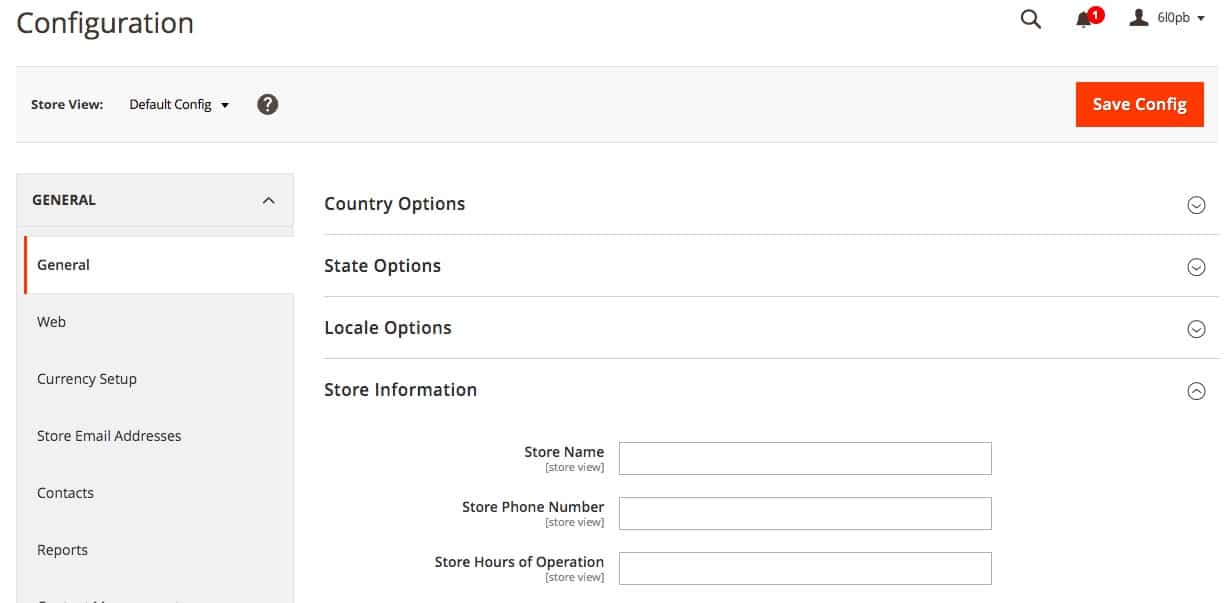
There are a lot of options to consider here, but some highlights you’ll want to address include:
- Location, timezone, and currency settings (including multiple currencies if selling internationally)
- Store name, legal business name, and contact information
- The email addresses to be used for transaction notifications (sales, support, general inquiries)
- Whether the price scope should be [global] or [website]
- Tax classes and region-specific tax rules
- Customer account settings
- Shipping and payment options
- SMTP email settings for reliable email delivery
Any extensions you add that have settings you might need to adjust will also appear in this list of configurations. Once you’ve made changes, you’ll need to click on the Save Config button in order for them to take effect.
Step 9: Set Up Your Product Pages With Prices and Images
Setting up products for your Magento store takes just a few steps. If you go to Catalog > Products you’ll see a list of your existing merchandise and the Add Product button:
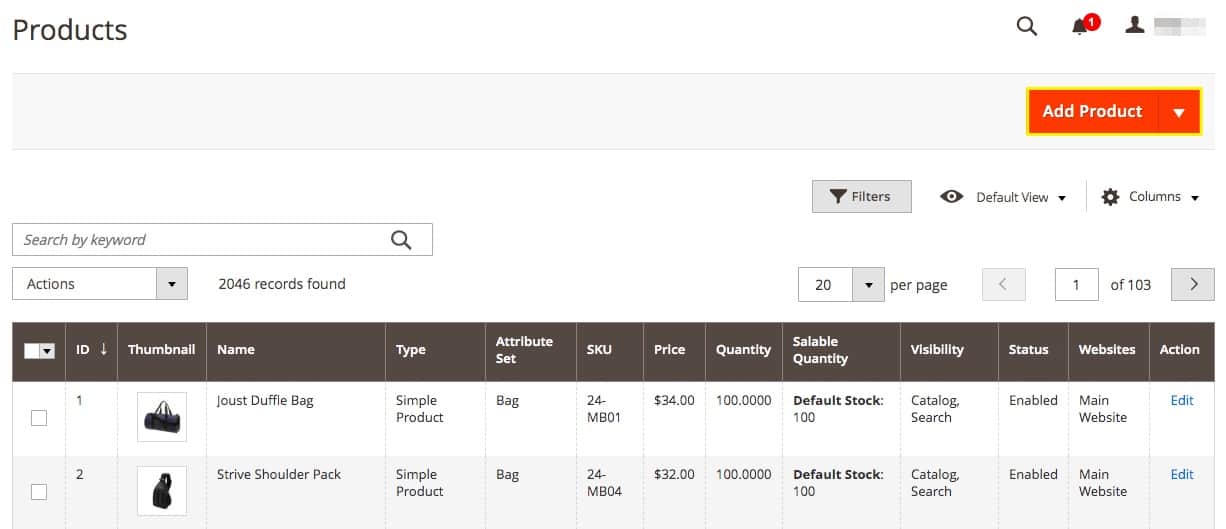
If you click on it, you’ll be able to select the type of product you want to add from the dropdown menu:
- Simple products: A standard physical product with no variations.
- Configurable products: Simple products that come in multiple variations (e.g., a shirt in different sizes and colors).
- Grouped products: A collection of simple products that can be purchased individually or together.
- Virtual products: Services, online courses, subscriptions, or other ‘products’ that don’t require shipping or downloading.
- Bundle products: A collection of items that customers can customize into a package (e.g., build-your-own computer).
- Downloadable products: Digital products that can be downloaded, such as e-books or software.
Which product type you select will determine the template you’ll use to create the corresponding page. You’ll always need to include a name, price, and Stockkeeping Unit (SKU) number. Optional information includes weight and dimensions, stock quantity, and a description.
Before you start entering product details, plan your category structure. Create main categories (e.g., Men, Women, Electronics) and break them into subcategories (e.g., Men > Shoes > Sneakers). Keep the structure simple – two to three levels deep is ideal. Enable layered navigation filters (by size, brand, price, color) to make browsing easier for customers.
When creating product pages, keep these best practices in mind:
- Upload high-quality images (compressed for fast loading, preferably in WebP format). Most people want to see what an item looks like before they purchase it.
- Write unique, keyword-rich product titles and descriptions for better SEO.
- Add alt text to all images for accessibility and search visibility.
- Consider adding product videos or 360-degree images for higher-value items.
- Enable customer reviews and ratings to build trust.
When you’re finished, click on the Save button in the top right corner. If you’re ready for your product to go live on your site, make sure the Product Online switch is toggled on as well. However, it’s sometimes best to wait until all your items are ready for customers before publishing them.
For large catalogs (thousands of SKUs), you can bulk-upload products using Magento’s CSV import/export feature rather than adding each one manually.
Step 10: Select Your Payment and Shipping Options
Payment and shipping options often have a big impact on whether or not a customer completes a purchase online. Fortunately, with Magento, you have a wide range of options for both.
As we briefly mentioned in Step 8, you’ll find these settings by going to Stores > Settings > Configuration. Then, Payment Methods will be listed under Sales in the collapsible menu in the left sidebar:
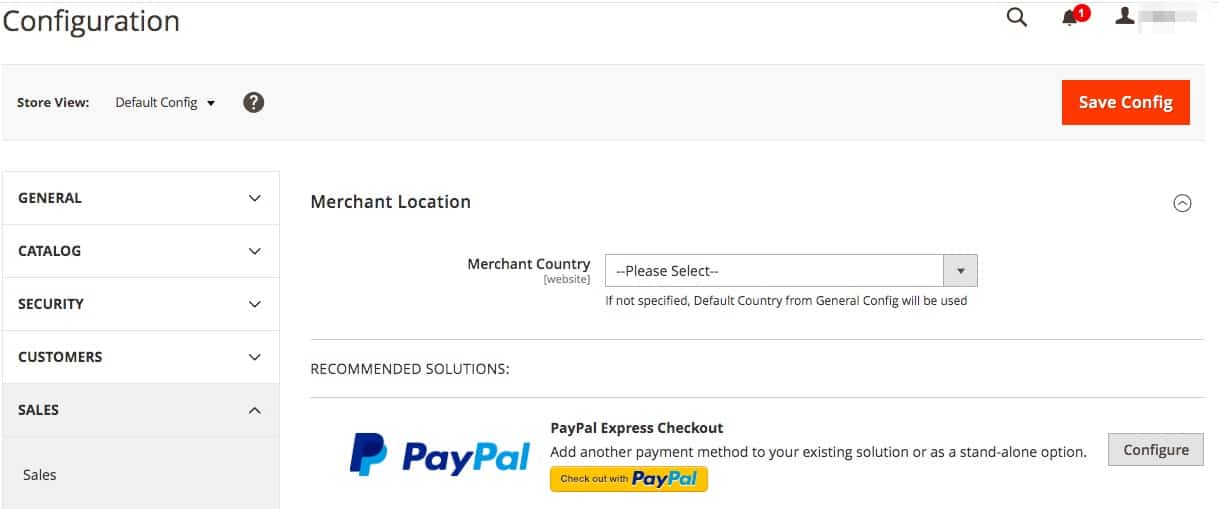
This is where you can configure the payment methods that come with Magento, including bank transfers, purchase orders, check/money orders, and zero subtotal checkout. You can also integrate popular payment providers such as PayPal, Braintree, Stripe, and Klarna.
Each available payment gateway will have a Configure button you can click on to open its complete list of settings. You’ll then need to add information such as which card types you’ll allow and other provider-specific settings.
It’s a good idea to offer at least two to three payment options. Many abandoned carts happen simply because a customer’s preferred payment method isn’t supported.
For shipping, you’ll find the settings under the same Sales section in the configuration menu. Magento supports several built-in shipping methods and carrier integrations, including:
- Flat rate shipping
- Table rate shipping (rates based on destination, weight, or price)
- Free shipping (with optional minimum order thresholds)
- UPS, FedEx, DHL, and USPS integrations
- In-store pickup
You can also extend your shipping options further through marketplace extensions for additional carriers or custom shipping rules. Configuration for each method is straightforward from the admin panel.
Step 11: Preview, Test, and Launch Your Website
Editing a live site can be confusing for visitors who find it while it’s still in progress, as well as causing other potential issues. For these reasons, it’s always best to use a staging environment or develop locally and then push your changes to your server.
Before making your website live, run through a thorough pre-launch checklist:
Frontend testing (customer experience):
- Check all menus, category links, product pages, and search functionality
- Test the complete checkout process with multiple payment methods
- Verify that contact forms, newsletter signups, and account registration work properly
- Test on mobile devices (both iOS and Android) – the majority of eCommerce traffic comes from mobile
Backend testing (admin and operations):
- Place test orders and verify the complete flow: order confirmation, invoicing, shipment, and refund
- Check that inventory updates correctly when orders are placed
- Validate tax calculations and shipping rate accuracy for different regions
- Verify all transactional emails (order confirmation, shipping update, password reset)
Performance testing:
- Test site speed using tools like Google PageSpeed Insights or GTmetrix
- Aim for page load times under 2.5 seconds
If you’ve been developing your site locally, the last step is to push all of your Magento files to your web server. You can do this through your local development application or with a File Transfer Protocol (FTP) client. Deploying to a live server can take anywhere from a few hours to several days depending on the size and complexity of your project.
Step 12: Optimize for Speed, SEO, and Security
Launching your store is a major milestone, but it’s not the finish line. To attract customers and keep them coming back, you’ll need to continuously optimize your site’s performance, search visibility, and security.
Speed Optimization
A fast-loading store directly impacts your conversion rates and search rankings. Key steps include:
- Enable caching. Use Magento’s built-in Full Page Cache and consider Varnish Cache for even better performance.
- Use a CDN. A Content Delivery Network (like Cloudflare or Fastly) serves your site’s static assets from servers closer to your visitors, reducing load times globally.
- Optimize images. Compress images without losing quality and use modern formats like WebP. Consider lazy loading for images and videos so they only load when visible on the screen.
- Minify code. Merge and minify JavaScript, CSS, and HTML files to reduce overall page size.
SEO Optimization
Good SEO helps potential customers find your store through search engines. Focus on:
- Clean URL structure. Use human-readable URLs (e.g., /mens/shoes/sneakers instead of long query strings).
- Meta data. Add optimized meta titles and descriptions for every product page, category page, and CMS page.
- Structured data. Implement Schema.org markup so your products can appear in Google rich snippets with pricing, ratings, and availability information.
- XML sitemap. Generate and submit your sitemap to Google Search Console. Configure your robots.txt to block irrelevant pages from indexing.
- Fix duplicate content. Use canonical tags and properly configure layered navigation to prevent SEO dilution.
- Connect analytics. Set up Google Analytics 4 and Google Search Console to track traffic, monitor rankings, and identify opportunities for improvement.
Security Hardening
Protecting your store and your customers’ data is non-negotiable. Essential security measures include:
- Keep everything updated. Regularly update the Magento core, extensions, and themes. Security patches should be applied as soon as they’re released.
- Enable Two-Factor Authentication (2FA). Add an extra layer of login security for all admin accounts.
- Secure your admin panel. Use a custom admin URL, strong unique passwords, and consider restricting admin access by IP address.
- Use a Web Application Firewall (WAF). Services like Cloudflare or Sucuri can protect against common attacks.
- Schedule regular backups. Automate backups so you can quickly restore your site in case of a hack or server failure.
- Run security scans. Adobe provides a free Magento Security Scan tool that checks for known vulnerabilities.
Optimization is an ongoing process. As your store grows, continue testing, measuring, and improving to stay competitive.
Frequently Asked Questions
How long does it take to build a Magento website?
A basic Magento store using a pre-built theme and a modest product catalog can be set up in 2-4 weeks. A fully customized store with a custom theme, complex integrations, and a large catalog can take 3-6 months or longer, depending on the scope of the project.
Is Magento good for small businesses?
Yes. Magento Open Source is free and highly customizable, making it a viable option for small businesses. However, it does require more technical knowledge than simpler platforms like Shopify. If you’re comfortable with some technical setup (or willing to hire a developer), Magento gives you more flexibility and control as your business grows.
What technical skills are needed to build a Magento site?
For basic setup using one-click installers and pre-built themes, you don’t need deep technical knowledge. For more advanced customization, familiarity with PHP, MySQL, HTML/CSS, JavaScript, and Linux server administration is helpful. Many store owners hire developers for the initial build and then manage day-to-day operations through Magento’s admin panel.
How does Magento compare to Shopify or WooCommerce?
Magento is best for businesses that need deep customization, scalability, and flexibility – particularly those with large catalogs or B2B needs. Shopify is easier for beginners and is fully hosted (SaaS), but offers less customization. WooCommerce is a good fit for smaller stores that are already built on WordPress. The right choice depends on your technical comfort level, budget, and growth plans.
Conclusion
Magento is one of the most powerful eCommerce platforms available, offering the flexibility and scalability that growing businesses need. While the learning curve is steeper than some alternatives, the payoff is a store that can be customized to meet virtually any requirement.
You should have enough information from this tutorial to move the process along confidently. Here’s a quick summary of the key steps: review system requirements, choose reliable hosting, install Magento, configure your theme and settings, add products, set up payment and shipping, thoroughly test everything, and then optimize for speed, SEO, and security after launch.
If you want more information or run into issues along the way, there are some useful resources available online, including:
- Adobe Resource Center
- Adobe Commerce Documentation on Experience League