Forums are a great way to build community online. If you’re looking to create a WordPress website with a forum, then you need to look no further because we have got the how-to guide to end all how-to guides to get you up and running.
In this guide, we’re going to show you how to add a forum to your website using phpBB.
The phpBB is an open-source bulletin board system which means changes can be made to the phpBB code without needing permission from the phpBB board. Although what we’ll be going through are the very basics of getting started, the fact that it’s open-source means it can be modified exactly to your needs as your forum develops.
Even though we pride ourselves on creating super simple and easy-to-follow instructions, this one will be a bit more technical, so we’ll need to roll up our sleeves and get stuck in, but we’re here to walk through it with you, step-by-step.
Table of Contents:
-
- What you’ll need to install phpBB and create your forum
- Installing phpBB using your DreamHost Control Panel
- Installing phpBB if you’re using a different host provider
- Installing phpBB manually if you’re self-hosting
- phpBB resources
What You’ll Need to Install phpBB and Create Your Forum
If you’re coming here completely new to the idea of building a forum, here are a couple of things you’ll need to consider first.
Web Hosting
There are loads of options when it comes to choosing a web hosting provider, and whoever you choose is up to your personal preference. We recommend DreamHost because of its simplicity and customer support is great. We’ll be using them for this tutorial, so you’ll be able to follow along with the screenshots. Other host providers will have a similar process, but it will vary slightly.
Domain Name
On the DreamHost website, click ‘Domains’ in the top menu, and you will see a search box. Here you can check the availability of any domain ideas you have before registering and purchasing it through DreamHost. If you’re also hosting through DreamHost, you can click on the ‘Get started’ button and sign up for one of their packages, all of which include free domain name registration.
Step-By-Step Guide for Creating Your Forum
Now is the time to start creating your forum.
Installing phpBB Using Your DreamHost Control Panel
Let’s first start by installing phpBB using your host’s (in our example DreamHost) control panel.
1. Create an Account and Choose a Package
First of all, visit the DreamHost website at www.dreamhost.com and click on get started.
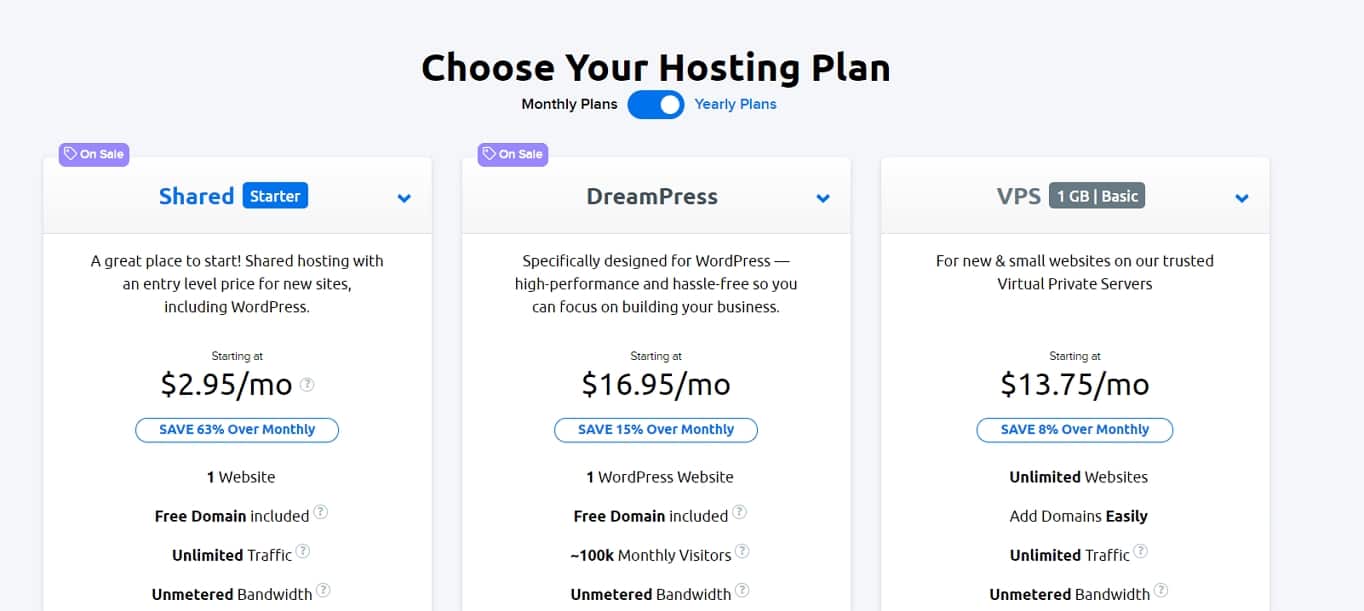
We’re going to be using the DreamHost one-click installer to keep it as simple as possible, and in order to do this, you need to have a fully hosted domain. For this, you need to choose either the shared starter or VPS option depending on what you need from your website hosting.
Once you’ve decided, click ‘sign up now’ on the option you’ve chosen.
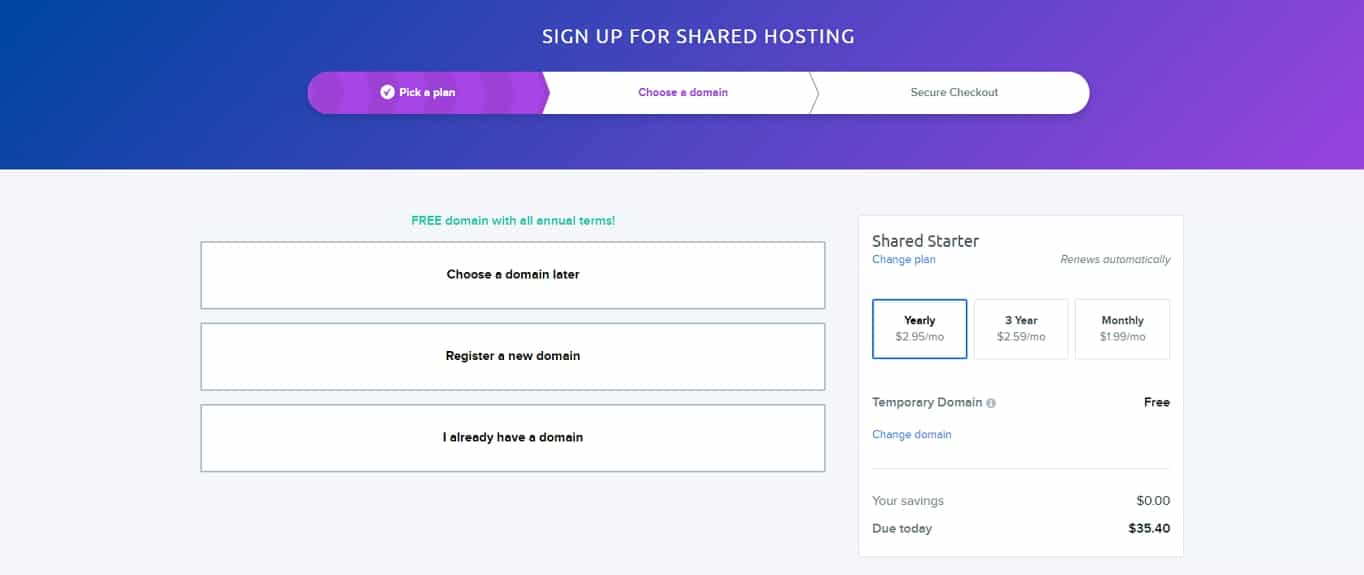
At this point, choose whether to register a new domain, you already have a domain you wish to use, or if you’re going to choose a domain later.
On the right-hand side, you can choose whether you would like to pay for your hosting monthly, yearly, or triennially.
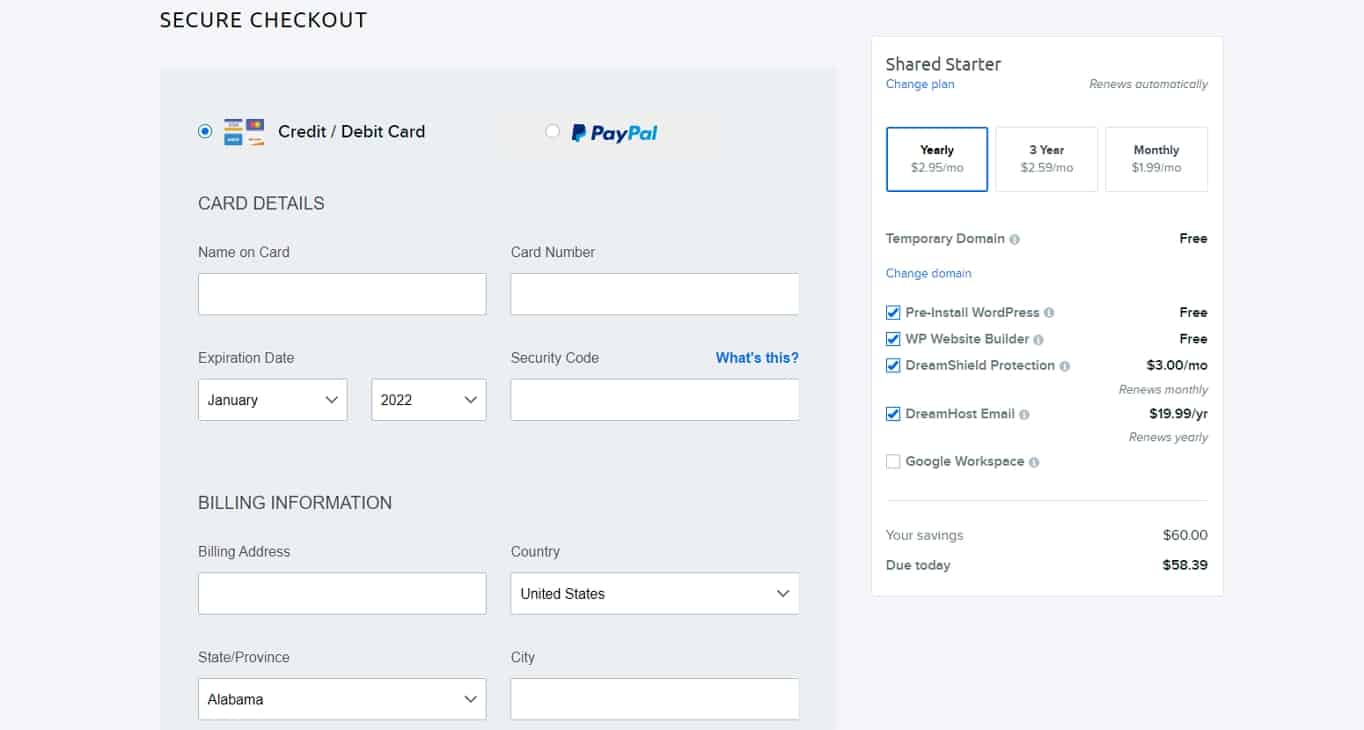
Fill in your payment details. Create an account by filling in your email address or signing in using your Google account, double-check the payment frequency you have selected and choose the checkboxes of any extras you would like included in your plan.
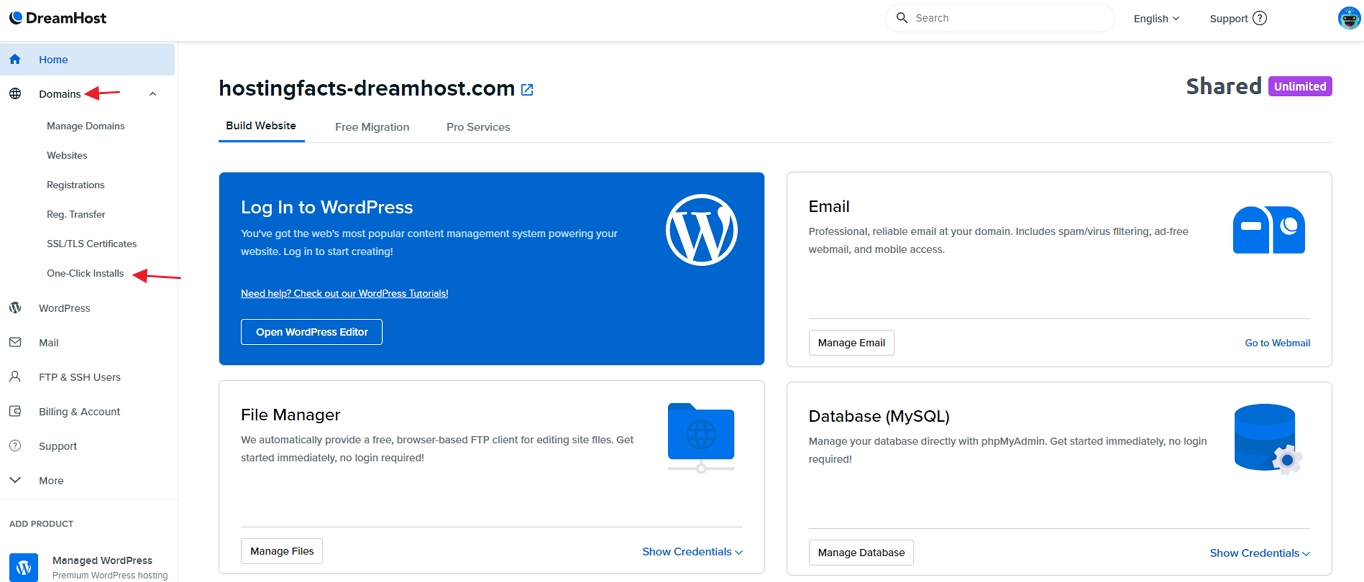
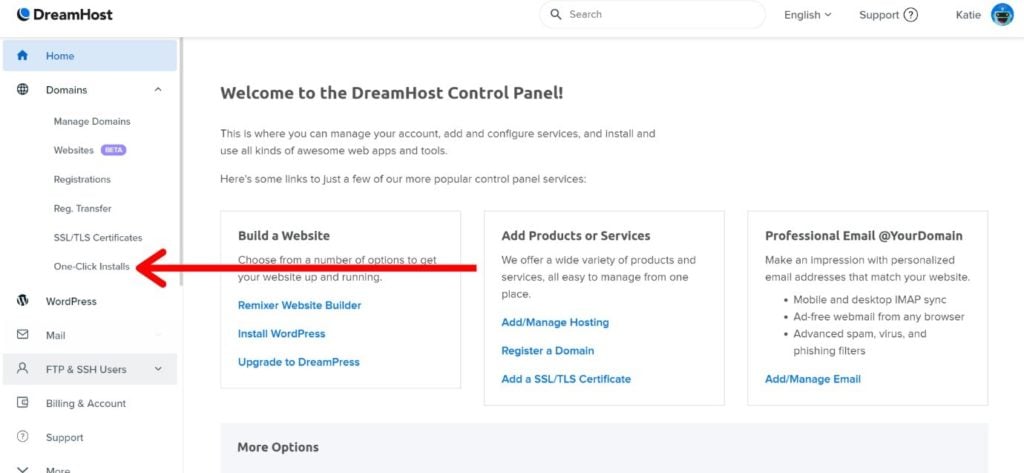
Once you’re on your DreamHost control panel, click on ‘Domains’ on the left-hand side menu to expand the options, and select ‘One-Click Installs’.
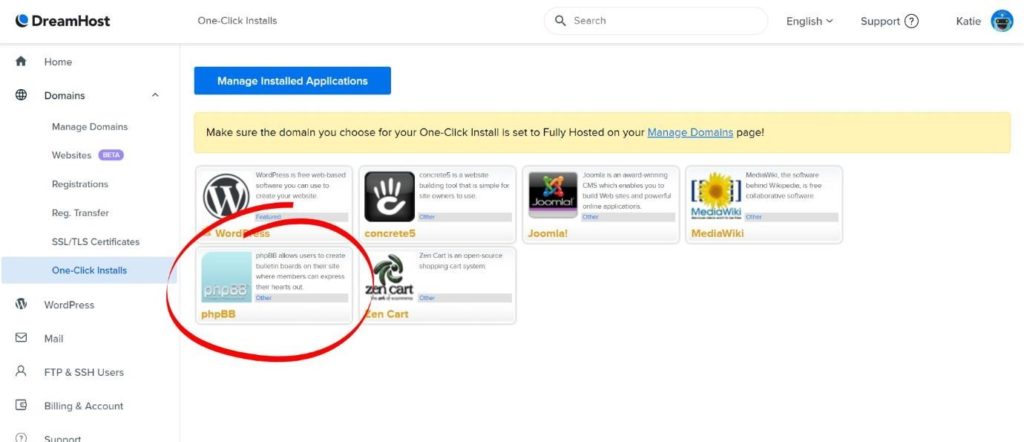
Select phpBB.
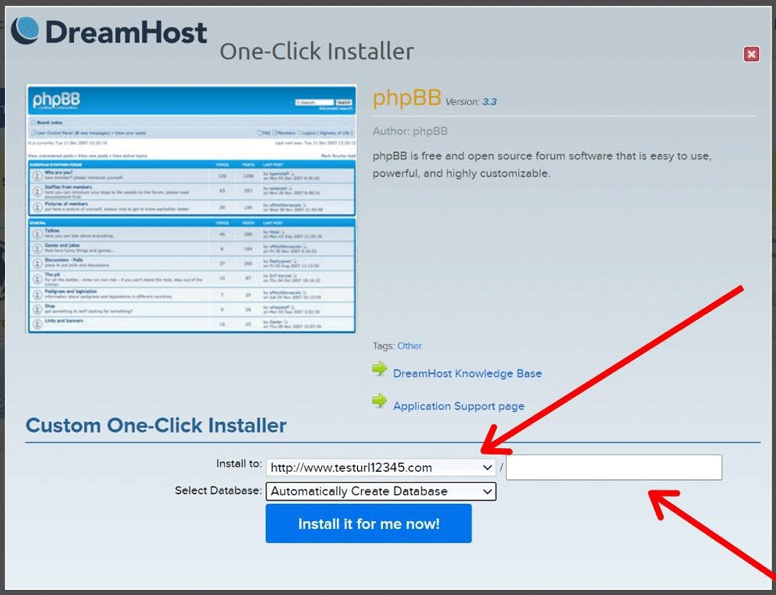
This will open the One-Click Installer box. Select the domain you would like to add phpBB to from the dropdown. If you leave the box after the forward-slash (/) blank, it will install it to your root domain.
If you wish to install it to a subdomain, write something in the box. For example, we might have chosen to add it to www.testurl12345.com/forum.
Once done, select ‘Install it for me now!’ and DreamHost will work their magic in the background to install it for you.
What if your domain isn’t appearing in the dropdown box?
Don’t panic. We just need to set it as fully hosted. For that, exit the installer box shown above.
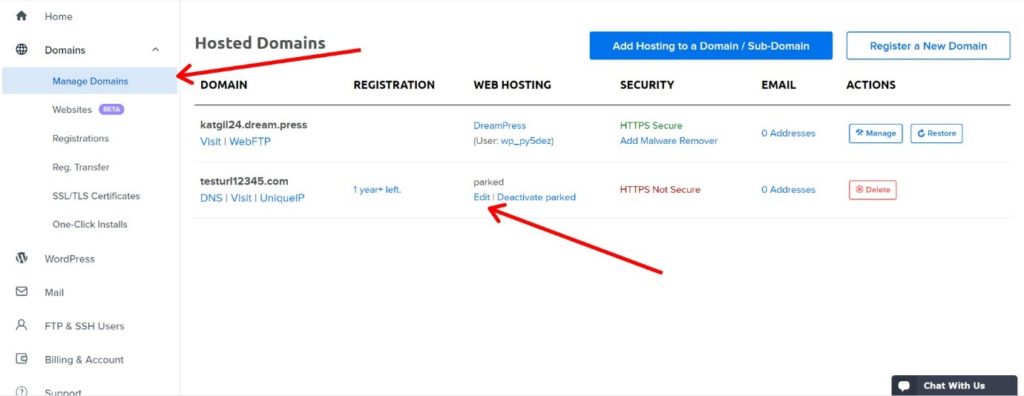
On the left-hand menu select ‘Manage Domains’, and then on the domain, you’re looking to use, select ‘edit’.
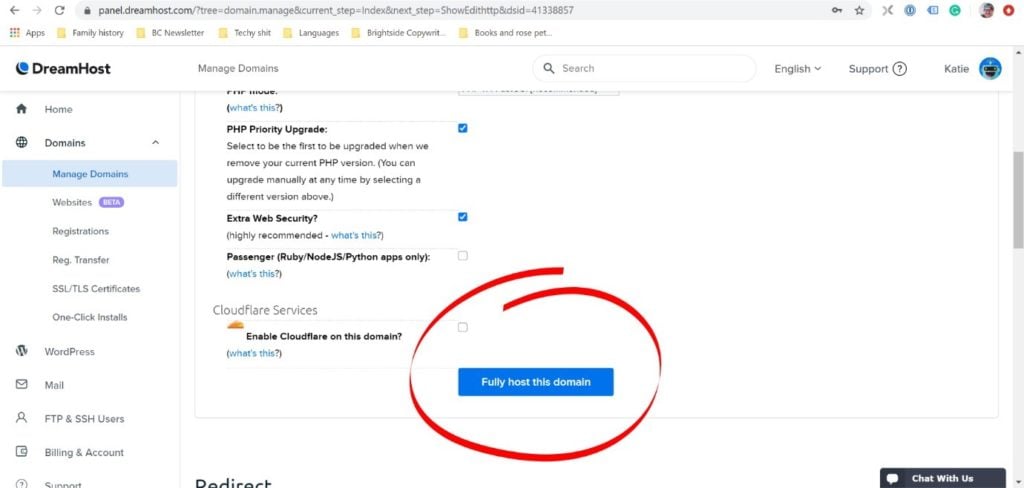
Select the ‘Fully host this domain’ button. Then you can return to ‘One-Click Installs’ in the left-hand menu and follow the instructions as above.
At this point, you can take a break. Bookmark these instructions, step away, make coffee, have a breather. After installing a one-click install, it takes a few hours for the MySQL subdomain to update – so there’s nothing else you can do for a bit.
2. Setup & Install
Once DreamHost has finished its magic behind the scenes, you can finish the phpBB setup.
To get there:
In the left-hand menu, click on ‘Domains’ to expand the options, and then ‘One-Click Installs’.
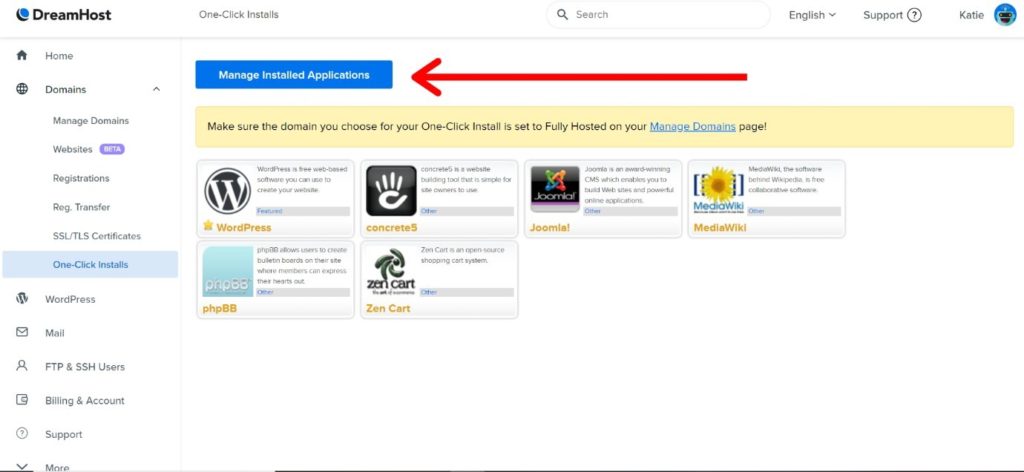
Click on the ‘Manage Installed Applications’ button.
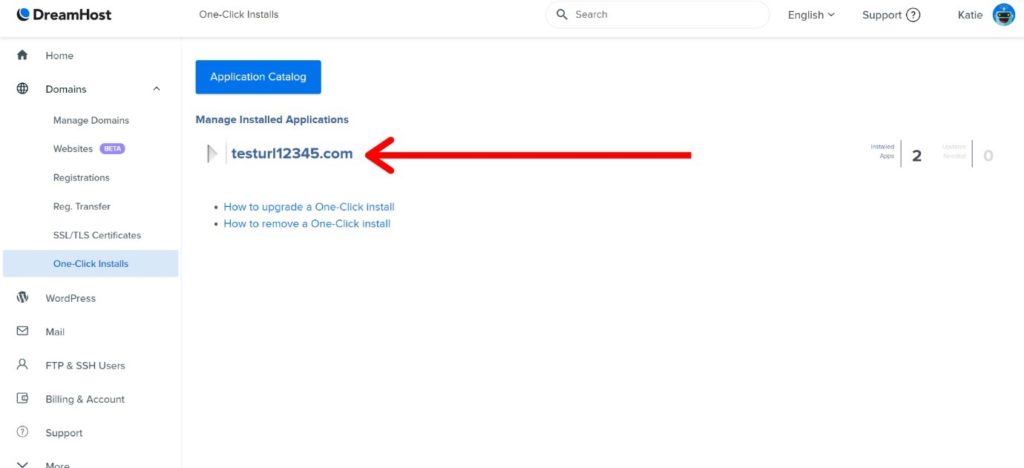
Click on the domain you’re installing phpBB to.
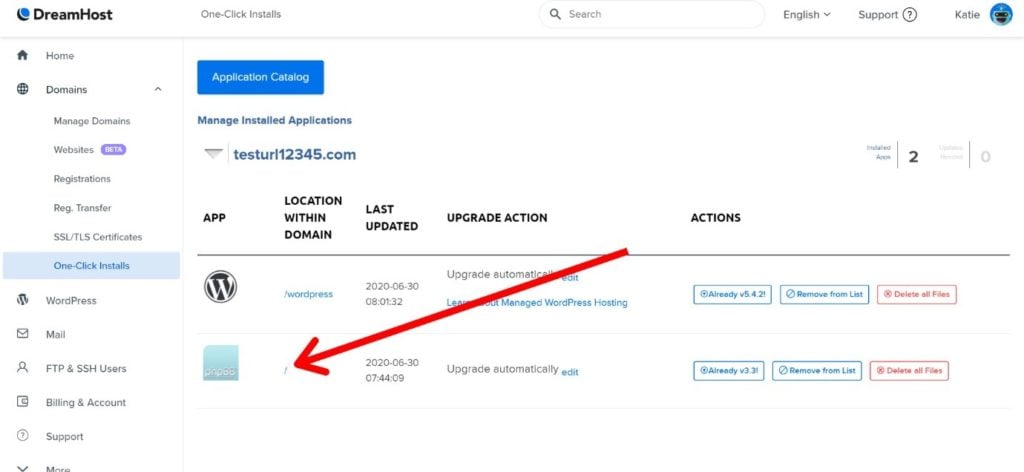
Select the ‘Location Within Domain’ of phpBB. In this instance, as we’re adding ours to the root domain this is just a forward slash. If you’ve chosen to install yours to a subdomain, however, yours might be something like ‘/forum’.
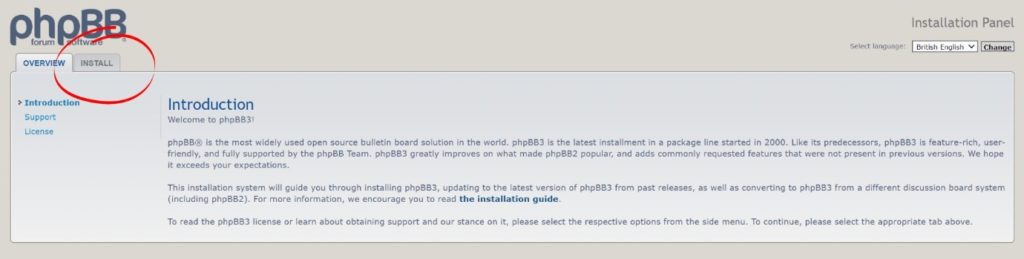
Once you reach the introduction page, click on the ‘Install’ tab.
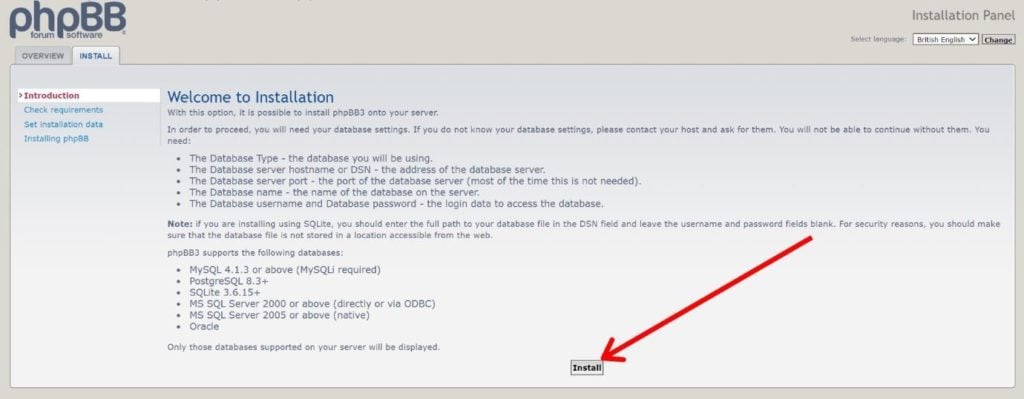
This screen gives you a list of the information you will need during the next step of the installation. We’ll walk through where to find that information in DreamHost. Once you’ve had a quick read, click the install button.
3. Configure Your Database
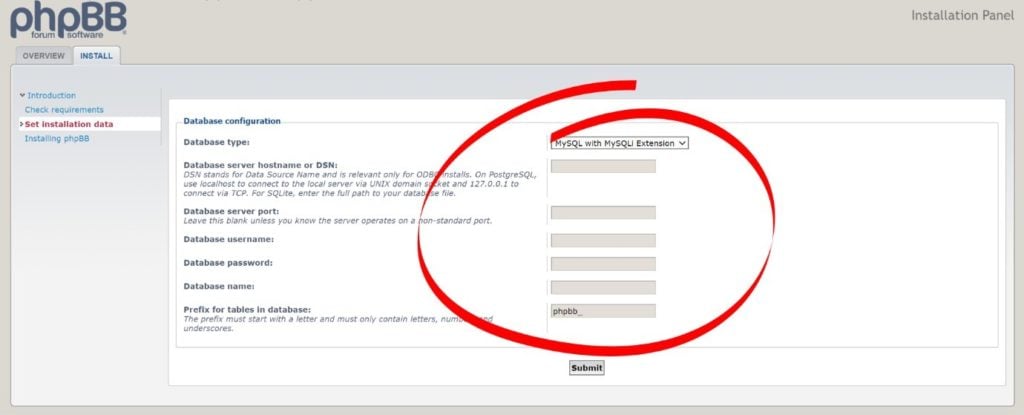
First of all, you’ll come to this screen where you need to input the information mentioned above. Before we go any further, we need to find the relevant information in DreamHost, so open a new tab in your browser and navigate to the DreamHost Home screen.
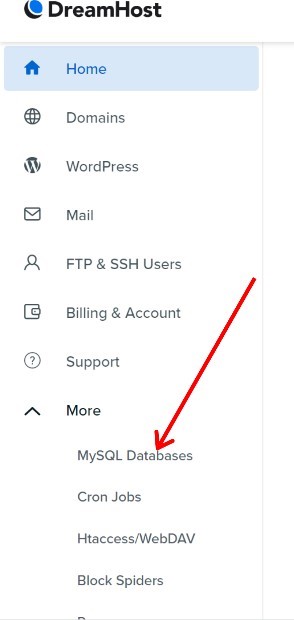
In the left-hand menu, click on ‘More’ to expand the options, and click on ‘My SQL Databases’.
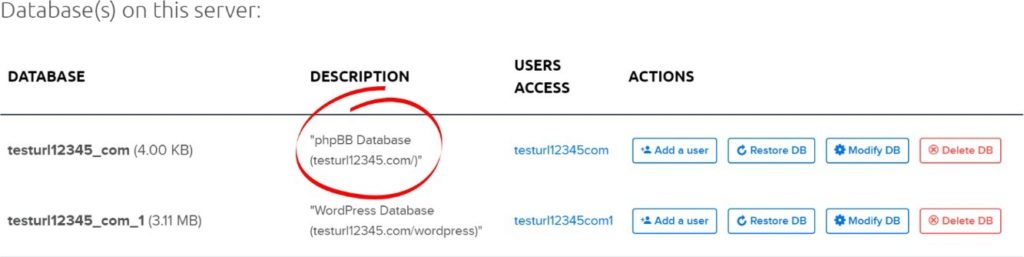
On this page, you need to scroll down until you find the database with the description that includes ‘phpBB’. Once you’ve found that, we can start copying and pasting the information across to the phpBB setup page.
- Database name: This is simply the entry under ‘Database’ above, in this instance ‘testurl12345_com’.
- Database Username and Password: The username for your database is the entry under ‘Users Access’ above, so in our case here it’s testurl12345com. To find the password, click on this username and scroll down to find a box already populated with your password. Click ‘Show’, and you can copy and paste the displayed password into the Database configuration form as above.
- Database Hostname: This can be found just above the ‘Databases on this server’ screenshot in DreamHost. It will have the heading ‘Hostname’ and you can copy and paste yours across to the form.
Shortcut tip: to copy and paste, highlight the text you wish to copy, and press Ctrl+C on your keyboard. Navigate to where you want to paste it into the Database Configuration form, click into the box, and hit Ctrl+V on your keyboard to paste it in – it’s a great little time saver.

Once you’ve done that, your form should be populated like this, and you can click on ‘Submit’.
4. Server Configuration
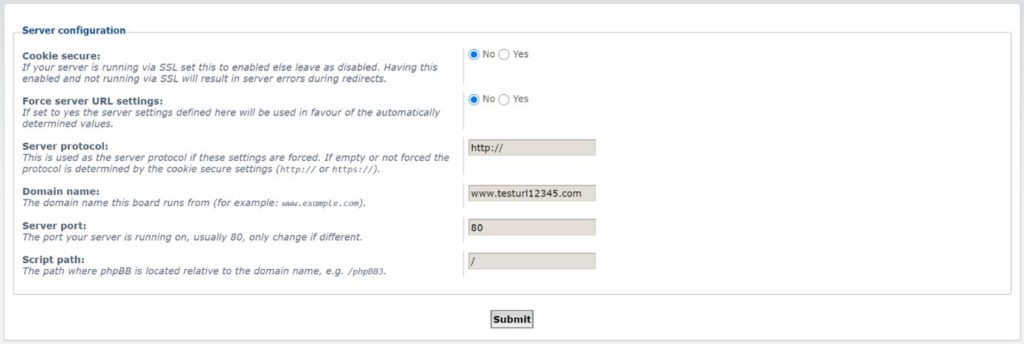
The next step in the installation progress is the server configuration. Most of this should already be populated for you, but you do need to pay attention to the top three boxes especially.
As we’ve created this domain for demonstration purposes, we don’t have an SSL certificate, but it’s highly recommended that if you want to be a trusted website that you’ll have one. When websites have SSL certificates attached, the URL in your browser begins with https:// instead of the usual https://. This tells search engines and website users alike that your site is secure, particularly if you’re asking users to share their details – an important thing to think about when creating a forum with sign-ups.
If you do have an SSL, you need to make sure ‘Yes’ is selected next to ‘Cookie secure’.
The setting you’ll most likely need is ‘No’ for ‘Force server URL settings’, but there are certain situations where ‘yes’ might be appropriate. If you want your forum showing on multiple domains, or you’re having trouble with redirects then ‘Yes’ might be needed. If you think that applies then you can read more about that here.
5. Email Setup
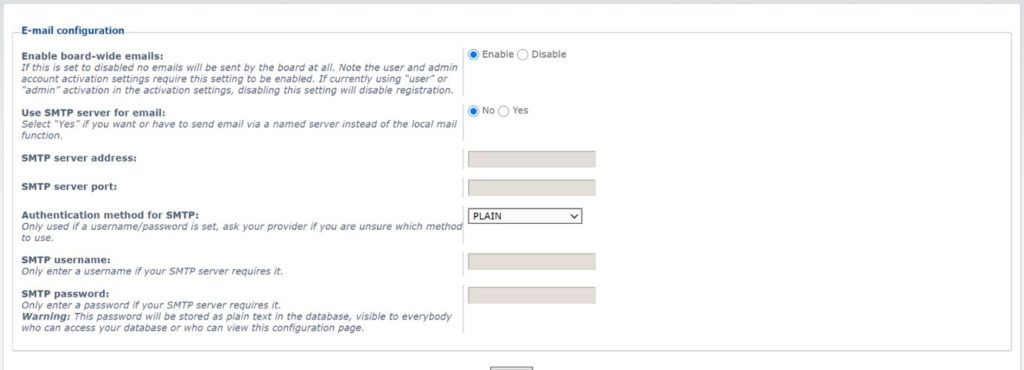
This part of the configuration is asking whether you want your forums to be able to send emails to members, for example, notifications when there’s a new post or a response to their post.
In order to do that, your forum needs to know how to send emails.
The way an email is sent is through a mail server using a protocol called SMTP which stands for Simple Mail Transfer Protocol.
In the setup shown above, you have two options:
- You can use the built-in mail programs on your server to send mail or,
- You can specify a different server that will send mail on your behalf.
Using the Built-In Option
If you set ‘Enable board-wide emails’ to ‘enable’, then your forum will try and send mail.
Choosing Another Server
If you choose to use a server then you need to give its details:
- SMTP server address and port: These are the address where your mail server lives.
- SMTP username and password: The credentials for logging in to that server.
- Authentication mode: This is how you authenticate – there are different security options.
If you aren’t sure what you want by way of emails yet, you can leave these settings as they are and come back to them later in the admin panel.
Once you’re done, click ‘Install’ and…
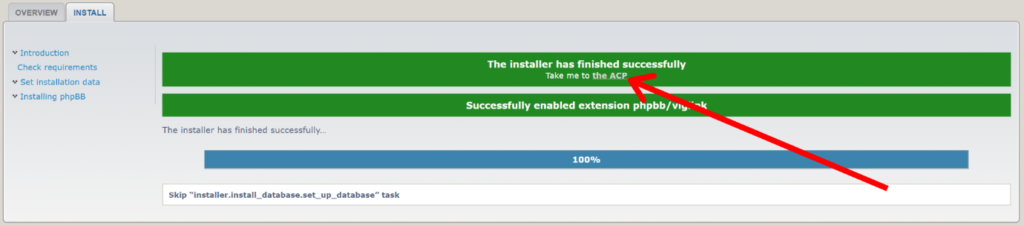
Voila! Give yourself a pat on the back, phpBB is successfully installed.
To take a look around and start building your forum, click on the slightly camouflaged ‘Take me to the ACP’. ACP stands for Admin Control Board.
Installing phpBB If You’re Using a Different Host Provider
There are many different host providers and it would be impossible for us to provide instructions for all of them. Having said that, most hosting services are likely to have a one-click install option like we’re walking through with DreamHost.
To find installation instructions for your host specifically, if you can’t find helpful documentation after searching install phpBB + [hostname] online, get in touch with your host’s support team and ask, they’ll be able to point you in the right direction.
Installing phpBB Manually If You’re Self-Hosting
If you’re self-hosting, installing phpBB requires a bit more technical know-how, but phpBB themselves have brilliant documentation to work through (or to pass on to someone a bit more technical, if the thought brings you out in a cold sweat).
Here is what you’ll need:
SQL Database
Structured Query Language or SQL (often pronounced sequel) is a coding language that communicates with databases allowing users to pull from, edit, and add to the information in a database.
PHP 7.1.3+ With Support for Database
PHP stands for Hypertext Pre-processor, and it’s a scripting language used to create websites and apps. PHP scripts can only be interpreted on a server that has PHP installed, and as this is what phpBB uses, you need to make sure it’s either installed on your server if you’re doing this manually or that the web hosting platform you’re using supports the use of the PHP version required.
The getimagesize () Function Enabled
The getimagesize function needs to be enabled on PHP. What this does, is it takes an image and determines its size, giving the height and width of an image.
PHP Modules
- JSON: Standing for JavaScript Object Notation, JSON is a syntax primarily for serializing and transferring data from a server to a web application.
- XML support: Extensible Markup Language is another language used for transferring data.
- Corresponding PHP module for a database: This will differ depending on which database system you are using for your database.
Optional PHP Modules for Additional Features
- Zlib compression support: This is used for data compression, to serve data to users faster.
- Remote FTP support: FTP stands for File Transfer Protocol, and it’s the language that computers on a network (like the Internet) use to transfer files to and from one another.
- GD Support: this is part of PHP, and some people’s installations will have GD whilst others won’t. If you want to work with images in PHP, it’s likely that you will need this to perform certain functions.
phpBB Resources
Asking Questions
The phpBB practice what they preach and have their own absolutely fantastic forum. There are lots of users on there, all with different levels of experience willing to help each other out. There’s no such thing as a silly question – everyone has to start somewhere, and this is a great and supportive environment in which to reach out.
Visit the phpBB Support Forum.
Learning More About the Capabilities of phpBB
If you need help that’s moving beyond the installation and running of phpBB then the discussion forum is filled with lots of people willing to help.